Hair Trends
38 Chic Bandana Hairstyles for Effortless Style
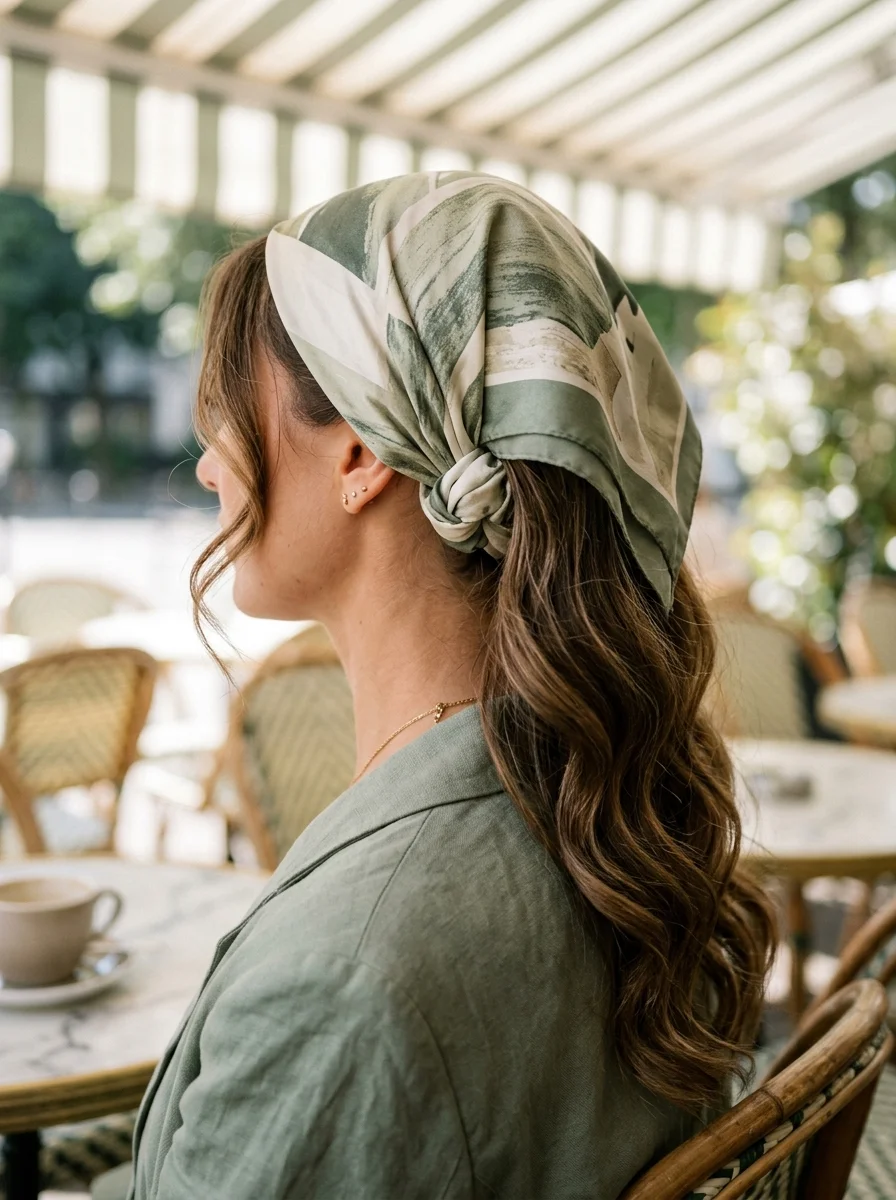
Bandanas and hair scarves have cycled through fashion for decades, but their current resurgence looks different from previous iterations. Where bandanas once signaled exclusively casual or counterculture aesthetics, the range of fabrics, prints, and tying techniques available now means the same accessory can work at a poolside brunch or a gallery opening. The difference lies entirely in material choice and placement.
A cotton paisley bandana tied at the nape reads completely differently from a silk equestrian-print scarf positioned at the crown. Understanding that distinction is what separates a genuinely styled look from one that feels improvised. The 38 styles below span the full spectrum: some take under two minutes to construct, others require more deliberate technique. All of them work with textures ranging from pin-straight to coily, though the prep steps vary significantly across hair types.
The Scarf Dressing Shift
Silk scarves have cycled in and out of fashion for decades, but their current moment is different from previous iterations. What we are seeing now is not just a head accessory trend but a full "scarf dressing" movement—where the same silk square gets styled as a shoulder wrap, an ascot, a bag charm, or a headscarf depending on the occasion. The fabric itself becomes the styling anchor rather than an afterthought.
The biggest shift this year is toward oversized geometric prints and abstract patterns rather than the traditional paisley or floral motifs. Think bold color-blocking, asymmetrical lines, and painterly swirls. These prints read as modern and intentional, and they photograph with a graphic quality that smaller, busier patterns lose at distance. A well-chosen silk scarf in an abstract print functions more like a piece of jewelry than a hair accessory.
The move? Stop matching your scarf to your outfit. Use it to anchor your entire look instead. Tie a silk bandana at the crown but let the long tails drape over your shoulders like a mini-cape. The fabric should lead, not follow—that is the difference between "I added a scarf" and "I built a look around this scarf."
1.Nautical Chic: Striped Bandana Low Ponytail
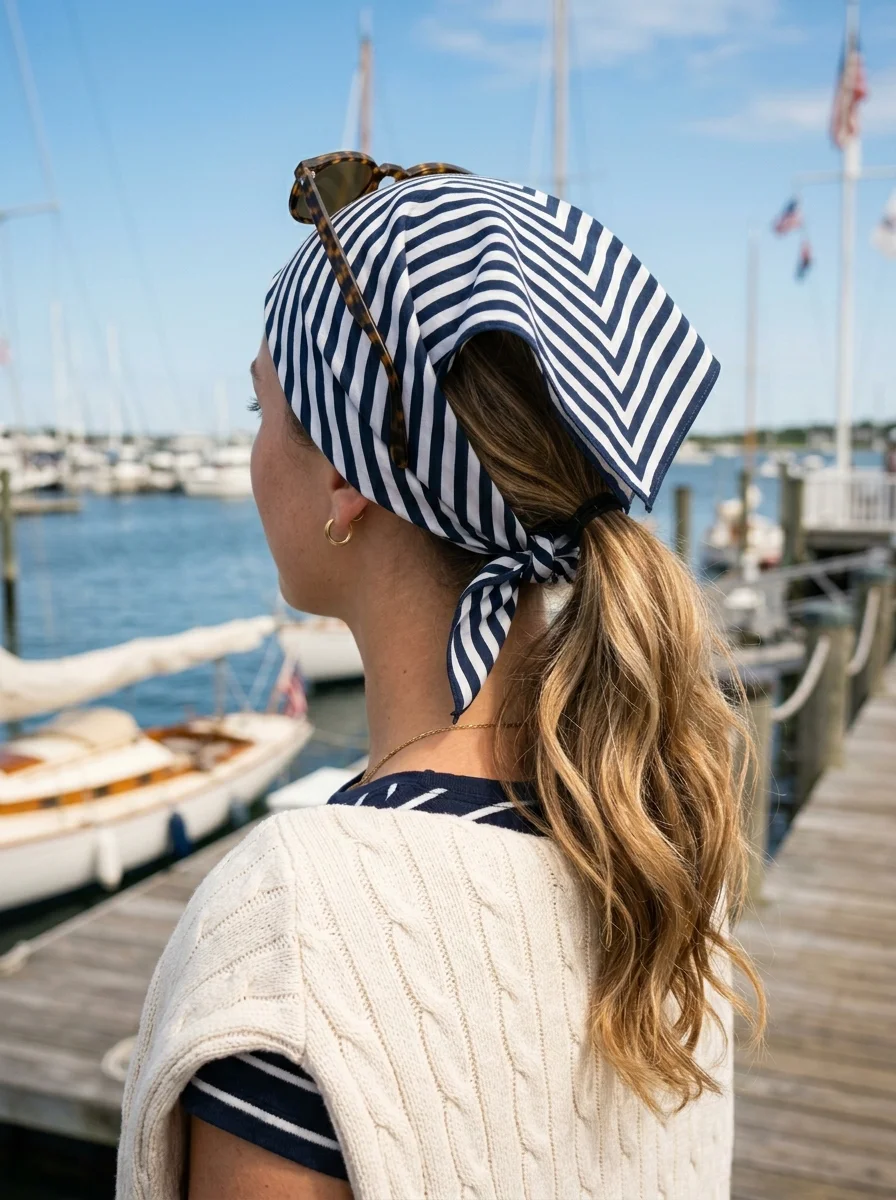
The overview: A navy-and-white striped bandana paired with a low ponytail reads like a Riviera uniform reinterpreted for everyday wear. The stripe direction matters here: horizontal bands across the crown create visual width, which flatters oval and heart-shaped faces by balancing a narrower jawline. The low ponytail placement at the nape keeps the silhouette clean and elongates the neck, a detail that photographs particularly well from profile angles.
This combination works because you can skip elaborate updos or heat tools and still look intentional. The nautical stripe pattern has staying power in fashion cycles precisely because it reads as both casual and polished simultaneously—a rare balance that makes it a reliable go-to from spring through early fall.
The look: The hair is brushed smooth and gathered into a low ponytail secured at the nape with a hair elastic. A navy-and-white striped bandana is folded into a triangle, then rolled into a narrow band approximately two inches wide. It is placed across the crown with the folded edge forward, and the ends are tied beneath the ponytail in a secure knot. One tail wraps around the elastic to conceal it, then is knotted or bowed for a finished appearance. The ponytail itself falls naturally, with the bandana tails adding a soft, asymmetrical detail against the clean lines of the stripe pattern.
Why this look is popular: The low ponytail with a bandana photographs cleanly from every angle, which is why it appears so frequently in street-style roundups and vacation content. The structured stripe pattern adds enough visual interest to hold its own against architectural backdrops—think harborside promenades, white-walled restaurants, or boat decks—without competing with your outfit. It also holds up well in wind, a practical advantage that translates to fewer re-styling moments throughout the day.
Where this look is suitable: Coastal vacations, weekend brunches, outdoor markets, boat excursions, and any daytime event where you want to look put-together without appearing overdressed. The style transitions easily from a morning walk along the waterfront to an afternoon lunch reservation.
Step by step:
- Brush hair back into a smooth, low ponytail and secure with a clear or hair-matching elastic.
- Fold the striped bandana diagonally into a triangle, then fold repeatedly to create a band roughly two inches wide.
- Place the band across the crown with the triangle point facing down the back of your head.
- Bring both ends around to the nape, positioning them directly beneath the ponytail base.
- Tie a snug knot with the two ends below the ponytail—tight enough to hold, not so tight that it causes tension headaches.
- Wrap one tail around the hair elastic to cover it completely, then secure with a small knot or bow.
- Adjust the band across the crown so both sides sit evenly and the stripe pattern displays prominently.
Tips and tricks: Medium-to-long hair in any texture works here, though fine hair benefits from a spritz of texturizing spray—Oribe Dry Texturizing Spray is a reliable choice—before gathering the ponytail to add grip. Straight and wavy hair types require minimal prep. For curly or coily textures, a light smoothing cream along the crown before pulling back the ponytail prevents flyaways while preserving natural curl pattern in the tail. A 1.25-inch barrel curling iron can add soft bends to a straight ponytail if you want movement, but the style holds its own without heat styling.
25 Trendy Beach Day Hairstyles for Vacation 2026 ☀️🌊
2.Boho Rhapsody: Crochet Bandana Accent
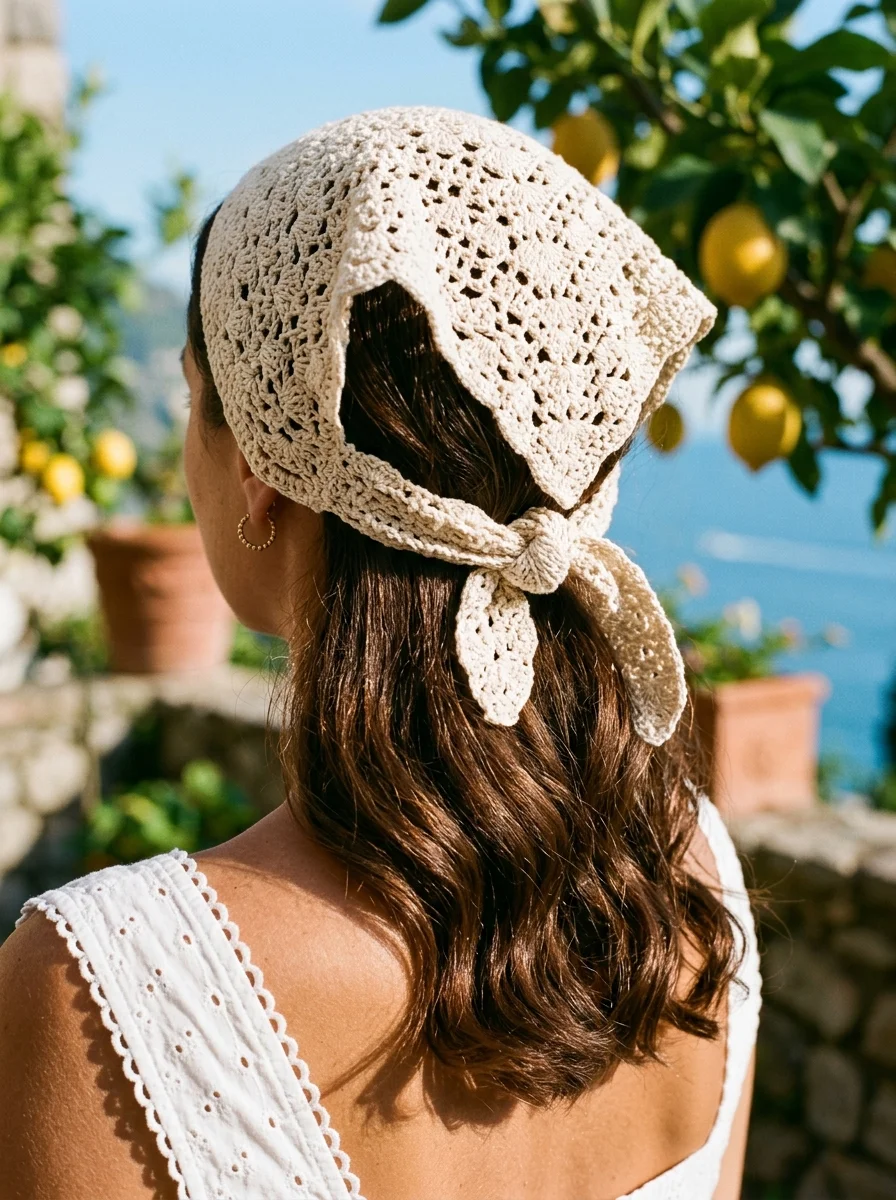
The overview: A crochet bandana introduces a tactile, artisanal element that fabric bandanas simply cannot replicate. The open-weave construction creates depth and shadow across the crown, drawing the eye without relying on color or bold pattern. In a soft cream tone, the piece functions almost like a woven crown, sitting naturally against both light and dark hair.
The structure of crochet fabric also behaves differently from cotton or silk. It holds its shape against the head more firmly without slipping, which eliminates the need for excessive pinning. The tradeoff is that the open weave lets hair peek through the gaps, creating an integrated look rather than one where the accessory sits on top of the style. This integration is what gives the appearance its effortless, lived-in quality.
The look: The hair falls naturally in loose waves or defined curls, left down to frame the face and shoulders. A cream-colored crochet bandana is folded into a triangle and draped over the back of the head, with the point resting between the shoulder blades. The two ends are brought forward near the temples, crossed over, then returned to the nape where they are tied in a relaxed knot or bow. The open-weave pattern of the crochet is visible throughout, with small sections of hair threading through the gaps, creating a woven-in effect. The ends drape naturally against the back, adding gentle movement.
Why this look is popular: The handmade quality of crochet aligns with the broader shift toward artisanal and slow-fashion accessories. It photographs with rich texture even in flat lighting, which makes it a reliable choice for outdoor events where you cannot control the sun. The neutral cream color pairs with virtually any outfit palette, removing the styling guesswork that comes with bolder prints.
Where this look is suitable: Garden parties, farmers' markets, casual outdoor weddings, weekend farmers' markets, art walks, and coastal vacation days. The style reads as intentional without being formal, making it appropriate for settings where you want to appear styled but not stiff.
Step by step:
- Start with hair down and in its natural wave pattern, or create loose waves using a 1.5-inch curling wand.
- Fold the crochet bandana into a triangle shape.
- Drape it over the back of the head with the point facing down between the shoulders.
- Bring both ends forward toward the face, crossing them near the temples.
- Return the ends to the nape and tie a loose knot or bow just below where the hair naturally gathers.
- Let the ends hang freely, adjusting the drape so the crochet pattern sits evenly across the crown.
- If the bandana shifts, secure it with two to three bobby pins concealed underneath the fabric at the temples.
Tips and tricks: Wavy and curly hair types benefit most from this style because the natural texture complements the crochet weave's organic pattern. Straight hair works too, but pre-waving with a wand gives the overall look more cohesion. Fine hair may need a volumizing powder at the roots before placement to prevent the bandana from sitting too flat. The cream color works across seasons but pairs particularly well with earth tones, whites, and linen fabrics. A light mist of flexible-hold hairspray—Kenra 13 is a solid option—on the crown before placing the bandana adds a subtle grip layer.
3.Boho Beach Babe: Textured Crochet Headband
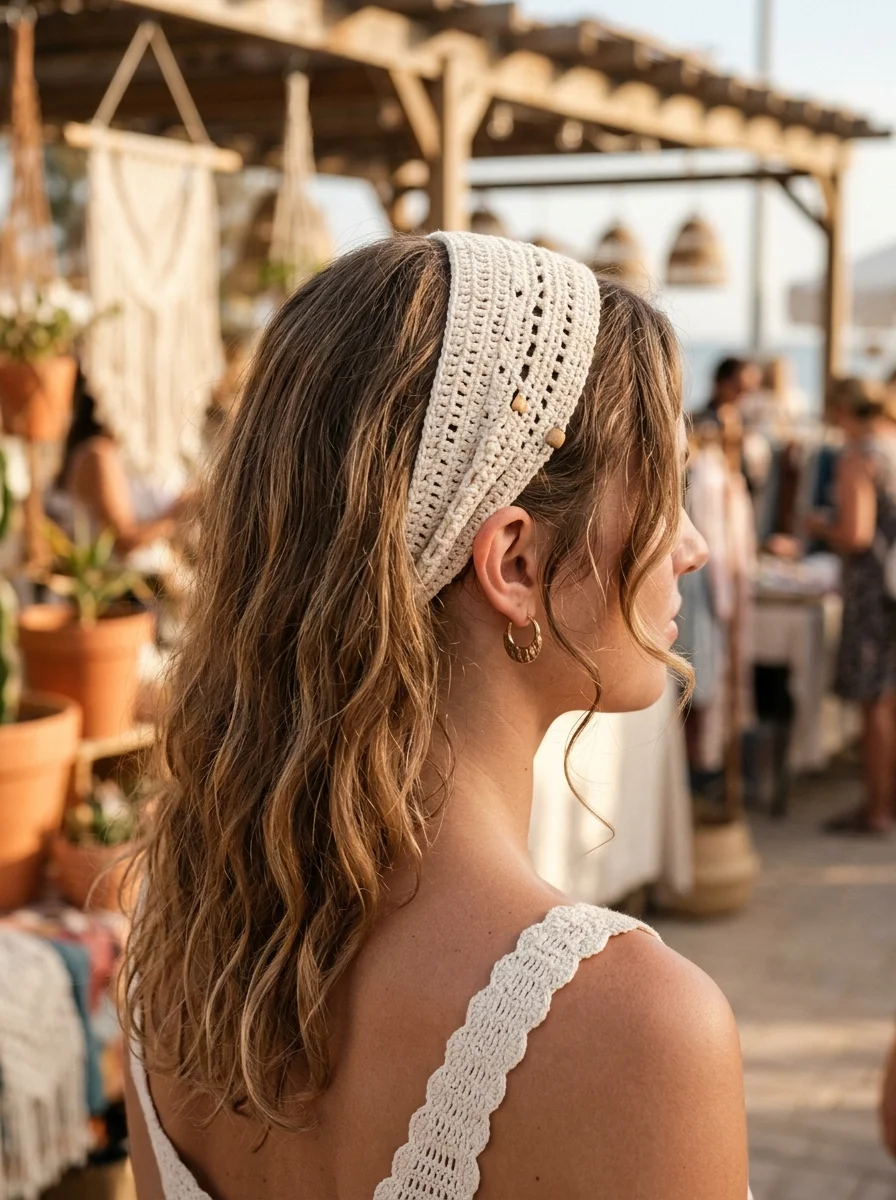
The overview: Unlike a traditional bandana tied around the head, a crochet headband is a continuous loop that sits in a fixed position—typically an inch above the ears and across the forehead. The wide construction distributes pressure evenly, making it more comfortable for extended wear than thinner headbands or tied scarves. Small wooden beads woven into the knit add a subtle dimensional detail that catches light and creates focal points without overwhelming the face.
The forehead placement is a deliberate styling choice with practical roots. It pushes hair back from the face without the severity of a slicked-back look, keeping strands loose and natural while still maintaining structure. This positioning also creates the illusion of added height at the crown, which elongates the face—a flattering effect for round and square face shapes in particular.
Why this look is popular: The headband requires zero tying, adjusting, or repositioning throughout the day. You put it on and it stays. For anyone who has experienced the frustration of a silk bandana slowly migrating off their head in humid weather, this fixed-position design solves that problem entirely. The bohemian aesthetic it creates also pairs naturally with the relaxed silhouettes—flowy dresses, oversized linen shirts—that dominate warm-weather wardrobes.
Where this look is suitable: Beach vacations, music festivals, poolside lounging, casual brunches, and weekend errands. The headband manages hair in humid or windy conditions while maintaining a styled appearance, making it a practical choice for any outdoor setting where you want to look effortless.
The look: A wide, cream-toned crochet headband with an open-knit pattern and small wooden beads sits across the forehead, positioned just above the eyebrows and extending to cover the tops of the ears. The hair flows freely beneath and behind the headband in loose, beachy waves with natural volume at the crown. The beads add earthy accents that break up the cream tone, creating visual rhythm across the headband's width. The overall silhouette is relaxed and organic, with the structured headband contrasting softly against the unstructured waves.
Step by step:
- Start with hair down, ideally with natural waves or texture. For straight hair, create loose waves with a 1.5-inch curling wand, alternating curl direction for a more natural pattern.
- Apply a light texturizing spray to the roots and mid-lengths for added grip and volume.
- Slide the crochet headband over your head, positioning it about one inch above the ears.
- Adjust the front edge so it sits comfortably across the forehead, roughly half an inch above the eyebrows.
- Gently pull the headband back at the crown to create a slight lift and volume.
- Tuck any stray hairs behind the ears for a cleaner line, and secure with discreet bobby pins if needed.
Tips and tricks: This headband accommodates most hair types, but it particularly excels on wavy and curly textures where the organic knit pattern mirrors the hair's natural movement. Fine hair benefits from a volumizing mousse applied to damp hair before air-drying, which creates enough body to prevent the headband from lying flat against the scalp. The wooden bead detail elevates the piece beyond a basic headband, so it pairs well with simple, unadorned clothing—think white cotton dresses or denim shorts. For shorter hair (chin-length or above), the headband still works but will sit higher on the head; position it closer to the hairline rather than the forehead for a more proportionate look.
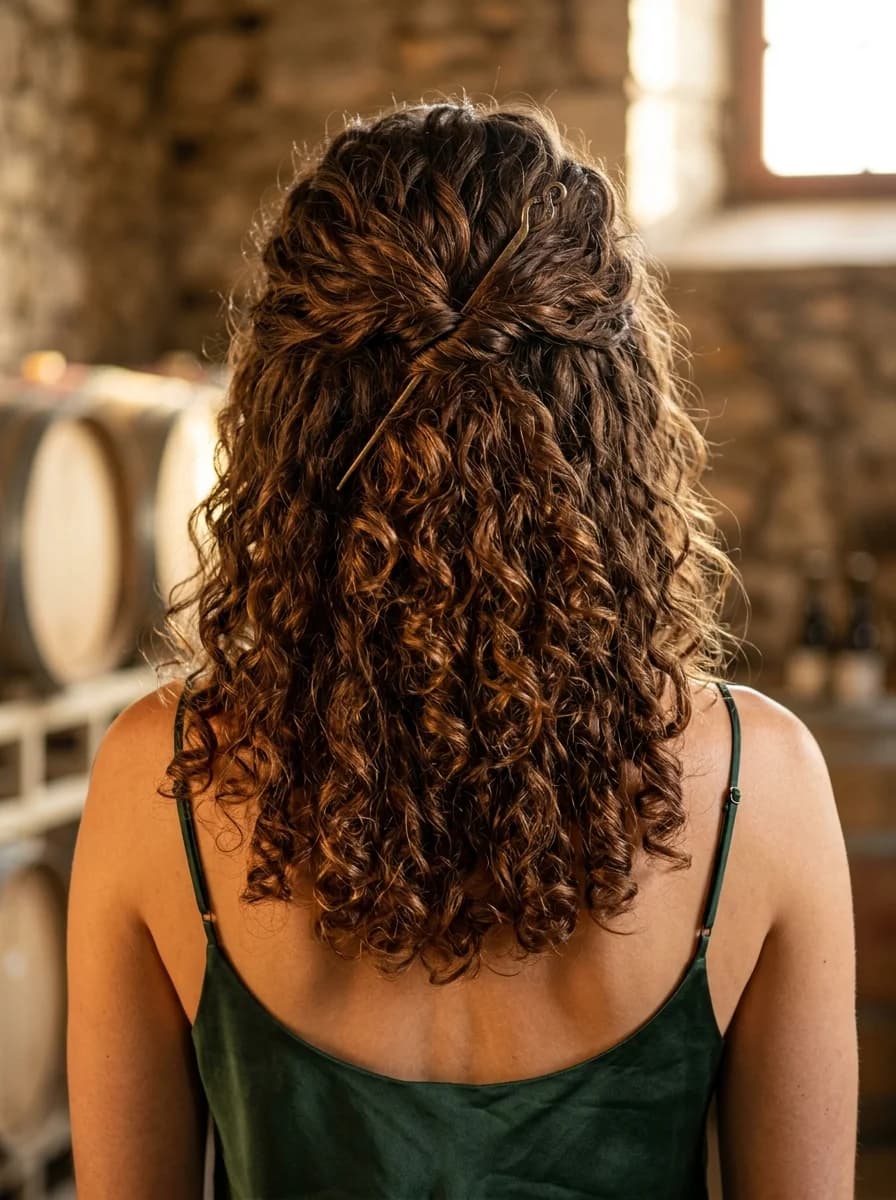
25 Top Curly Hairstyle Trends for 2026 ➰✨
4.Monaco Glam: Silk Scarf Tied Back
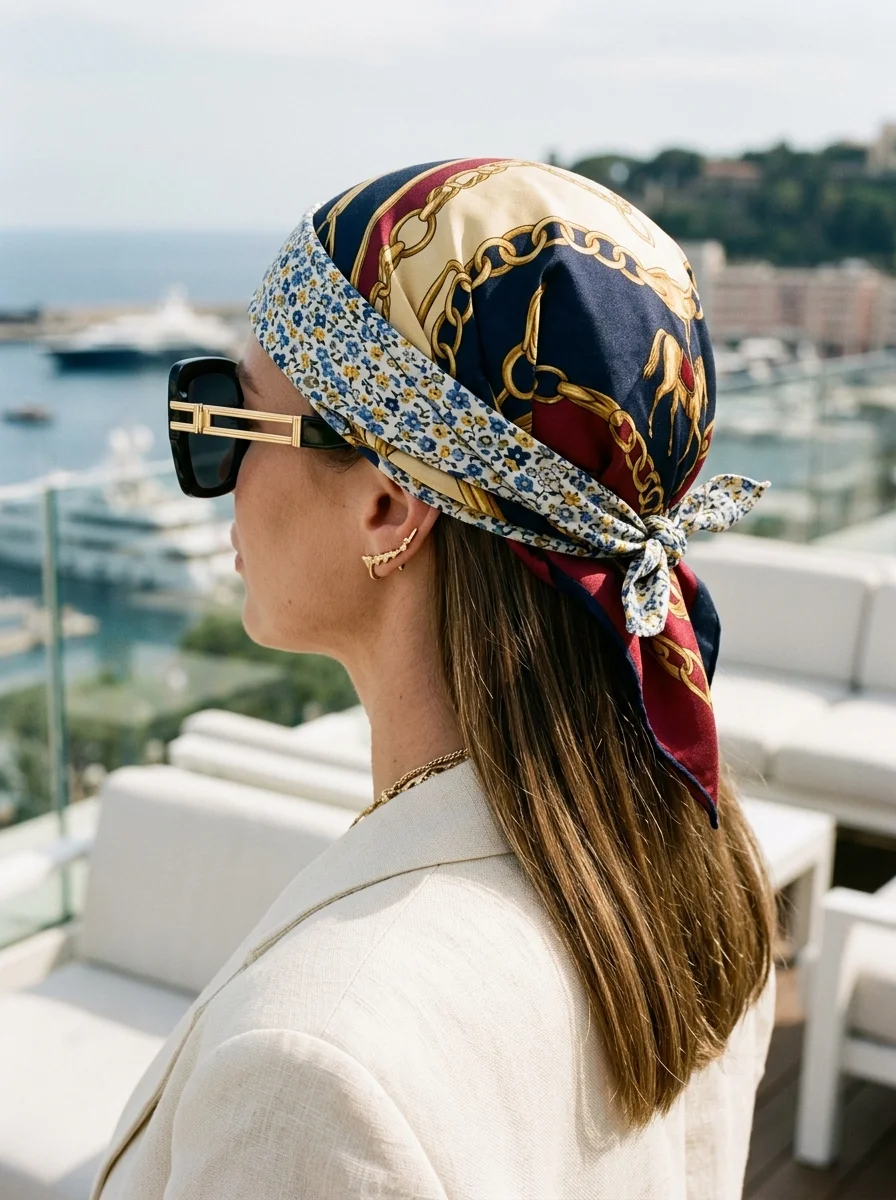
The overview: A silk scarf worn as a head covering is a technique that dates back to 1950s and 60s Mediterranean resort culture, when women used scarves to protect styled hair from sea breeze while maintaining an air of refinement. The modern iteration preserves that function but leans into the visual statement: a large-format silk scarf with a chain-and-crest motif becomes the focal point of the entire look, requiring minimal hairstyling effort on either side.
Silk behaves differently from cotton or synthetic blends when folded and draped. It holds a crisp edge, reflects light with a subtle sheen, and resists wrinkling—properties that make it ideal for a style where the fabric's surface is fully exposed. The weight of quality silk also means the scarf stays in place with a single knot rather than requiring multiple ties or pins, keeping the back clean and uncluttered.
Why this look is popular: The silk head scarf creates a high-impact visual with very few steps, which appeals to anyone who wants a polished appearance without a complicated routine. The chain-and-crest pattern references equestrian and luxury branding, lending an immediately recognizable sense of sophistication. In photographs, the scarf's sheen and pattern hold up against any background—city streets, coastal landscapes, or indoor settings—making it a consistently photogenic choice.
Where this look is suitable: Upscale brunches, gallery openings, resort dinners, city sightseeing, and outdoor events where you want to look elevated without overdressing. The style pairs equally well with a linen dress and sandals as it does with a tailored blazer and trousers.
The look: The hair is straightened smooth and falls freely down the back. A large silk scarf featuring a chain-link and crest pattern in deep navy, gold, and cream tones is folded lengthwise into a band approximately three inches wide. The band is placed across the crown, starting slightly back from the hairline to expose a thin strip of hair at the front. The ends are brought down along the sides of the head and tied in a secure knot at the nape, positioned just below the hairline. The hair flows from beneath the knot, creating a clean separation between the structured scarf above and the loose, straight hair below. Oversized sunglasses complete the silhouette.
Step by step:
- Blow-dry or flat-iron hair until smooth and straight. Use a heat protectant—GHD Bodyguard is a lightweight option—to maintain shine without weighing hair down.
- Fold the silk scarf lengthwise into a band approximately three inches wide, ensuring the pattern displays evenly along the length.
- Place the folded scarf across the crown, starting about one inch back from the hairline.
- Bring both ends down along the sides of the head, passing over the ears.
- Cross the ends at the nape and tie a firm knot. Position it directly below the hairline for the cleanest line.
- Smooth the scarf across the crown, checking that the pattern is centered and the edges are even on both sides.
- Allow the hair to fall naturally beneath the knot, and finish with a light shine serum on the ends for added polish.
Tips and tricks: Straight and wavy hair types are the ideal canvas here because the smooth texture lets the scarf's pattern and sheen take center stage. Very curly or coily hair can be straightened for this specific look, or the scarf can be positioned further back on the head to allow curls to frame the face instead—a variation that changes the mood from polished to romantic. Fine hair should avoid heavy serums that might weigh it down; a dry oil spray provides shine without the weight. The knot at the back can be secured with a single bobby pin threaded through the knot's center if you are concerned about slippage. This style works best with scarves in the 35–45 inch range; smaller squares fold too narrowly to achieve the three-inch band width.
5.Graphic Edge: Bold Print Bandana
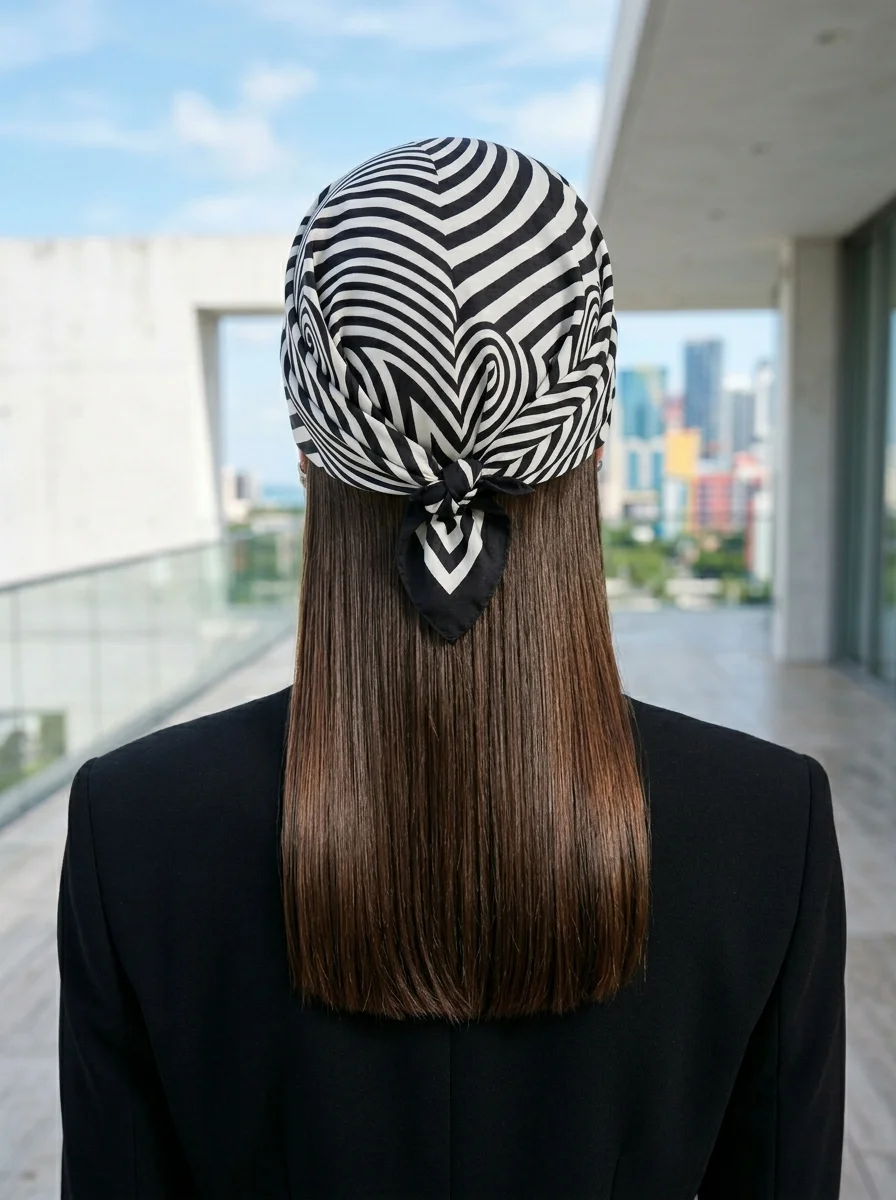
The overview: A black-and-white graphic print bandana relies on optical contrast rather than color to create visual impact. The swirling, almost op-art pattern creates movement across the crown that draws attention upward, making it a strong choice for anyone who wants to add height and dimension without volume-building techniques. When paired with pin-straight hair, the effect is one of deliberate tension—the busy, dynamic print against the still, smooth hair creates a modern juxtaposition.
This pairing works because it respects the principle of contrast in styling: one element is complex, the other is minimal. The bandana does not need a ponytail or updo to support it; the straight hair falling beneath acts as a clean backdrop, almost like a frame around a piece of art. The result reads as intentional rather than improvised, which is the difference between a casual accessory and a styled look.
Why this look is popular: The monochrome palette makes this bandana surprisingly versatile—it pairs with any color outfit without clashing. The graphic pattern photographs with sharp definition even at a distance, making it visible and distinctive in full-body shots. For anyone who gravitates toward minimalist clothing but wants a single statement piece, this bandana fills that role without adding color coordination complexity.
Where this look is suitable: Art gallery visits, fashion-forward city outings, creative workplace settings, gallery openings, and any environment where bold, graphic styling is appreciated. The monochrome palette also makes it appropriate for more subdued settings where a彩色 bandana might feel out of place.
The look: The hair is ironed to a sleek, straight finish, falling in a smooth curtain below the shoulders. A square bandana featuring a bold black-and-white swirling graphic print is folded into a triangle, then rolled into a band roughly two and a half inches wide. It is placed across the crown with the folded edge positioned about an inch back from the hairline, and the ends are tied in a tight, flat knot at the nape. The knot sits flush against the head to avoid creating a bump beneath the hair. The straight hair falls uniformly beneath, with the graphic pattern of the bandana creating a striking crown-like effect against the dark, reflective surface of the hair.
Step by step:
- Flat-iron hair in small sections for a consistently sleek finish. Use a ceramic or tourmaline iron and work from roots to ends in single passes.
- Apply a lightweight anti-frizz serum—Moroccanoil Treatment Light works well—to lock in smoothness without stiffness.
- Fold the graphic bandana into a triangle, then roll it into a band approximately two and a half inches wide.
- Place the band across the crown, starting about one inch back from the hairline, and pull the ends toward the nape.
- Tie a tight, flat knot at the nape. The knot should sit against the head, not protrude outward.
- Adjust the band so the graphic pattern is centered and the edges are symmetrical on both sides.
- Run a fine-tooth comb through the ponytail ends one final time to ensure the straight line is unbroken.
Tips and tricks: Fine to medium hair straightens most efficiently for this look, and the sleek surface best showcases the bandana's pattern contrast. Thick or coarse hair will require multiple passes with the flat iron and a stronger-hold smoothing product to achieve the necessary smoothness. If your natural texture is curly or coily, this specific style demands straightening—it is the contrast between the busy print and the still hair that makes the look work. For a lower-commitment version, try the same bandana with a sleek low bun instead of loose hair; the graphic print still provides the focal point while keeping hair contained. A flat iron with adjustable temperature settings is important here; fine hair should stay at 300°F or below to minimize damage.
28 Effortless Hot Weather Day Hairstyles for Women 2026 ☀️💇♀️
6.Equestrian Elegance: Equestrian Print Silk Scarf
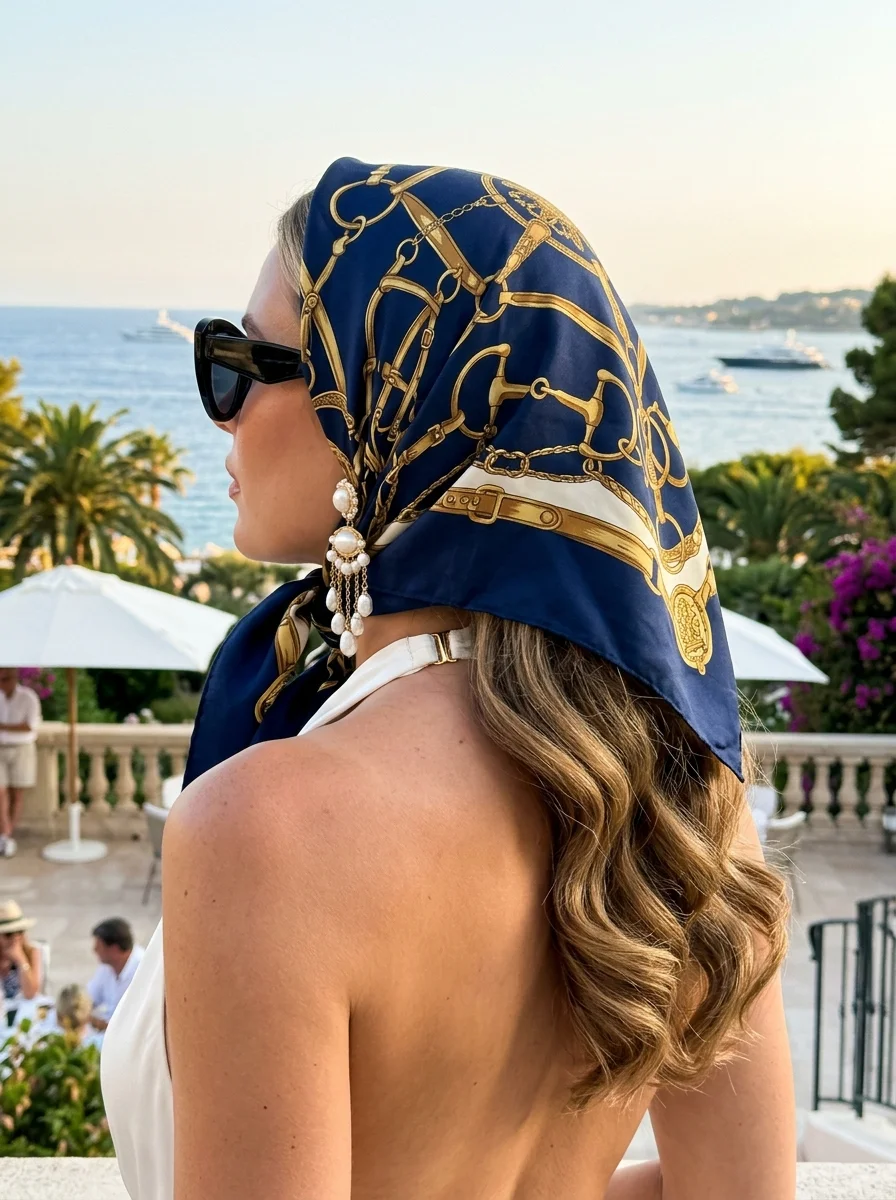
The overview: An equestrian-print silk scarf carries a specific visual vocabulary—bits, bridles, gold chain links, and heraldic motifs—that immediately signals a polished, heritage-inspired aesthetic. The navy base color grounds the ornate print, preventing it from reading too busy, while the gold accents provide warmth that flatters most skin tones. When worn as a head scarf, the pattern faces outward across the crown, turning the top of the head into a showcase for the scarf's detailed design.
Silk's natural drape is essential to how this style sits. Unlike cotton, which folds into rigid lines, silk curves gently over the head's contours, creating soft edges that feel refined rather than casual. The fabric's slight grip against hair also means the scarf holds its position throughout the day without constant readjustment—a functional advantage that translates directly to how polished the style looks at hour six compared to hour one.
Why this look is popular: The equestrian motif connects to a long tradition of heritage fashion that carries inherent associations with quality and timelessness. In practical terms, the detailed print masks minor imperfections in folding or tying—a small crease or uneven edge disappears into the pattern. The navy-and-gold color combination pairs with a wide range of outfit palettes, from neutral camel and cream to deeper jewel tones, making the scarf a versatile addition to a wardrobe rather than a single-use accessory.
Where this look is suitable: Horse races, charity luncheons, garden parties, afternoon tea, upscale brunches, and formal daytime events. The style carries enough polish for semi-formal settings while remaining relaxed enough for elevated casual occasions like a weekend at a country house or a visit to an outdoor sculpture park.
The look: The hair is styled in soft, defined waves that cascade over the shoulders and down the back. A navy silk scarf with an equestrian print—gold bits, bridles, and ornate chain-link details—is folded into a band roughly three inches wide. The band is positioned across the crown, starting about an inch back from the hairline, and the ends are brought to the nape where they are tied in a neat knot. The waves are directed forward to frame the face, creating a soft curtain that contrasts with the structured, detailed scarf above. Pearl-and-gold earrings bridge the gap between the scarf's ornate pattern and the hair's organic texture.
Step by step:
- Create soft, glamorous waves using a 1.25-inch curling wand. Wrap sections away from the face for a more open, flattering frame.
- Allow curls to cool completely, then gently brush through with a wide-tooth comb to soften them into waves.
- Fold the equestrian-print silk scarf into a band approximately three inches wide, ensuring the print faces outward and is centered.
- Place the band across the crown, starting one inch back from the hairline, and bring both ends to the nape.
- Tie a secure knot at the nape. Position it slightly off-center for a less symmetrical, more relaxed appearance if desired.
- Arrange the waves to frame the face, pulling a few pieces forward over the shoulders.
- Adjust the scarf so the equestrian pattern is clearly visible and the fabric sits smoothly across the crown.
- Add earrings that echo the scarf's gold tones—pearl drops or gold hoops work particularly well.
Tips and tricks: Medium-to-long hair with a natural wave pattern is the most forgiving canvas for this style, as the waves hold their shape under the scarf's weight. Straight hair can be pre-waved with a curling wand, but use a medium-hold hairspray—Bumble and Bumble Does It All—to ensure the waves survive the scarf placement process. Very curly or coily textures can be worn naturally beneath the scarf for a different but equally striking effect; position the scarf slightly further back to allow curls to frame the forehead. The quality of the silk matters significantly here: a lightweight, 100% silk scarf drapes and holds far better than a polyester blend, which tends to slide and crease. Invest in a genuine silk piece if you plan to wear this style regularly. A light mist of flexible-hold hairspray on the finished waves keeps them defined through a full day of wear.
7.Mediterranean Romance: Lace-Trimmed Scarf
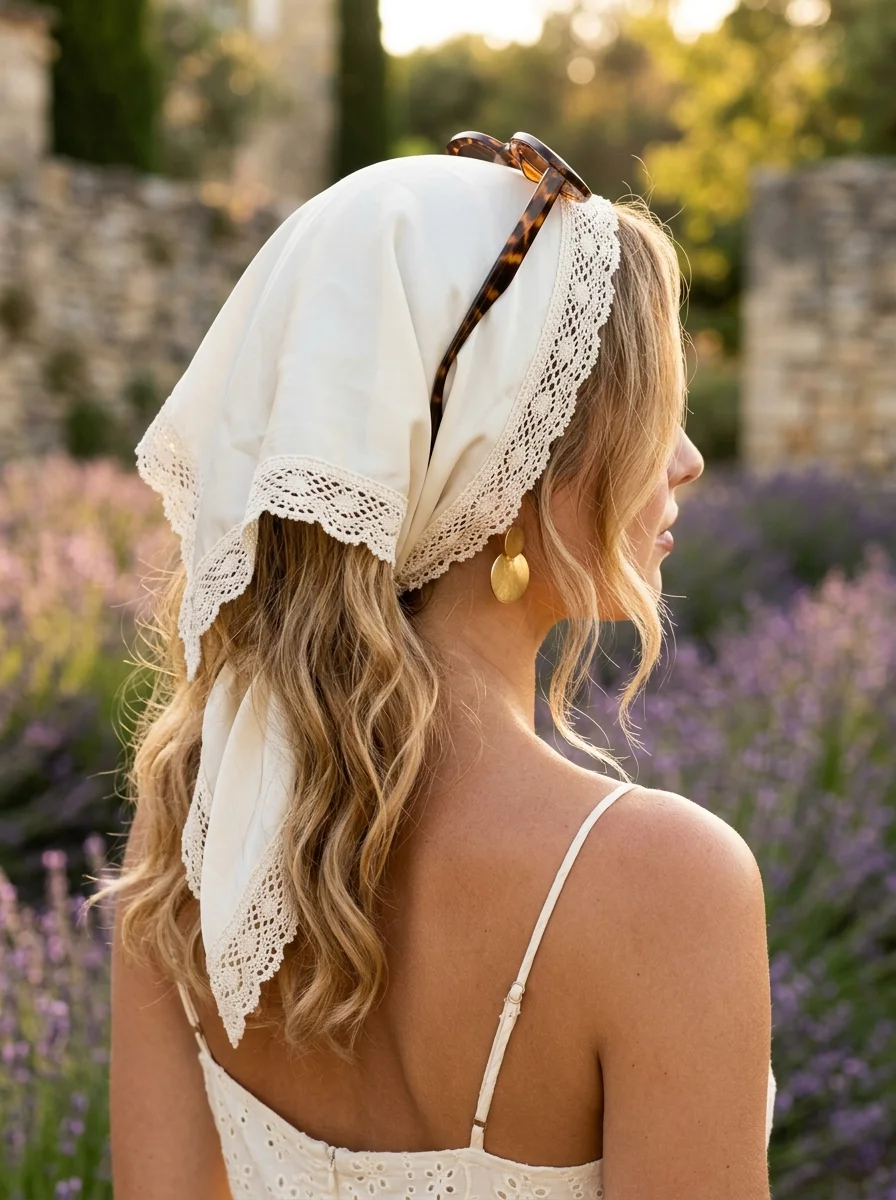
The overview: A lace-trimmed scarf introduces a secondary texture—delicate, open-work lace along the edges—that transforms a standard bandana fold into something more considered. The off-white color reads as soft and luminous against most hair colors, while the lace creates a frame that softens the line between fabric and hair. Unlike a printed bandana where the pattern sits on the fabric's surface, the lace trim exists at the boundary, blurring the edge in a way that feels organic rather than applied.
The romantic association of lace is well-documented in fashion history, but what makes this particular application effective is its restraint. The lace appears only at the edges, not across the entire scarf, so it adds detail without overwhelming the face or competing with the hair's texture. This subtlety is what makes the style work across age groups and settings—a younger wearer gets the bohemian charm, while an older wearer gets the classic elegance.
Why this look is popular: The off-white palette is universally flattering and requires no color matching with your outfit—it works with whites, creams, pastels, earth tones, and even dark colors as a contrast element. The lace trim photographs with beautiful detail in close-up shots, making this a strong choice for occasions where you expect to be photographed at portrait distance. The style also holds up well in warm weather, keeping hair off the face while maintaining a soft, approachable appearance.
Where this look is suitable: Summer weddings (as a guest), Mediterranean-style vacations, outdoor dining, romantic date nights, garden tours, and any occasion where a feminine, refined accessory adds to the atmosphere without dominating it.
The look: The hair is styled in loose, tousled waves with a slightly undone quality—think second-day texture rather than freshly curled precision. An off-white scarf with delicate lace trim along both edges is folded into a triangle, then rolled into a band approximately two inches wide. The lace edge is positioned to face forward along the front of the band, creating a visible lace border at the forehead. The scarf is draped over the back of the head, the ends are crossed near the temples and returned to the nape, where they are tied in a soft knot or bow. A few face-framing tendrils are pulled loose to enhance the romantic, undone quality. The lace detail is visible at the front edge and at the hanging ends, providing a cohesive frame for the face.
Step by step:
- Create soft, tousled waves using a 1.5-inch curling iron, wrapping random sections and leaving the ends slightly straighter for a natural finish.
- Allow curls to cool, then shake them loose with your fingers rather than brushing—this preserves the tousled texture.
- Fold the lace-trimmed scarf into a triangle, then roll it into a band approximately two inches wide, ensuring the lace trim is visible along one edge.
- Drape the band over the back of the head with the lace edge facing forward, positioned about an inch back from the hairline.
- Bring both ends forward near the temples, cross them over, and return them to the nape of the neck.
- Tie a soft knot or bow at the nape, allowing the ends to drape naturally with the lace trim visible.
- Pull out two to three face-framing tendrils and adjust them to sit softly against the cheeks.
Tips and tricks: Wavy and curly hair types are the natural match for this style—the organic texture of the hair mirrors the organic quality of the lace. Straight hair works if soft waves are added first; a flat iron can create gentle bends by twisting the iron as you pass it through sections. Fine hair benefits from teasing at the crown before scarf placement—a quick backcombing with a fine-tooth comb at the roots adds the subtle lift that prevents the scarf from lying too flat against the head. The off-white color shows dirt more readily than darker scarves, so store it folded in a clean drawer rather than draped over a hook. For outdoor events in humid conditions, a light misting of dry shampoo at the roots before styling absorbs excess oil and maintains volume throughout the day. This style pairs naturally with flowing fabrics—chiffon, cotton voile, linen—and delicate jewelry rather than chunky or modern pieces.
24 Stunning Bridesmaid Hairstyles for Weddings 2026 💍✨
8.Classic Cool: Paisley Bandana Ponytail
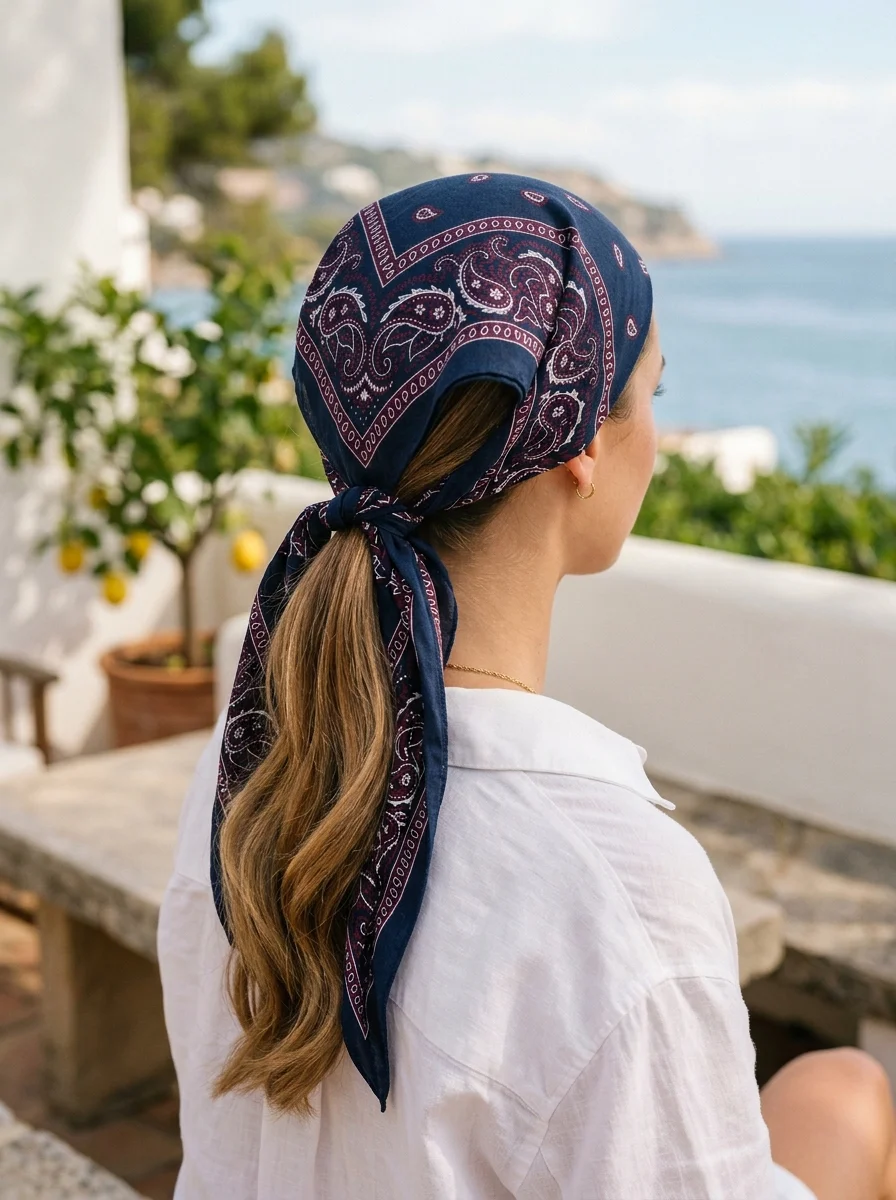
The overview: The paisley bandana is the most recognizable bandana pattern in existence, and its longevity is not accidental. The teardrop-shaped boteh motif, originally derived from Persian and Indian textile traditions, creates a dense, all-over pattern that reads as visually rich without being chaotic. A navy base with white and burgundy paisley strikes a balance between boldness and wearability—dark enough to feel grounded, detailed enough to hold interest.
Pairing this pattern with a low ponytail is a functional choice as much as an aesthetic one. The ponytail gathers hair at the nape, creating a defined anchor point for the bandana to wrap around. The bandana tail then conceals the elastic, which eliminates the visual interruption of a visible hair tie and creates a seamless transition from head to ponytail. This small detail is what separates a styled look from a quick, thrown-together one.
Why this look is popular: The paisley pattern has a retro quality that connects to decades of casual American style, from 1970s streetwear to 1990s hip-hop culture. This cross-generational appeal makes it feel familiar without being dated. The navy colorway is also one of the most practical: it hides minor perspiration, resists visible wear, and coordinates with virtually every outfit color. The low ponytail keeps the look low-maintenance throughout the day, requiring no re-styling after the initial setup.
Where this look is suitable: Weekend errands, outdoor concerts, casual dining, sporting events, picnics, and everyday wear. The style is relaxed enough for the most informal settings but polished enough that it does not look careless. It transitions from a morning at the park to an afternoon coffee run without needing a change.
The look: The hair is gathered into a low ponytail at the nape, secured with a hair elastic. A navy paisley bandana with white and burgundy details is folded into a triangle, then rolled into a narrow band. The band is placed across the crown with the folded edge forward, and the ends are tied beneath the ponytail in a secure knot. One tail is then wrapped around the elastic to conceal it and knotted or bowed to hold in place. The ponytail itself has soft, natural waves that add relaxed texture below the structured bandana. The paisley pattern covers the crown from hairline to the back of the head, creating a dense, detailed frame around the face while the ponytail provides movement and softness below.
Step by step:
- Brush hair into a smooth, low ponytail at the nape and secure with a hair elastic that matches your hair color.
- Fold the paisley bandana into a triangle, then roll it into a band approximately two inches wide.
- Place the band on the back of the head with the folded edge near the hairline, covering the crown.
- Bring both ends around to meet beneath the ponytail.
- Tie a secure knot directly below the ponytail base.
- Take one tail and wrap it around the hair elastic, covering it completely.
- Secure the wrapped tail with a small knot or bow, then let the remaining tail hang naturally.
- Gently separate and fluff the ponytail waves with your fingers to add body and movement.
Tips and tricks: Medium-to-long hair across all textures works for this style. Fine hair gains the most from a texturizing spray—R+Co Badlands Dry Shampoo Paste is effective—applied to the ponytail before securing, which adds grip and visual volume without heat styling. Straight hair stays smooth and clean-looking; curly and wavy hair adds natural movement to the ponytail. The paisley bandana is available in multiple colorways, but the navy-and-white combination remains the most versatile and the easiest to coordinate with casual wardrobes. For a variation, try folding the bandana into a narrower band (about 1.5 inches) for a more minimalist appearance, or leave the triangle point unfolded and visible at the back for a classic kerchief silhouette. The style holds up well in moderate wind—the knot beneath the ponytail provides a secure anchor—but in strong wind, a single bobby pin threaded through the knot adds extra insurance.
9.Poolside Goddess: Vibrant Turban Twist
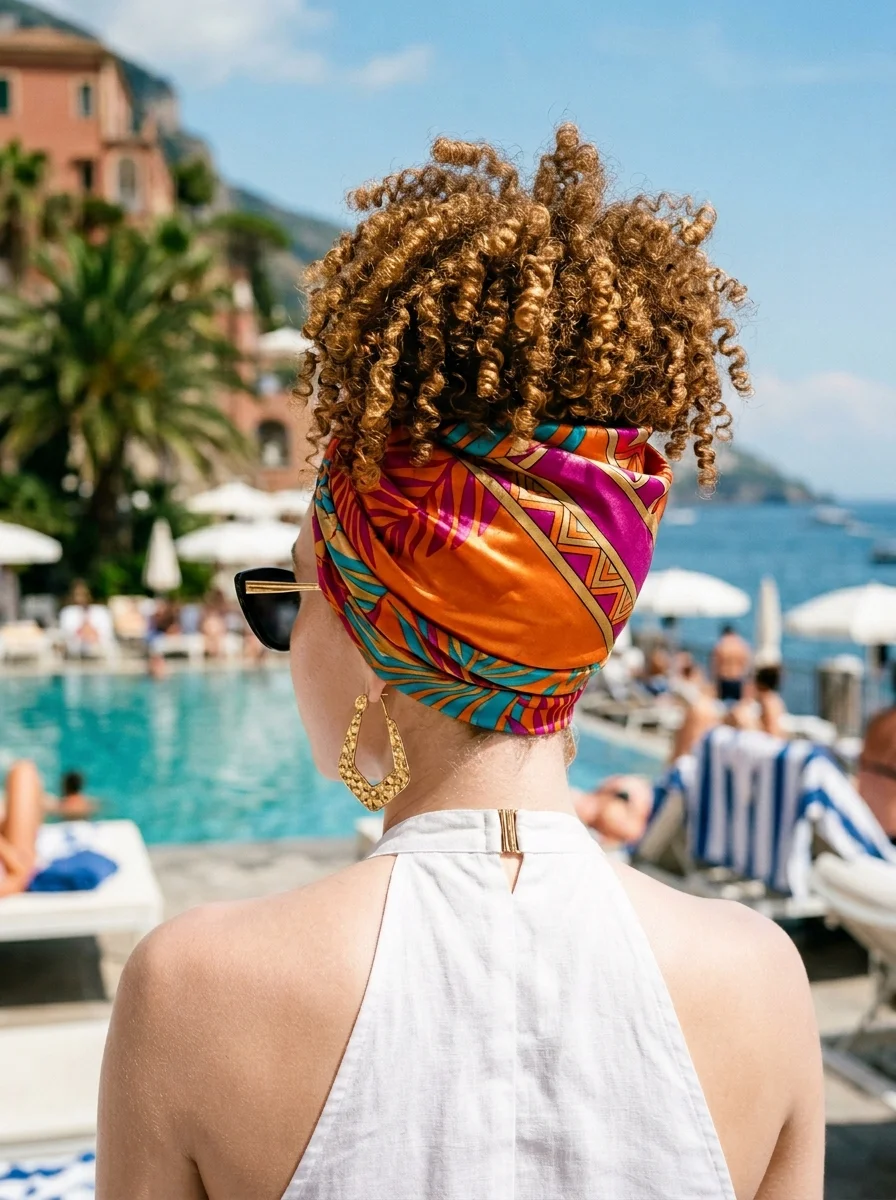
The overview: A voluminous turban twist constructed from a bold abstract-print silk scarf is one of the most effective ways to protect natural curls from UV and saltwater damage while maintaining a polished silhouette. The technique involves crossing the scarf ends at the forehead, wrapping them around the crown, and tucking them underneath the layers to create a sculptural, almost architectural shape. The orange, pink, and teal palette reads as resort-ready without veering into costume territory.
What makes this construction practical is how completely it shields the hair shaft. Natural coils and curls—particularly type 3C through 4C—benefit from reduced sun exposure and moisture loss when wrapped this way. A silk or satin scarf with a tighter weave also minimizes friction, which means less breakage at the ends. The volume created by the twisted fabric at the crown distributes weight evenly, so the turban stays secure even during movement.
Why this look is popular: The turban twist photographs exceptionally well from every angle because the sculptural folds create natural dimension and shadow. At poolside gatherings or beach clubs, the saturated colors pop against neutral swimwear, making it an easy statement piece. The style also eliminates the need for heat styling, which appeals to anyone trying to reduce manipulation during vacation.
Where this look is suitable: Resort vacations, pool parties, beach clubs, outdoor music festivals, and any setting where you want sun protection without sacrificing visual impact.
The look: A large rectangular silk scarf in a vibrant abstract print— featuring shades of orange, pink, and teal—is wrapped and twisted around the head to build a voluminous turban. The sculptural knot sits at the crown, while natural curls peek out at the nape, adding texture. Statement gold earrings anchor the look and complement the warm color story.
Step by step:
- Prep curly or coily hair with a curl-defining cream such as Cantu Shea Butter Define & Shine or Eco Styler Olive Oil Gel to enhance definition before wrapping.
- Take a large rectangular silk scarf (approximately 35" × 35") and drape it over the back of your head, holding both ends in front.
- Cross the ends over each other at the forehead, then bring them back around to the nape.
- Twist the scarf ends together and wrap them around the head in a circular motion, building volume with each pass.
- Tuck the remaining ends underneath the wrapped layers, ensuring they sit flat against the scalp to avoid bulk.
- Shape the crown area by gently pulling the fabric outward to create a balanced, rounded silhouette.
- Allow a few curls to escape at the nape for a softer finish, or tuck them completely for a fully protected style.
- Finish with large statement earrings—gold hoops or chandelier styles work particularly well with the warm scarf tones.
Tips and tricks: This style works best on medium to long hair, especially natural curls and coils that grip the fabric. For finer or straighter hair, pin a few bobby pins at the hairline before wrapping to give the scarf something to anchor to. A small amount of cotton batting or a volumizing insert placed under the scarf at the crown can add height if your hair doesn't provide enough natural bulk. A quality silk scarf with a smooth finish will drape more cleanly than cotton, which tends to bunch.
28 Stunning Softball Hairstyle Ideas with Braids for 2026 🥎✨
10.Emerald Opulence: Satin Turban Knot
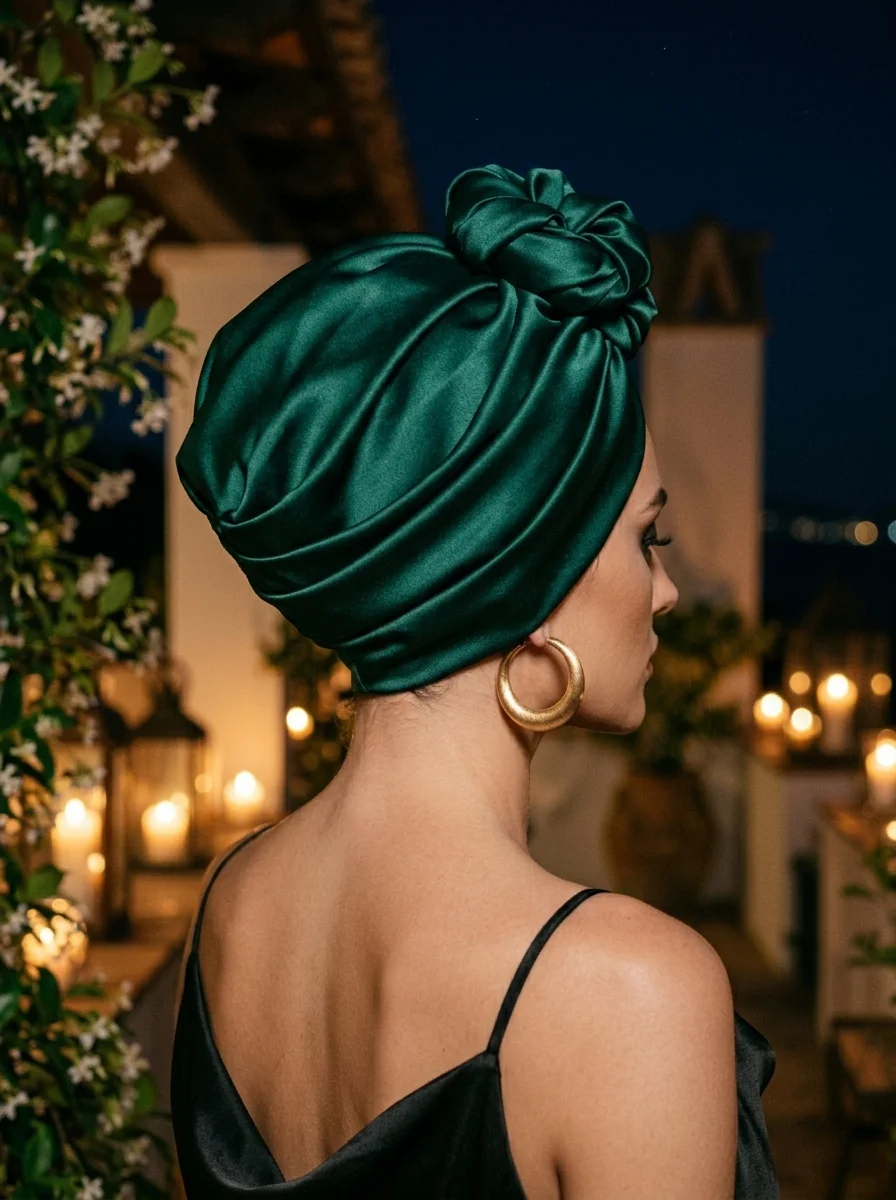
The overview: Deep emerald green satin transforms a basic turban wrap into something that reads as eveningwear. The technique here is straightforward—fold a square scarf diagonally, drape it from the nape, and wrap the ends forward—but the result is a sculpted headpiece with smooth, light-catching folds that create an almost floral shape at the crown. The satin's natural sheen does most of the visual work, eliminating the need for additional accessories or embellishment.
A fully covered turban like this is one of the most practical options for bad hair days, post-chemical treatment recovery, or any situation where you want a chic head covering without drawing attention to what's underneath. The emerald tone specifically complements warm and deep skin tones beautifully, though it works across a broad range. The wrapped construction distributes tension evenly, so it sits comfortably for hours without the pulling headaches that tighter styles can cause.
Why this look is popular: The satin material photographs with a dimensional quality— highlights and shadows shift across the folds depending on the light source, which makes the style visually dynamic in both natural and artificial lighting. The rich color and sculptural shape read as intentional and polished, making it suitable for events where a casual bandana would feel underdressed.
Where this look is suitable: Evening events, formal dinners, gallery openings, holiday parties, and occasions where you want a sophisticated head covering that transitions seamlessly from day to night.
The look: A deep emerald green satin scarf is folded into a triangle and wrapped around the head, creating smooth, voluminous folds that catch the light. The knot or twist sits at the crown, forming a sculpted shape reminiscent of a flower bud. All hair is completely covered, and simple gold hoop earrings provide a clean accent without competing with the turban's dramatic presence.
Step by step:
- Smooth your hair back into a low bun or brush it flat against the head using a boar bristle brush. A light application of smoothing serum helps eliminate flyaways.
- Take a large square satin scarf (35" × 35" or larger) and fold it diagonally to form a triangle.
- Drape the triangle over the back of your head with the longest fold resting along the hairline at the nape.
- Bring both ends toward the front, crossing them over the forehead.
- Continue wrapping the ends around the head, layering them to build smooth folds and volume.
- Tuck the remaining ends underneath the wrapped layers at the back or side, ensuring a clean, seamless finish.
- Adjust the fabric at the crown to create a balanced, rounded shape—gently pull the outer layers to build height if needed.
- Secure with a single bobby pin at the temple if the wrap feels loose, then add simple gold hoop earrings to complete the look.
Tips and tricks: This style works universally across all hair types and lengths since the hair is fully concealed. It's particularly effective for anyone experiencing hair loss or thinning who wants an elegant alternative to wigs. The satin material can slip on very smooth hair, so a few bobby pins placed at the temples before wrapping add grip. For overnight wear, a silk or satin pillowcase underneath prevents the turban from shifting and keeps your hair smooth beneath it.
11.Positano Dreams: Lemon Print Scarf Updo
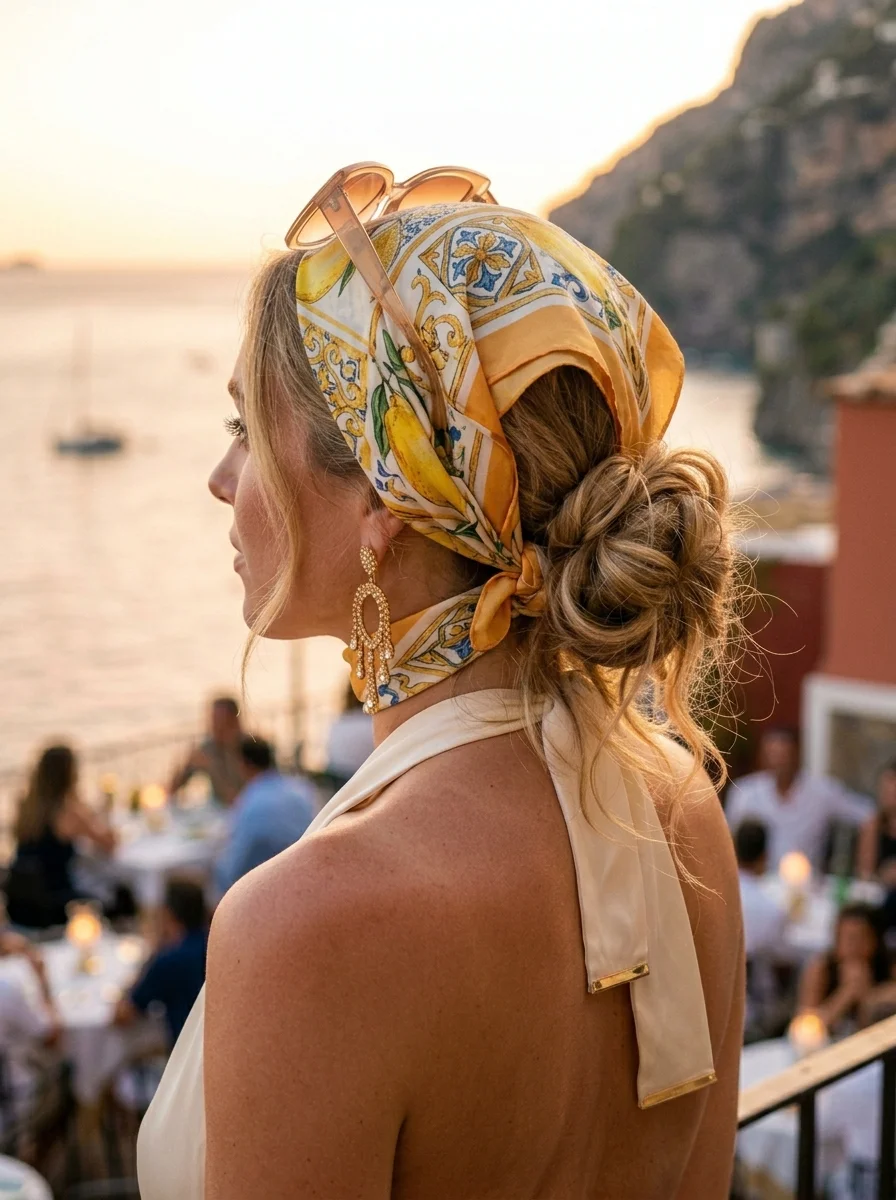
The overview: A lemon-print silk scarf tied into a loose updo sits at the intersection of casual and refined—a combination that's harder to achieve than it looks. The scarf acts as both a functional anchor for the bun and a decorative element, with the knot positioned slightly off-center to create visual interest. The creamy background of the fabric keeps the look soft rather than loud, which is why this particular print tends to photograph well against Mediterranean-style architecture and outdoor settings.
Why this look is popular: The combination of a textured updo with a patterned scarf creates enough visual complexity to read as styled without requiring precision. Loose face-framing tendrils soften the overall shape, which makes it forgiving for those who don't want every strand in place. The print itself evokes a specific aesthetic—Italian summer—that resonates with vacation and warm-weather content.
Where this look is suitable: Garden parties, outdoor weddings, brunches, Mediterranean vacations, and any setting where a polished but relaxed updo fits the dress code.
The look: A silk scarf featuring a lemon and floral print on a cream background is incorporated into a soft, textured chignon at the nape. The scarf knot sits slightly to one side, and loose tendrils frame the face. The updo itself is intentionally imperfect—a few loops and ends are left visible, giving the style a romantic, unstudied quality.
Step by step:
- Create a soft, textured bun at the nape using a donut bun maker or by twisting and pinning sections with U-shaped pins. Avoid making it too tight—looseness adds to the relaxed quality.
- Fold your lemon-print silk scarf into a triangle.
- Drape the triangle over the back of your head with the point hanging down toward your back.
- Bring the two ends forward, cross them over the forehead, then bring them back to the nape.
- Tie a knot or bow around the base of the bun, positioning it slightly off-center for a more artful arrangement.
- Let the scarf ends trail down naturally alongside the bun— they don't need to be tucked in.
- Gently pull a few strands free around the face using the tail end of a rat-tail comb for controlled placement.
- Mist lightly with a flexible-hold hairspray such as Oribe Superfine to lock the shape without stiffness.
Tips and tricks: Medium to long hair with some natural wave or texture holds this updo best—the slight irregularity helps the bun maintain its shape. Fine hair benefits from the scarf adding visual bulk. Before building the bun, a dry texturizing spray like Living Proof Full Dry Volume & Texture Spray gives the hair enough grip to hold pins in place. For very silky hair, skip conditioner on the day you plan this style—the added texture makes a significant difference in how well the updo stays put.
12.Timeless Elegance: Blue Floral Scarf Ponytail
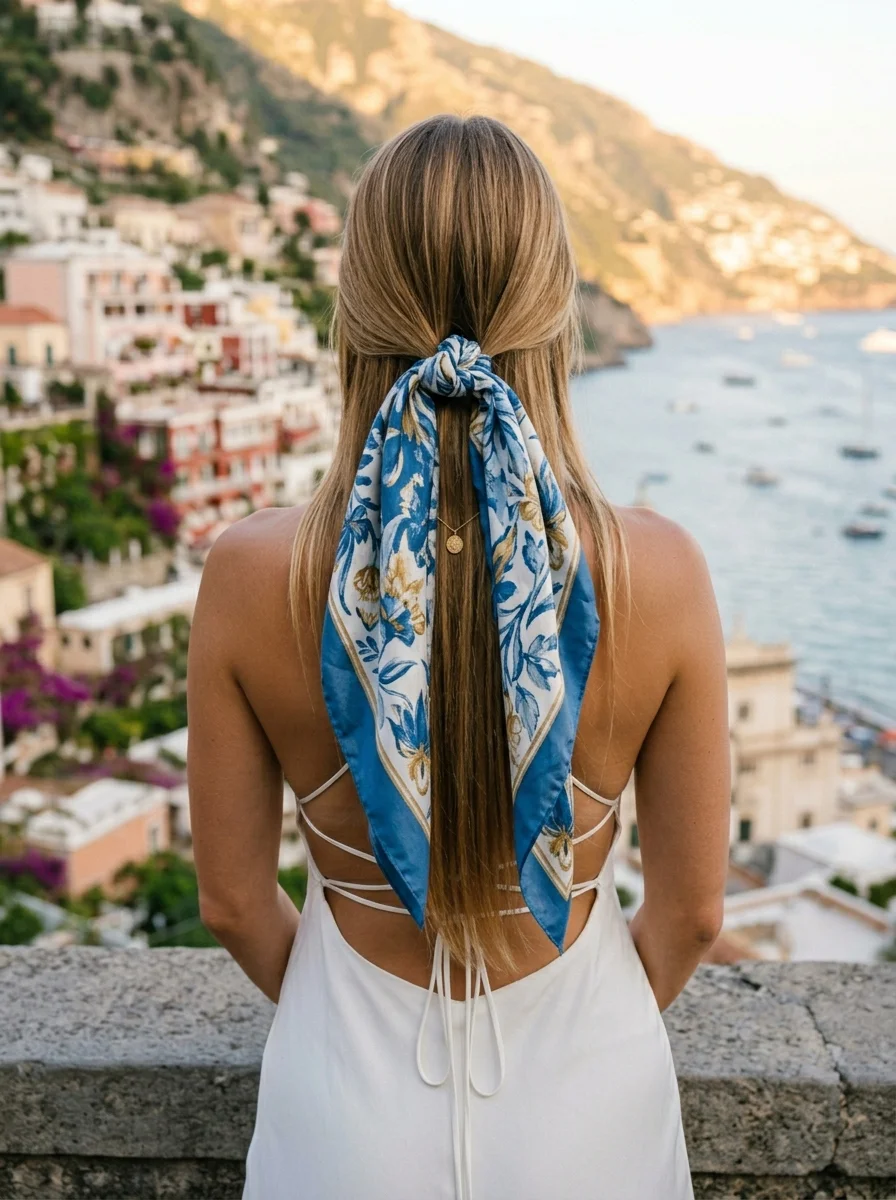
The overview: Wrapping a narrow-folded floral scarf around a sleek ponytail is one of the simplest upgrades to a style most people already know how to do. The scarf conceals the elastic, adds a pattern element, and introduces a soft bow detail that elevates the ponytail from gym-ready to office-appropriate. The blue and white floral print against pin-straight hair creates a clean contrast that reads as polished without requiring advanced styling skills.
Straight, smooth hair is the ideal canvas here because any frizz or texture will compete with the scarf's pattern. A flat iron pass with a temperature setting between 300°F and 350°F—depending on your hair's tolerance—produces the sleek finish that makes this look work. A smoothing serum applied before ironing adds the glossy, reflective quality that complements the scarf's silk sheen.
Why this look is popular: The scarf-wrapped ponytail reads as intentional and styled without being time-consuming. The bow detail adds a feminine touch that photographs well in profile, and the blue floral pattern works across seasons—it reads as spring/summer in natural light but pairs with darker palettes in fall. The style holds up throughout a full day because the scarf reinforces the elastic's grip.
Where this look is suitable: Business meetings, luncheons, office settings, daytime events, and any occasion where a standard ponytail feels too casual but an updo feels excessive.
The look: A square silk scarf with a blue and white floral print is folded into a narrow band and wrapped around the base of a sleek, straight ponytail. The ends are tied in a neat bow, adding a delicate finishing detail. The hair itself is completely smooth and straight, creating a mirror-like surface that contrasts with the intricate floral pattern of the scarf.
Step by step:
- Apply a heat protectant such as Tresemmé Keratin Smooth Shine Serum, then flat iron hair in small sections from root to tip for a sleek finish.
- Gather hair into a mid-height ponytail and secure with a snag-free elastic. Smooth any bumps with a fine-tooth comb.
- Take your floral silk scarf and fold it into a band approximately 1.5 to 2 inches wide.
- Wrap the folded scarf around the base of the ponytail, completely covering the elastic.
- Tie the ends in a secure bow—either at the side or directly at the back, depending on which angle you prefer.
- Adjust the bow loops so they're even, then let the tail ends drape alongside the ponytail.
- Run a flat iron pass over the ponytail one more time if any sections have shifted, ensuring the hair remains smooth and straight.
- Finish with a light mist of shine spray such as CHI Shine Infusion to enhance the glossy finish.
Tips and tricks: This style works best on straight or lightly waved hair. If your hair is naturally curly or coily, a full straightening session is necessary to achieve the polished finish the look requires—there's no way around that. For medium-length hair that doesn't reach the mid-back, the scarf bow actually adds visual length. A 20" to 26" scarf provides enough material for a full wrap and bow without excessive bulk. The scarf's pattern can be adjusted to complement your outfit's color palette—blue floral is versatile, but any muted print on a silk base works.
13.Chic City Slicker: Sleek Head Wrap
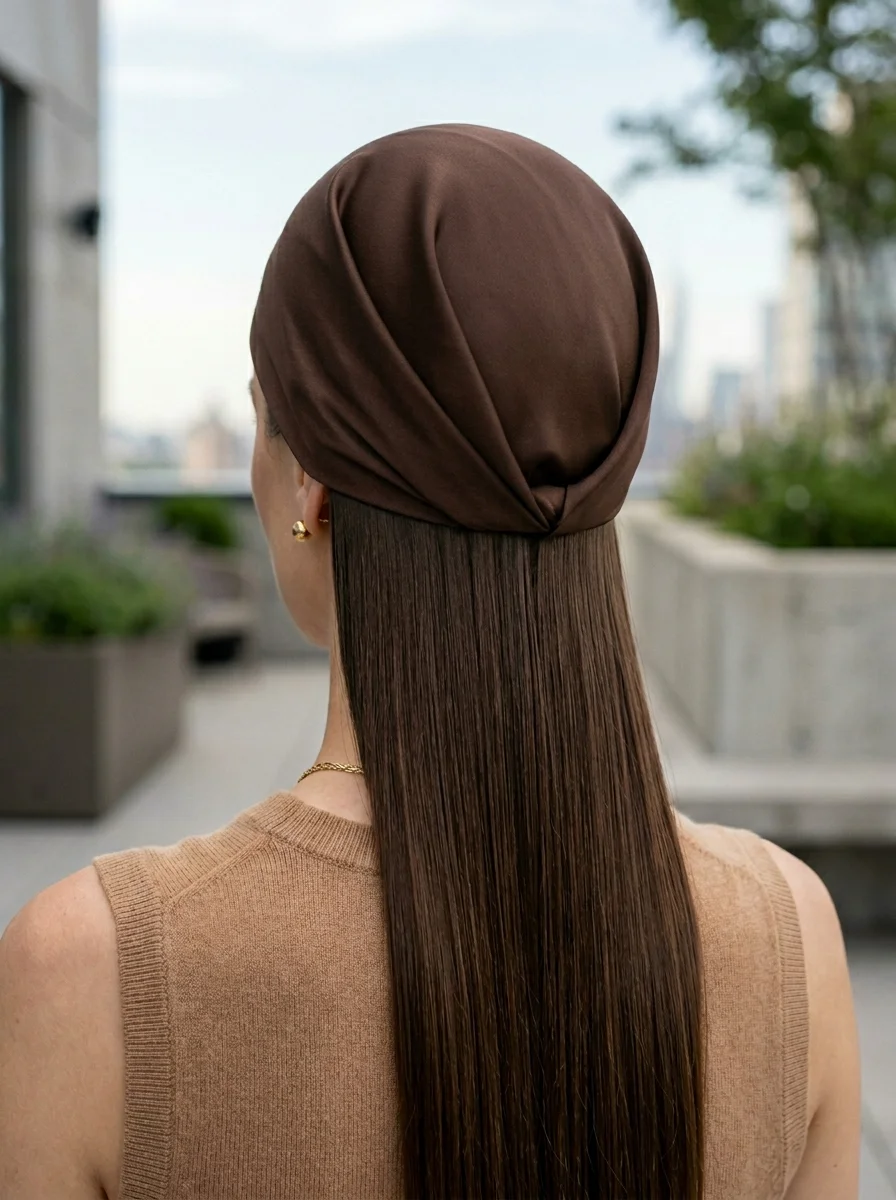
The overview: The pairing of a matte fabric head wrap with pin-straight hair flowing beneath it creates a deliberate contrast that reads as both minimal and architectural. The brown jersey or cotton-blend wrap sits close to the head, forming a turban- like silhouette, while the hair cascades down the back in a straight, polished sheet. The tension between the soft fabric and the sharp, reflective hair surface is what gives this style its visual edge.
A head wrap that covers only the crown and hairline—leaving the lengths exposed—serves a dual purpose: it hides any root texture or regrowth while showcasing the sleekness of the mid-lengths and ends. This makes it a practical option for anyone between salon visits who still wants a put-together appearance. The matte fabric doesn't compete with the hair's shine, so the overall effect stays clean rather than busy.
Why this look is popular: The minimalist approach appeals to anyone who prefers clean lines over pattern. The wrap's simplicity means it pairs with virtually any outfit—from tailored blazers to casual tees— without clashing. The contrast between covered crown and flowing lengths creates a strong profile silhouette that reads well in both editorial and everyday photography.
Where this look is suitable: City errands, business-casual offices, museum visits, coffee runs, and any urban setting where understated style is the goal.
The look: A smooth, matte brown fabric head wrap is tied around the head, creating a clean turban-like shape. The wrap is twisted or knotted at the front or side for a subtle design detail. The hair underneath is worn completely straight, flowing down the back like a polished curtain. The contrast between the soft, matte fabric and the sharp, reflective hair surface defines the entire aesthetic.
Step by step:
- Straighten hair completely using a flat iron at 320°F–350°F. A lightweight smoothing cream applied before ironing eliminates flyaways and adds a mirror-like finish.
- Center the fabric head wrap at the back of your head, just above the nape.
- Bring both ends forward, crossing them over the forehead.
- Wrap the ends around to the back again, layering them to create smooth, even folds.
- Tuck the ends underneath the wrap at the back, ensuring no loose fabric is visible.
- Shape the fabric at the front to create a subtle twist or knot detail—this adds dimension without overwhelming the clean lines.
- Ensure all hair beneath the wrap lies flat and smooth. Run the flat iron through the lengths one final time if needed.
- This style holds with minimal adjustment throughout the day, making it genuinely low-maintenance once constructed.
Tips and tricks: This look requires straight or straightened hair—the contrast between the wrap and sleek lengths is the entire point, so wavy or curly textures need a full flat iron session first. Medium to long hair (past the shoulders) shows the contrast most effectively. A jersey or cotton-blend fabric grips better than silk or satin, which is why the matte material is functional as well as aesthetic. For added security, two bobby pins placed at the temples before wrapping anchor the fabric in place during wind or movement.
25 Stunning Summer Vacation Hairstyles for 2026 ☀️🌊
14.Houndstooth Chic: Retro Bandana Style
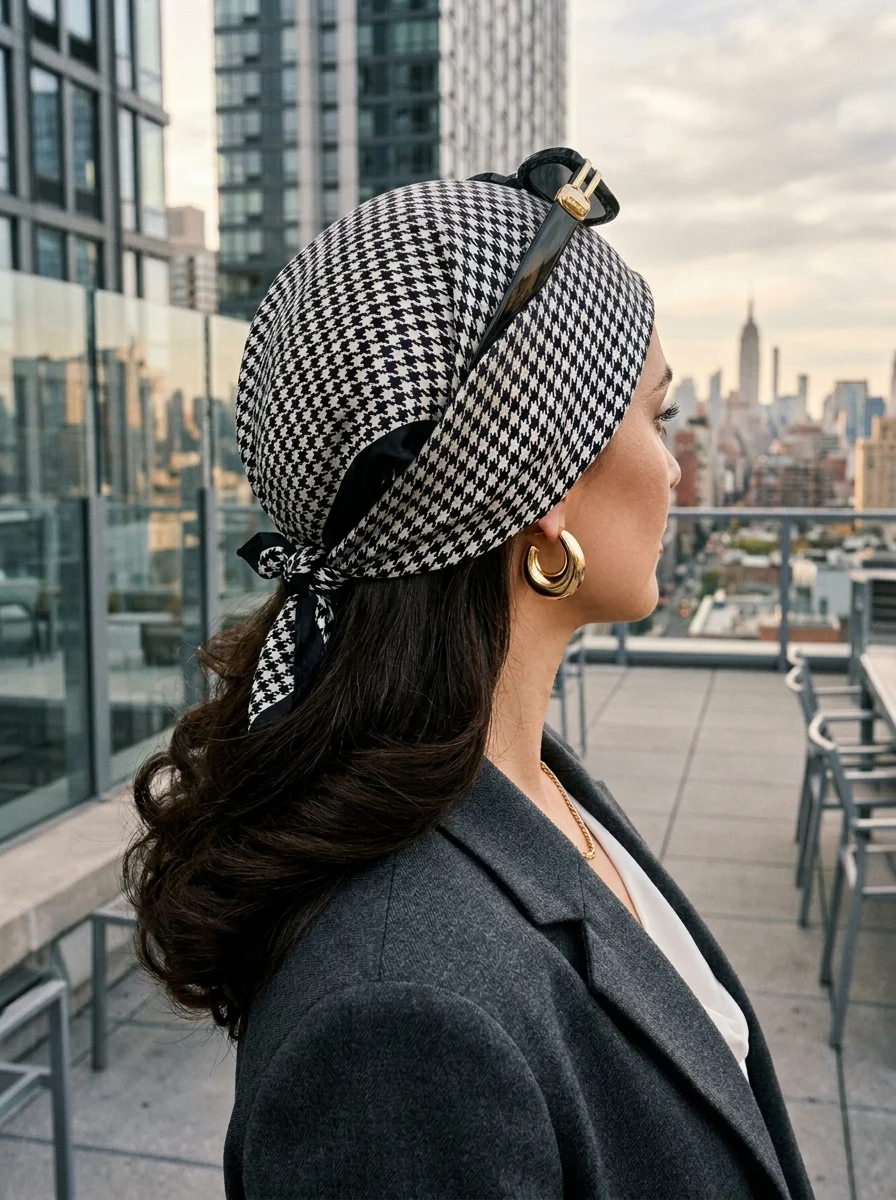
The overview: Layering a tortoiseshell headband over a folded houndstooth bandana is a styling move that borrows from both '60s mod and contemporary prep aesthetics. The bandana provides the pattern and color story—classic black and white houndstooth is one of the most enduring prints in fashion—while the headband adds structural reinforcement and a second textural element. The combination holds the hair back securely while allowing loose waves to frame the face, creating a look that balances structure and softness.
The houndstooth pattern itself functions as a neutral because its small-scale repeat reads as texture from a distance. This means it pairs with nearly any color palette without clashing, which is a significant practical advantage over bolder prints. The headband placement—positioned directly over the bandana—locks both accessories in place, eliminating the slippage that can occur with a single layer.
Why this look is popular: The retro-inspired aesthetic appeals to anyone drawn to vintage styling without committing to a full period look. The houndstooth pattern photographs with clear definition even in low light, making it reliable for evening events. The headband-and-bandana combination also solves the common problem of scarves slipping throughout the day—a practical benefit that contributes to its staying power as a trend.
Where this look is suitable: Brunch dates, shopping outings, vintage-inspired events, casual dinners, and any setting where a classic, polished accessory combination fits the dress code.
The look: A black and white houndstooth bandana is folded into a narrow band and tied at the back of the head. A tortoiseshell headband is positioned directly over the bandana, securing it in place. The hair underneath is styled in loose, glamorous waves that cascade past the shoulders. The combination of the graphic print, the structured headband, and the soft waves creates a layered aesthetic that references vintage styling while remaining thoroughly modern.
Step by step:
- Create loose, bouncy waves using a 1.25" curling iron or wand. Wrap sections away from the face, then brush them out with a paddle brush for a softer, more blended result.
- Fold the houndstooth bandana into a long, narrow band approximately 2 inches wide.
- Position the bandana on the head, starting about an inch back from the hairline.
- Bring the ends to the back and tie a secure knot at the nape, tucking the ends underneath.
- Place the tortoiseshell headband directly over the bandana, pressing gently to nest it against the fabric and secure both layers.
- Smooth the bandana fabric on either side of the headband to ensure the houndstooth pattern is visible and flat.
- Pull a few face-framing waves forward and arrange them to soften the structured accessory line.
- Check the symmetry from both sides—adjust the headband position if needed to ensure even coverage.
Tips and tricks: This style works on medium to long hair. If your hair is naturally straight, a curling iron session is non-negotiable— the waves are what balance the structured accessories. A texturizing spray applied before curling helps the waves hold their shape throughout the day. The headband-and-bandana layer technique is particularly useful for anyone who finds scarves slip on fine or very smooth hair—the headband acts as an anchor. Choose a headband with a slightly textured interior grip for the best hold.
15.Coastal Breeze: Light Blue Bandana Accent
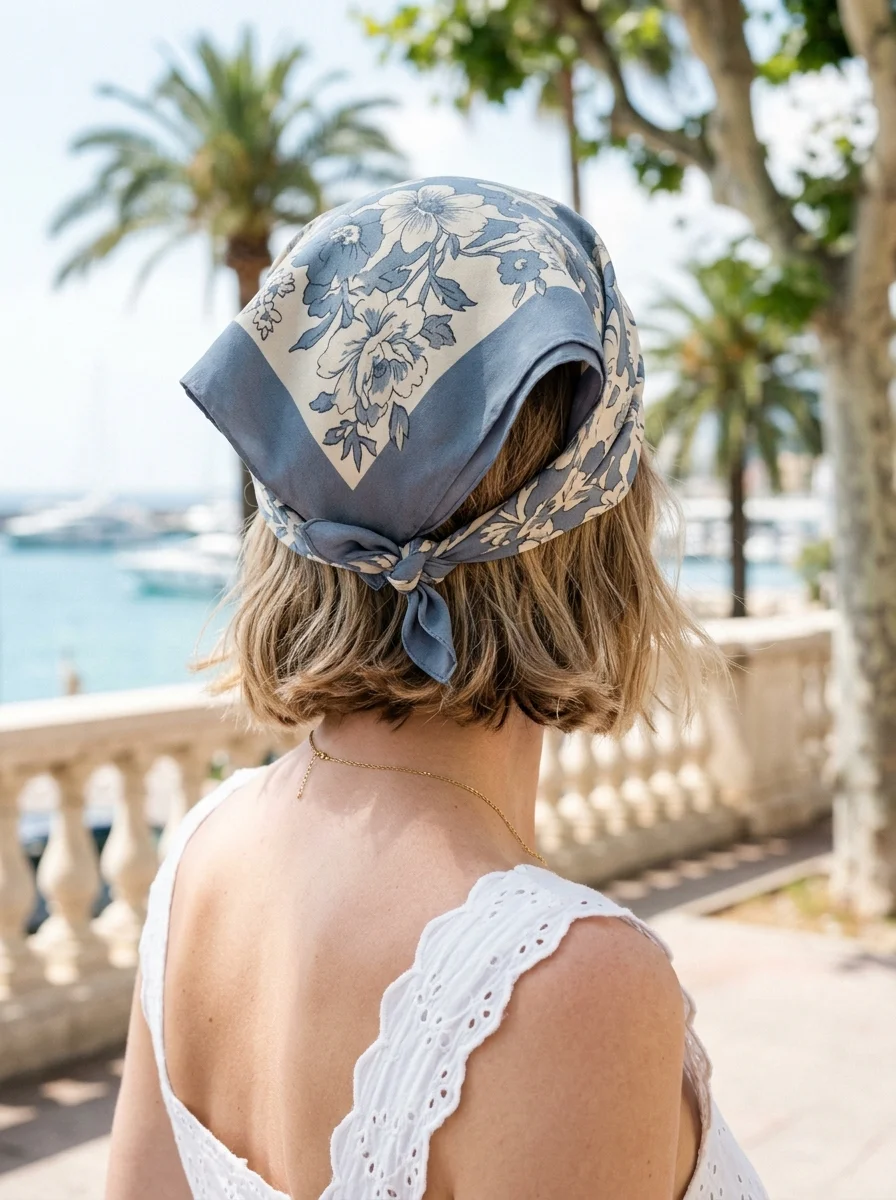
The overview: A light blue linen-blend bandana tied at the nape of a textured bob demonstrates how a single accessory can completely reframe a short haircut. The linen fabric's naturally slightly crinkled texture pairs with the bob's gentle waves to create a cohesive relaxed aesthetic— neither the hair nor the bandana looks over-styled. The soft blue tone functions as a neutral in warm-weather contexts, complementing denim, white, and earth tones without competing for attention.
Bobs—particularly those with some natural texture or movement—are one of the hair lengths most people overlook for bandana styling. The assumption that scarves require long hair to anchor to is inaccurate. A bob provides enough hair at the nape to secure a bandana knot, and the shorter length means the accessory sits higher on the head, creating a more visible focal point than it would on longer hair.
Why this look is popular: The light blue color reads as fresh and seasonally appropriate without being overly thematic. The linen-blend fabric's texture photographs with more character than flat cotton, adding visual depth to a simple tie-back. For bob wearers who want to add variety to their daily rotation, this style offers a quick variation that takes under two minutes to construct.
Where this look is suitable: Beach walks, farmer's markets, coastal towns, casual weekend outings, and any warm-weather setting where a relaxed but intentional accessory feels right.
The look: A soft, light blue linen-blend bandana is folded into a triangle, then into a band, and tied at the nape of a textured bob. The bob features gentle waves that add movement, and the bandana's ends hang down slightly at the back. The fabric's natural crinkled texture adds to the casual, lived-in quality. A few face-framing pieces are pulled loose to soften the overall shape.
Step by step:
- Start with a bob that has some texture—if your hair is naturally straight, create loose waves using a 1" curling iron or apply a sea salt spray and scrunch.
- Take the light blue bandana and fold it into a triangle.
- Fold the triangle again to create a band approximately 2 to 2.5 inches wide—adjust based on your forehead height and personal preference.
- Place the folded bandana at the back of the head, with the folded edge sitting just above the nape.
- Bring the ends forward, cross them over at the sides, then bring them back to the nape.
- Tie a secure knot at the nape and let the ends hang naturally.
- Pull a few face-framing pieces loose using the tail end of a rat-tail comb for controlled placement.
- Adjust the bandana width on your forehead for comfort and visual balance.
Tips and tricks: This style is specifically designed for bob lengths—it doesn't try to compensate for short hair or pretend the hair is longer than it is. The bandana sits higher on the head with a bob, which actually makes the accessory more prominent. A linen-blend fabric holds its shape better than pure linen, which wrinkles excessively, while still providing that relaxed texture. For bobs that hit above the chin, a narrower fold (about 1.5 inches) prevents the bandana from overwhelming the face.
16.Sun-Kissed Waves: Earthy Toned Scarf
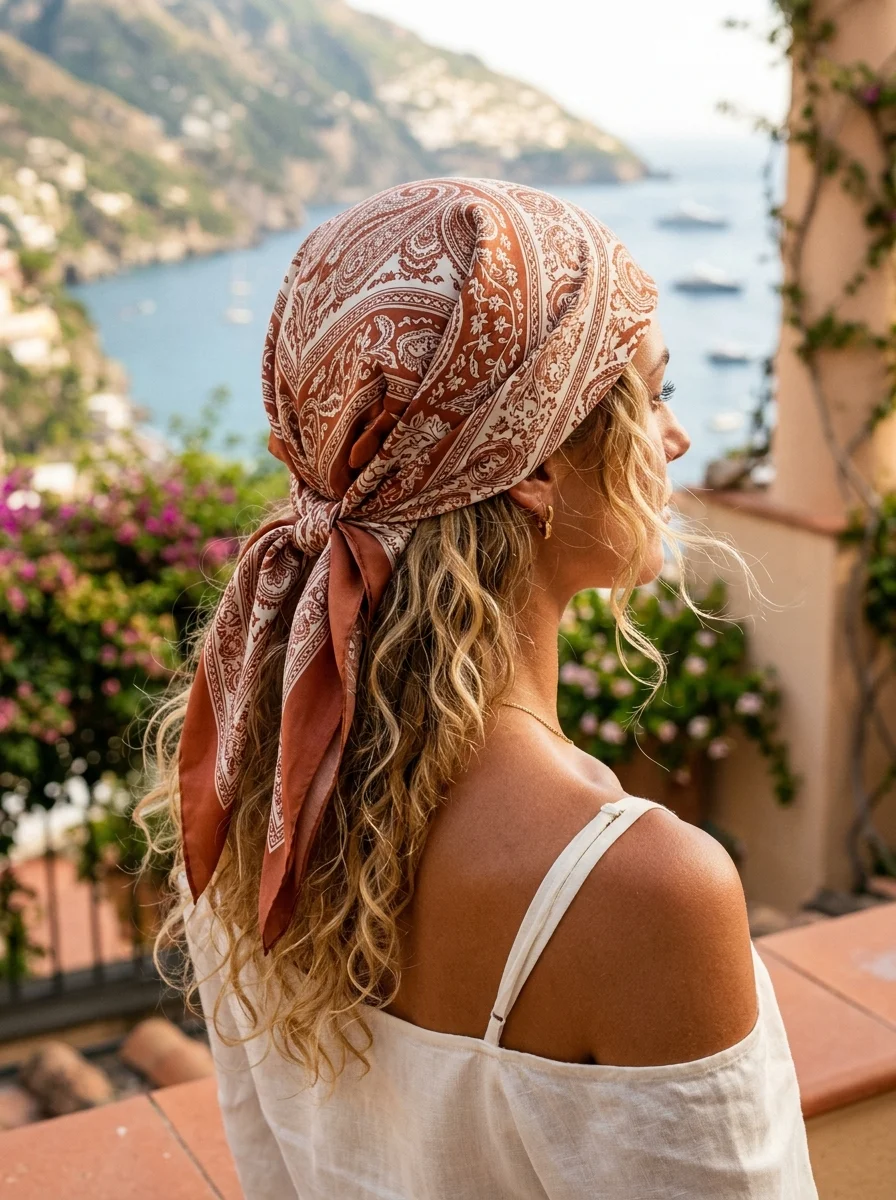
The overview: A warm rust-colored scarf with a paisley-inspired print paired with loose beachy waves is one of the most consistently wearable combinations in the bandana style category. The earthy tone works across skin tones and seasons, and the paisley pattern adds enough visual interest without overwhelming the hair underneath. The construction—folded into a triangle, then a band, and tied at the nape—is straightforward enough to execute in under two minutes once you've done it a few times.
The key to this style's effectiveness is the wave pattern. Loose, tousled waves with irregular sizing create the lived-in quality that makes the scarf look integrated rather than placed on top. A 1.25" to 1.5" curling iron barrel produces waves in this size range—anything smaller reads as ringlets, anything larger falls flat quickly. The goal is movement, not precision.
Why this look is popular: The warm color palette photographs with a golden quality in natural light, which makes this style particularly appealing for outdoor settings. The combination of waves and scarf creates a bohemian aesthetic that feels intentional without appearing overworked. The earthy tone also functions as a neutral, meaning it integrates seamlessly into most wardrobes without requiring a specific outfit pairing.
Where this look is suitable: Casual outings, picnics, farmers' markets, vacation settings, weekend brunches, and any relaxed environment where a bohemian-leaning accessory fits the tone.
The look: A warm rust-colored scarf with a delicate paisley-inspired print is folded into a triangle, then a band, and tied at the nape. The hair underneath falls in soft, natural beachy waves that look tousled and lived-in. The scarf sits comfortably without tightness, and a few face-framing strands are left loose to enhance the relaxed, undone quality of the overall style.
Step by step:
- Create soft, irregular waves using a 1.25" curling iron. Wrap sections of varying sizes—some thicker, some thinner— to avoid uniformity. Alternate curling direction for a more natural pattern.
- Once curled, flip your head upside down and shake the waves loose with your fingers. Apply a sea salt spray such as Bumble and Bumble Surf Spray for texture.
- Fold the earthy-toned scarf into a triangle.
- Fold the triangle again to create a band approximately 2 to 3 inches wide.
- Place the folded edge at the back of the head, just above the hairline.
- Bring the ends forward, cross them, then bring them back to the nape.
- Tie a secure knot or bow at the back, allowing the ends to hang naturally alongside the waves.
- Pull a few face-framing strands free and adjust the scarf for comfort and visibility of the print.
Tips and tricks: This style works best on medium to long hair with natural wave or curl. Straight hair requires a curling iron session to achieve the tousled quality—the waves are integral, not optional. A texturizing spray or dry shampoo applied before curling gives the hair enough grip to hold the wave pattern longer. The earthy rust tone pairs well with neutral and natural-colored clothing, but it also works against denim and white. For an asymmetrical variation, position the knot slightly off-center—a small adjustment that adds visual interest without changing the construction.
17.Resort Ready: Tropical Print Head Wrap
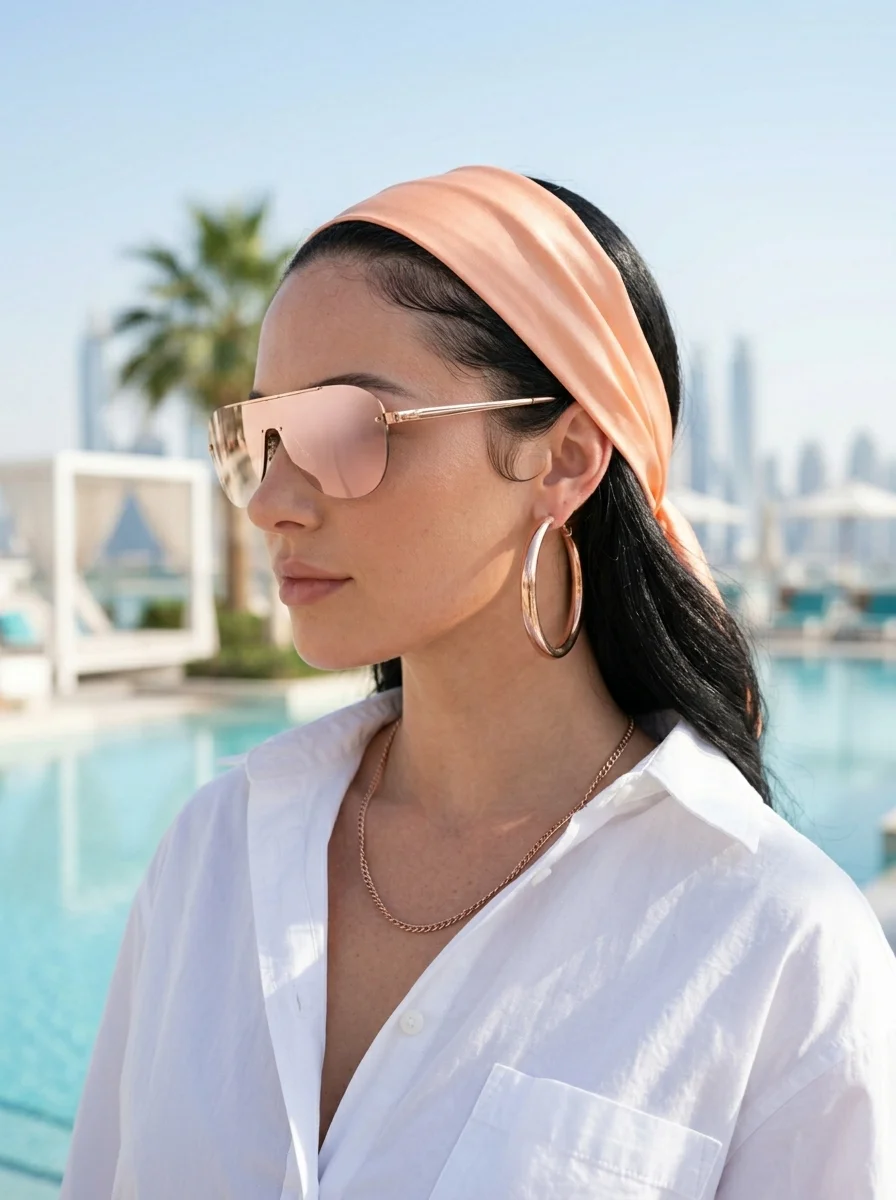
The overview: A voluminous turban wrap in a saturated tropical print — palm fronds and hibiscus motifs rendered in greens, corals, and golds — is one of the fastest ways to look vacation-ready without touching a single hot tool. The rectangular scarf, typically 35 to 40 inches in length, is folded lengthwise into a wide band and wrapped in overlapping layers that build height at the crown, finishing with a twisted knot or rosette detail positioned slightly off-center.
Silk or satin-blend fabrics work best here because they compress without creating bulk and keep natural hair smooth underneath. The turban technique fully conceals the hairline, which means it functions as both a protective style and a statement accessory. For textured or coily hair, the enclosed wrap also shields curls from humidity and salt air — a practical benefit that doesn't compromise the visual impact.
Turban wrapping has deep roots in West African, Caribbean, and South Asian hair traditions, and the technique has been adopted widely across resort and cruise fashion for its versatility. Modern tropical-print versions — often on silk twill or satin charmeuse — read as polished rather than costume-like, especially when the color palette stays in the warm botanical range.
Why this look is popular: The turban wrap photographs with strong silhouette definition against poolside and beach backdrops, and the saturated print fills the frame without requiring any hairstyling skill whatsoever. It also eliminates frizz concerns in tropical climates, making it a reliable choice for destination weddings, cruises, and resort dinners where humidity would otherwise undo a blowout.
Where this look is suitable: Poolside lounging, beach vacations, cruise formal nights, tropical destination weddings (particularly for guests or the mother of the bride), outdoor brunch, and any occasion where a bold headpiece reads as intentional rather than casual.
The look: The scarf wraps in layered folds that create visible volume at the crown and temples, with the twisted rosette knot sitting just above the forehead or slightly to one side. All hair is tucked neatly beneath the wrap, and the fabric edges are concealed. Statement sunglasses and gold hoop earrings complete the composition — the headpiece does the heavy lifting so the rest of the styling stays minimal.
Step by step:
- Pull hair into a low bun or flat twist at the nape to create an anchor point; bobby-pin the base flat against the head.
- Lay the rectangular scarf flat and fold it lengthwise into a band approximately 8 to 10 inches wide.
- Center the folded scarf at the nape, with the long edges draped forward over both ears.
- Cross the two ends over each other at the center of the forehead, then twist them together into a single rope.
- Wrap the twisted rope back toward the nape, tucking it under the original layer; repeat for additional length if needed.
- Shape the twisted section at the crown into a rosette or decorative knot, securing with two or three bobby pins threaded through the fabric.
- Tuck all loose ends under the wrap and press the folds flat with your palms to even out the silhouette.
- Mist the finished wrap with a light-hold finishing spray to keep flyaways at bay without stiffening the fabric.
Tips and tricks: This style works on every hair type and length because the hair is fully covered — it's one of the most inclusive options on this list. Fine or low-density hair benefits from a volumizing powder at the roots before wrapping to prevent the turban from sitting flat. Very thick or coily hair may require a larger scarf (45 inches or more) to accommodate the bulk without pinching. A satin-lined scarf is worth investing in if you plan to wear this frequently; cotton blends can absorb moisture and create friction against the hair cuticle. Pair with lightweight, breathable fabrics — linen, cotton voile, or chiffon — to keep the overall look resort-appropriate.
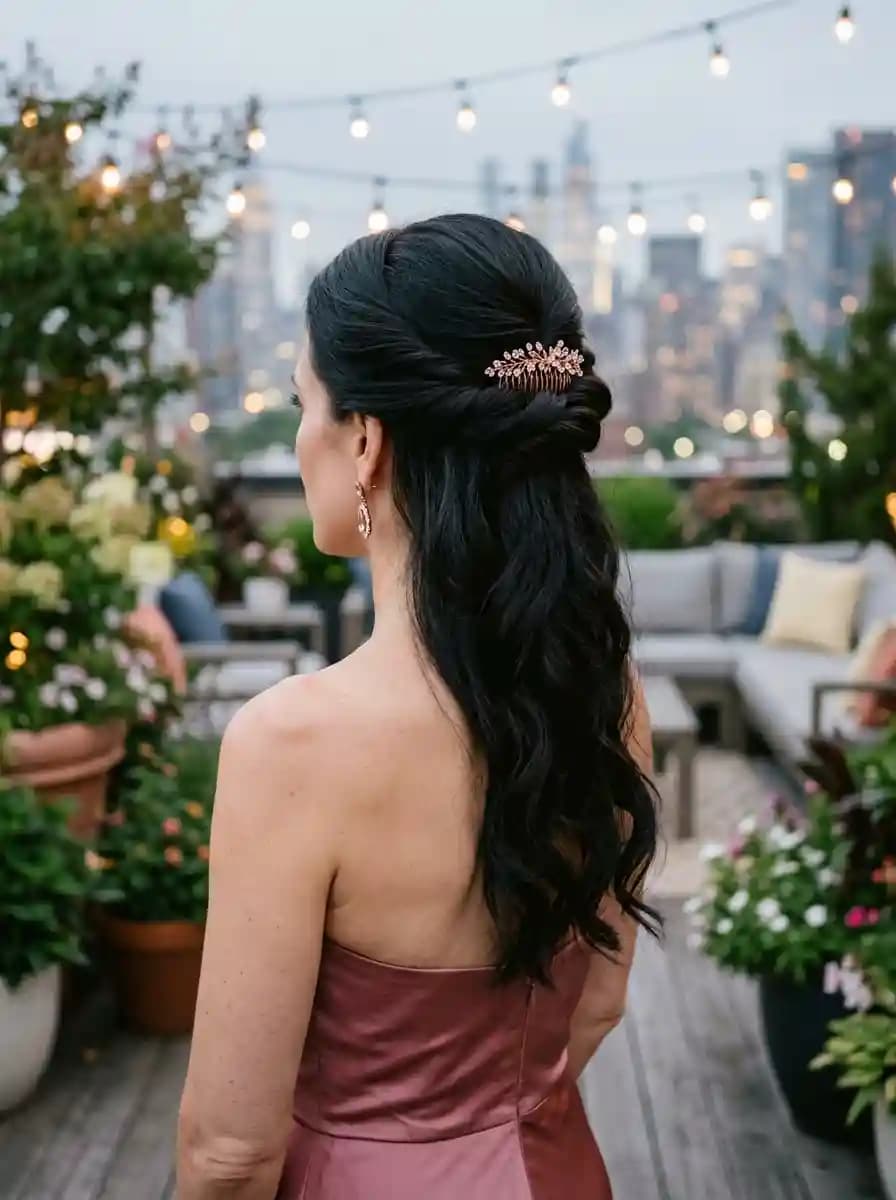
20 Stunning Mother of the Bride Hairstyle Ideas for 2026 💍
18.Chic French Cafe Waves with a Botanical Scarf
The overview: Loose, S-shaped waves gathered into a low ponytail at the nape, paired with a square botanical-print scarf folded into a triangle and secured underneath the ponytail base — this is the Parisian sidewalk formula that keeps showing up on editorial mood boards. The scarf's longest edge sits along the hairline, with the knotted ends tucked beneath the ponytail so the fabric frames the crown without adding height.
The wave pattern here is deliberately inconsistent: some sections curl away from the face while others bend inward, creating the lived-in texture that defines this aesthetic. A 1.25-inch barrel curling iron (think ghd Classic Curl or T3 SinglePass Curl) at medium heat — around 320°F for fine hair, 370°F for medium to coarse — produces the right diameter. After setting, brush through with a wide-tooth comb or fingers to break up uniform spirals.
The low ponytail placement is critical: it keeps the scarf flat against the head and lets the knot sit at the nape where it won't interfere with the waves above. The overall effect reads as intentional yet unforced — the hallmark of French women's approach to hair accessorizing.
Why this look is popular: It balances polished and undone in a way that works for both daytime and evening. The botanical print adds visual interest without overwhelming the face, and the low ponytail keeps the silhouette clean enough to pair with structured outerwear or delicate blouses. The style also holds up well through several hours of wear because the scarf anchors the ponytail at a natural tension point.
Where this look is suitable: Café and brunch settings, gallery openings, casual office environments, weekend shopping, first dates, outdoor markets, and travel days where you want to look put-together without spending an hour on hair.
The look: The waves fall in alternating directions through the lengths, creating visible movement and body without stiffness. The botanical scarf — typically a silk twill or lightweight cotton in muted greens, creams, and soft florals — wraps from the forehead back and ties at the nape, sitting just below where the ponytail is secured. The knot is positioned slightly off-center, and the loose ends drape naturally. The overall silhouette is soft at the crown, defined through the lengths, and anchored at the nape.
Step by step:
- Apply a texturizing spray (Oribe Dry Texturizing Spray or Bumble and bumble Prêt-à-Powder) to second-day hair for grip and body.
- Using a 1.25-inch curling iron, alternate curling sections away from and toward the face, holding each section for five to seven seconds before releasing.
- Let the curls cool for two to three minutes, then rake through with your fingers to separate and soften them.
- Gather hair into a low ponytail at the nape and secure with a clear elastic; leave the ponytail slightly loose at the crown for volume.
- Fold the square scarf diagonally into a triangle, then place the longest edge along your hairline with the point facing toward the back.
- Bring the two ends to the nape, underneath the ponytail, and tie a knot; position it slightly off-center for a more natural look.
- Tuck the knot ends under the wrapped fabric or let them drape alongside the ponytail.
- Finish with a flexible-hold hairspray (Living Proof Flex Hairspray) to maintain the wave shape without crunchiness.
Tips and tricks: Fine hair responds well to a volumizing mousse applied to damp hair before blow-drying, which creates a foundation the waves can grip. Coarse or thick hair benefits from a smoothing serum (Moroccanoil Treatment Light) on the mid-lengths before curling to prevent frizz without weighing the waves down. The scarf works in silk, cotton, or linen — silk adds a subtle sheen that reads more formal, while cotton feels casual and bohemian. Sleeping in loose braids the night before can pre-set the wave pattern, reducing heat exposure and saving time in the morning. This style actually improves as it loosens throughout the day.
19.Boho Chic Leopard Scarf with Textured Waves
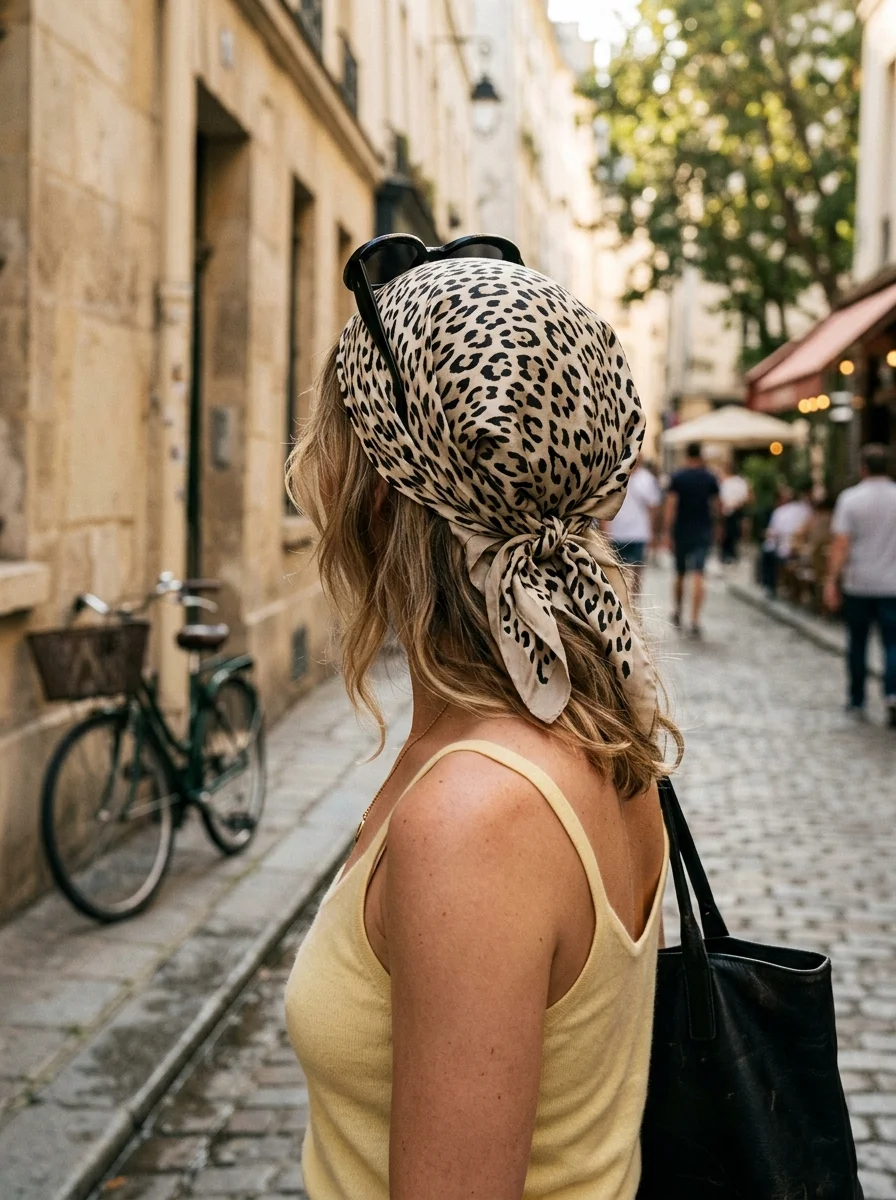
The overview: Leopard print functions almost as a neutral in hair accessorizing — the warm browns and blacks work across skin tones and pair with most wardrobe palettes without clashing. Here, a square leopard-print scarf is folded into a triangle, wrapped from the forehead back, and tied at the nape with a loose bow, allowing face-framing tendrils to escape on both sides. The hair is styled in textured, air-dried waves that look deliberately unfinished.
The key difference between "textured waves" and "beachy waves" comes down to product: sea salt spray creates defined, separated pieces, while a texturizing mousse or dry shampoo builds volume at the root and mid-length without the same piecey separation. For this particular look, the waves are slightly fuller and less defined — achieved by diffusing damp hair on low heat and then scrunching in a lightweight texturizing cream (Kevin Murphy Hair Resurrection or R+Co Trophy Shine + Texture Spray).
The sunglasses perched on top of the scarf aren't just practical — they anchor the scarf fabric at the crown and prevent it from sliding backward, a common issue with silk scarves on fine or straight hair. It's a functional styling choice that also looks intentional.
Why this look is popular: The combination of animal print and undone texture reads as confident without being overdone, which is why it consistently appears in street-style photography during fashion weeks and music festivals alike. The loose bow tie adds a playful focal point at the back of the head, and the face-framing pieces soften the jawline — a universally flattering detail.
Where this look is suitable: Music festivals, farmers' markets, casual weekend brunches, outdoor concerts, vacation sightseeing, and any daytime setting where you want to look stylish but approachable. The leopard print adds enough edge to work for a low-key dinner or cocktail hour as well.
The look: The waves fall with natural movement and a slightly matte finish — not glossy or overly styled. The leopard scarf wraps from the forehead to the nape, with the loose bow sitting just above the ponytail base. Two to three face-framing pieces are pulled free from the wrap, curving gently around the cheekbones. Sunglasses rest on the crown, holding the scarf in place. The overall impression is that the hair was air-dried on a warm afternoon and the scarf was tied as an afterthought — even though both elements are deliberately styled.
Step by step:
- Apply a texturizing mousse to damp hair, concentrating at the roots and scrunching through the mid-lengths.
- Diffuse on low heat and low airflow, flipping the head upside down periodically to build root volume.
- Once fully dry, spritz a dry texturizing spray through the lengths and massage at the roots for additional lift.
- If any sections lack definition, use a 1.5- to 2-inch curling wand to loosely wave two or three random sections, leaving the ends out for a more natural finish.
- Gather hair into a loose, low ponytail at the nape and secure with an elastic.
- Fold the leopard scarf diagonally into a triangle and place the longest edge along the hairline.
- Wrap the ends to the nape, tying a loose bow over the elastic; let the bow loops and tails fall naturally.
- Pull two to three strands free around the face and adjust the bow for balance.
Tips and tricks: Straight hair types may find the waves fall flat by midday; a pre-styler like Bumble and bumble Prep contributes enough grip to extend the wave hold without product buildup. Fine hair gains visible density from the root-lifting technique of diffusing upside down, and the texturizing spray adds the grit that fine strands often lack naturally. For thicker hair, a light smoothing serum on the ends before styling prevents the frizz that can make "undone" look messy rather than intentional. The leopard scarf pairs naturally with warm-toned outfits — camel, olive, rust — but also contrasts well against black or white if you prefer a sharper color story.
20.Bohemian Rhapsody: Fringed Scarf Style
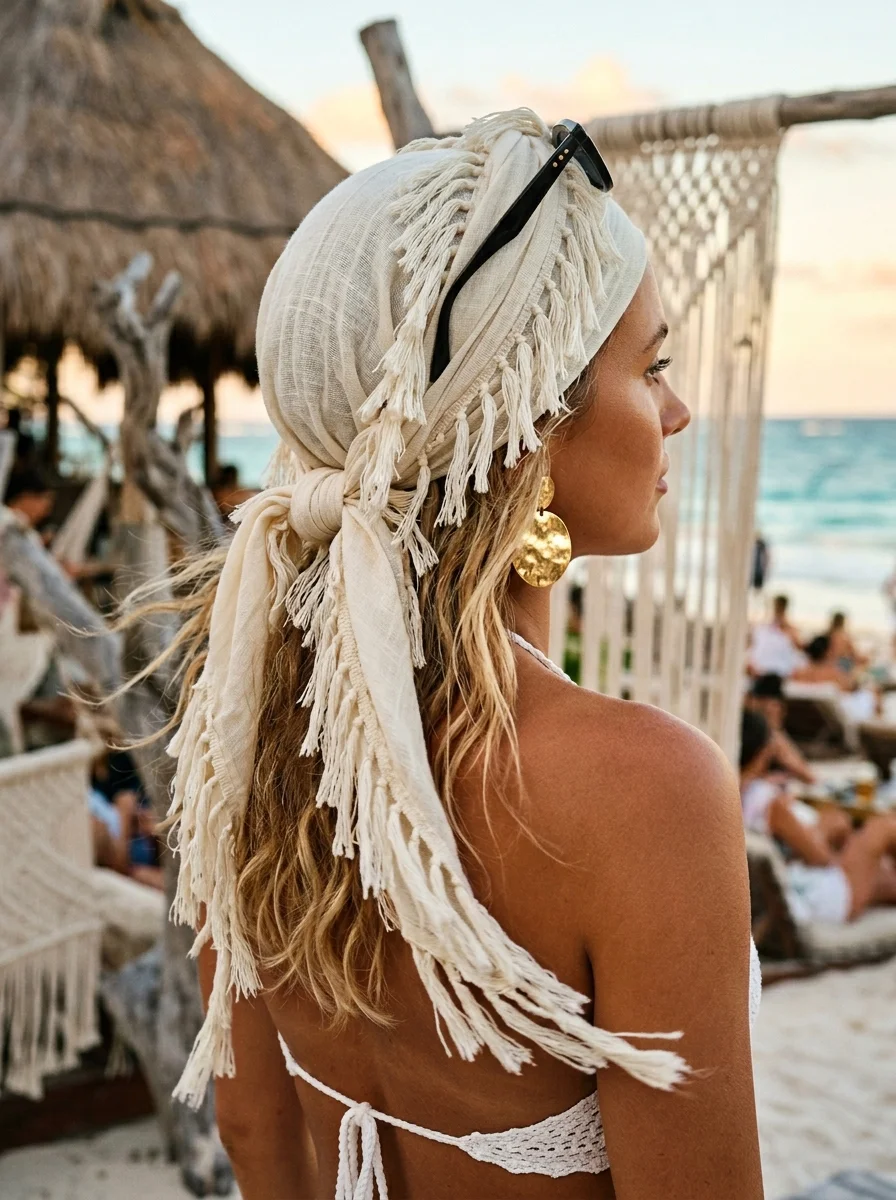
The overview: Fringe transforms a standard head scarf into a kinetic accessory — the tassels move with every turn of the head, adding visual texture that a plain-edged scarf simply can't produce. A cream or off-white cotton or cotton-linen blend scarf, roughly 20 to 24 inches square, with 2- to 3-inch fringe along two edges, is draped over the crown and tied at the nape in a relaxed wrap. The hair stays down in loose, natural waves that blend with the fringe rather than competing with it.
This particular variation uses a half-turban wrap: the scarf covers the top and sides of the head but leaves the hair exposed from the ears down, with the fringe falling along the temples and jawline. The technique is simpler than a full turban — no twisting or rosette shaping required — making it accessible even if you've never wrapped a scarf before. Gold statement earrings peek through the fringe, adding a metallic anchor to the soft textures.
Why this look is popular: The fringe detail photographs with natural movement, which gives images an editorial, slightly cinematic quality. The cream tone works as a universal complement across hair colors, and the scarf's texture adds visual complexity without requiring intricate hairstyling. It's also one of the fastest styles on this list — under three minutes from start to finish.
Where this look is suitable: Outdoor festivals, beach bonfires, garden parties, casual weddings (particularly bohemian or rustic-themed), weekend markets, and vacation days where comfort and style need to coexist. The fringe detail makes it more visually interesting than a plain bandana, so it works in settings where you want to look styled without appearing formal.
The look: The cream scarf drapes over the crown with the fringe hanging along both sides of the face and shoulders, creating a soft, layered frame. The hair falls in loose, tousled waves that merge with the fringe strands — the textures overlap so it's not always clear where the scarf ends and the hair begins. Gold earrings add structure and a warm metallic accent. The silhouette is wide and relaxed, with movement in the fringe providing constant visual interest.
Step by step:
- Prep damp hair with sea salt spray (Sun Bum Sea Spray or Not Your Mother's Beach Babe) and let air-dry, scrunching periodically.
- Once dry, separate a few face-framing sections and wrap them loosely around a 1.5-inch curling wand if they need additional definition.
- Lay the fringed scarf flat and position it over the back of the head, centering it so the fringe hangs evenly on both sides.
- Bring the two ends forward, cross them over the forehead, and wrap them back toward the nape.
- Tie a secure knot at the nape, underneath the hair, and tuck the ends under the scarf body.
- Pull out two to three strands around the face and let the fringe settle naturally over the hair and shoulders.
- Add gold statement earrings — hoops or drop earrings work best — to anchor the look.
Tips and tricks: Fine or straight hair may need extra texture to match the scarf's visual weight; a volumizing powder (SexyHair Powder Play) worked into the roots adds lift without residue. Wavy or curly hair types will find this style particularly flattering because the natural texture mirrors the fringe movement. The cream color works universally, but if you want more contrast against light hair, look for fringe scarves in rust, olive, or terracotta. Bobby pins placed diagonally underneath the scarf at the temples can prevent slippage on very smooth or straight hair — a hidden insurance policy that doesn't affect the visual.
21.Mediterranean Breeze: Light Blue Scarf Bob
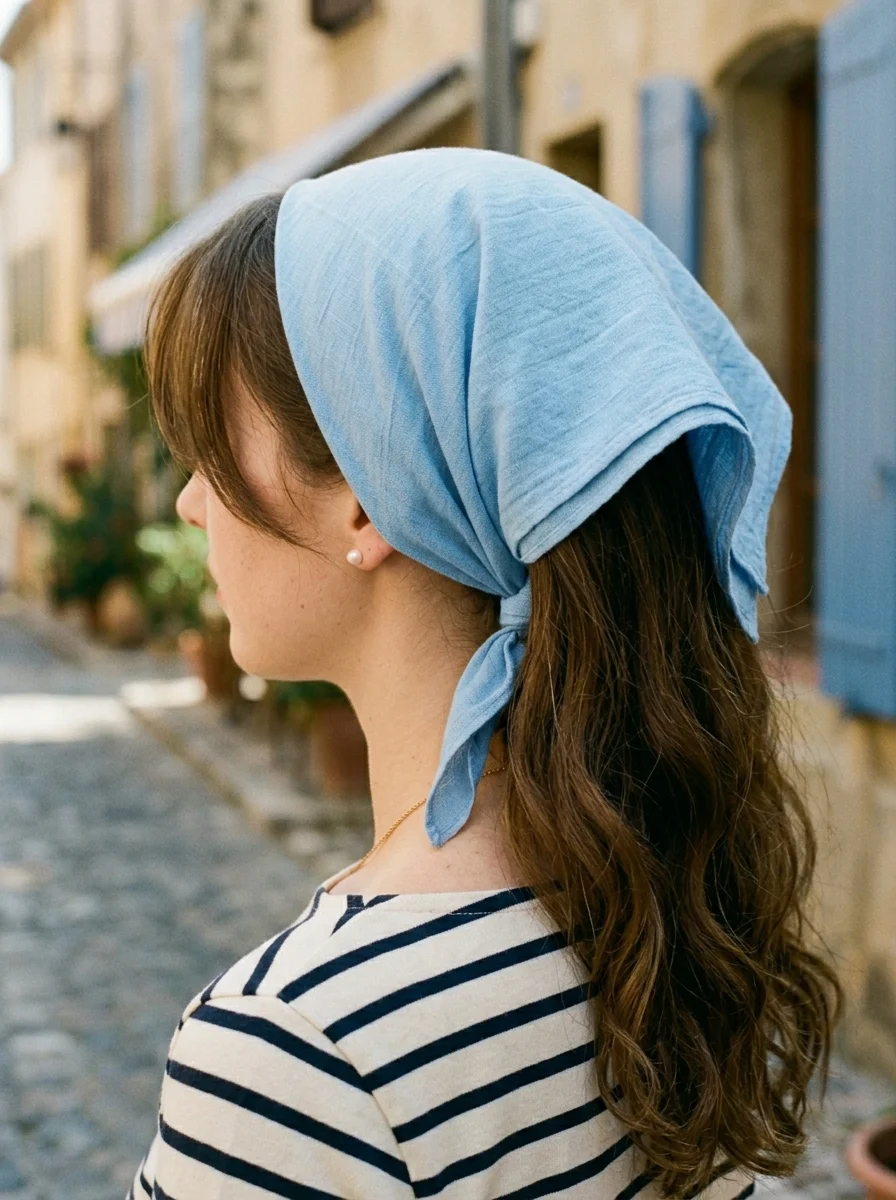
The overview: A light blue linen-blend bandana folded into a triangle and then narrowed into a 2-inch-wide strip, tied at the nape with the pointed end hanging down the back — this is one of the simplest and most effective ways to style a bob. The technique works because the folded band creates a clean, horizontal line across the forehead that contrasts with the vertical movement of a chin-length or jaw-length cut.
The linen blend fabric has a slightly crinkled, matte texture that reads as relaxed rather than polished, which is intentional. A crisp cotton bandana would create a sharper line and a more casual, Americana feel, whereas the linen softens the overall impression and gives it that European coastal sensibility. The light blue — somewhere between powder blue and cornflower — picks up warmth in most skin tones and pairs naturally with denim, white, and neutral palettes.
Why this look is popular: Short hair limits the number of styling options available, and this bandana technique adds visual interest without requiring length, clips, or heat tools. The folded band also compresses any flyaways at the hairline, giving the bob a cleaner silhouette. For anyone growing out a pixie or adjusting to a new short cut, this accessory bridges the gap between stages gracefully.
Where this look is suitable: Coastal towns, seaside restaurants, farmers' markets, casual weekend outings, travel days, and warm-weather settings where a bob can feel limiting without accessories. It also works well for outdoor dining, walking tours, and any occasion where sun protection at the hairline is a practical consideration.
The look: The bandana sits across the forehead and temples as a narrow band, with the point trailing down the back of the head. The bob falls in gentle, slightly tousled waves that end just above the shoulders. A few face-framing pieces are pulled free from the band, softening the hairline. The fabric has a visible linen texture — slightly irregular, matte, and breathable — that complements the casual wave pattern. The overall effect is clean, light, and Mediterranean in tone.
Step by step:
- Start with a bob that has some natural texture; if the hair is very straight, use a 1-inch curling iron to add loose bends throughout, leaving the ends out.
- Take the light blue bandana and fold it diagonally into a triangle, then fold the triangle again to create a band approximately 2 inches wide.
- Place the folded bandana at the back of the head, with the point hanging down and the long edges positioned to wrap forward.
- Bring both ends forward along the temples and cross them at the forehead.
- Wrap the ends back toward the nape and tie a secure knot, keeping the band snug but not tight.
- Let the ends and the triangular point hang naturally at the back.
- Pull out a few pieces around the face and adjust the band width at the forehead for a balanced look.
Tips and tricks: This style is specifically flattering on bobs and lobs because the band creates a horizontal counterpoint to the jawline — a proportional trick that makes the face appear more balanced. Fine hair benefits from a texturizing spray before styling to give the waves enough body to stand up to the band's weight. Thick or coarse hair can be smoothed with a lightweight serum at the ends to prevent the bob from looking bulky beneath the bandana. The linen blend fabric breathes well in heat but does wrinkle easily; if a crisp look matters, steam the bandana briefly before folding. For extra security on windy days, place a bobby pin horizontally through the knot at the nape.
22.Beachy Curls: Boho Fringe Scarf
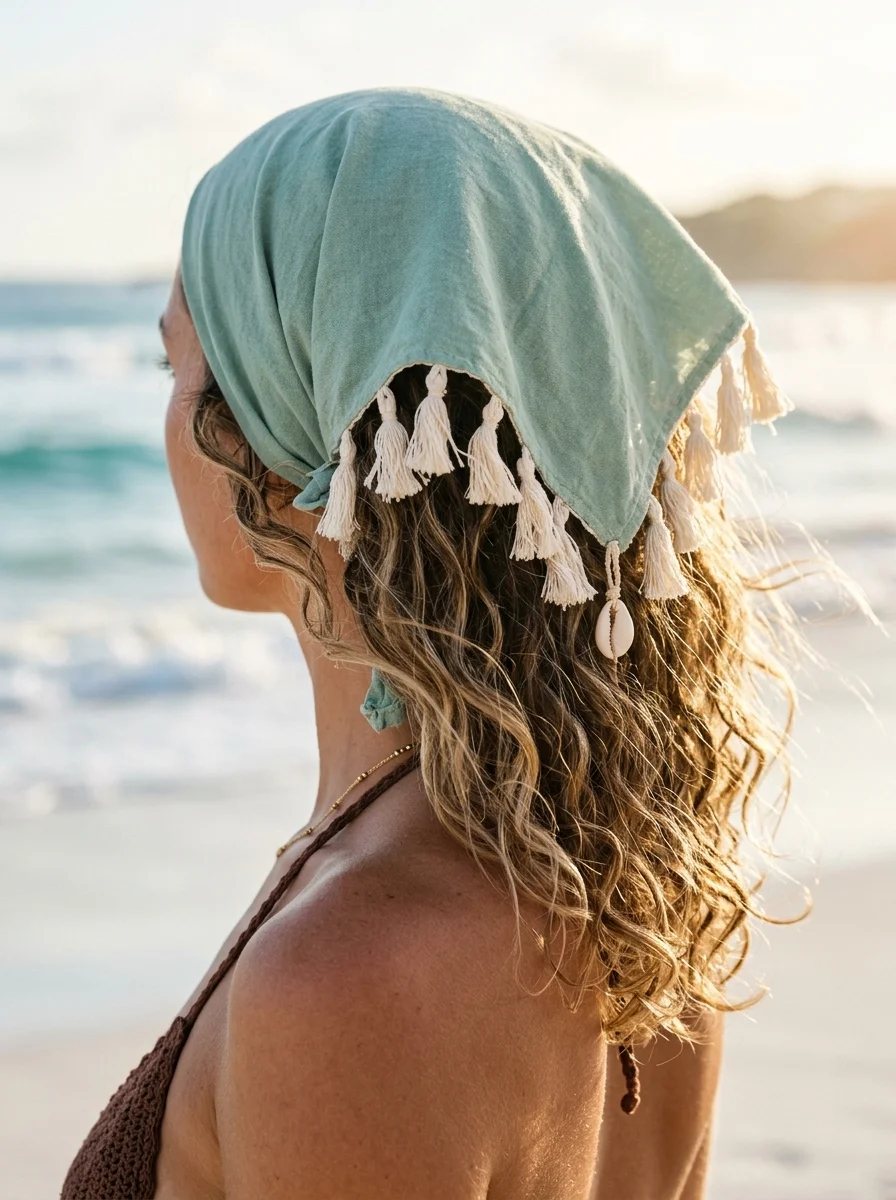
The overview: The fringe scarf returns here in a different configuration: rather than a half-turban wrap, this version uses a full wrap where the scarf covers the crown and the fringe falls forward, blending directly into the curls. The result is a more immersive texture — the tassels and the curl pattern become a single visual unit rather than two separate elements. The scarf is cream or ecru with a cotton or cotton-linen weave and 3-inch fringe along the edges.
The curls themselves are looser and more defined than the textured waves in item 19 — these are deliberate spiral shapes, created with a 1.25- to 1.5-inch curling iron or wand and left intact rather than brushed out. The distinction matters: beachy curls retain their individual shape and separate from each other, while textured waves merge into a single mass of movement. The fringe scarf pairs better with curls because the individual tassels echo the individual curl clumps.
This variation works particularly well for medium-length hair (between the collarbone and shoulder) where there's enough length for the curls to hang but not so much that the fringe gets lost in the volume. The bohemian aesthetic here is stronger than in item 20 — the curl definition pushes the look further from casual and closer to intentionally styled.
Why this look is popular: The interplay between the fringe strands and the curl clumps creates a rich, layered texture that photographs beautifully in natural light — the individual elements catch shadows and highlights differently, adding depth to what might otherwise read as a flat, single-toned hairstyle. It's also a practical choice for anyone who wants their curls to look styled without committing to a full updo or half-up style.
Where this look is suitable: Beach vacations, tropical resorts, outdoor weddings (guests and bridal party alike), garden parties, poolside events, and any setting where the bohemian-curl combination reads as festive rather than casual. It's dressy enough for a daytime celebration but relaxed enough for a vacation afternoon.
The look: The cream fringe scarf wraps the crown and ties at the nape, with the fringe falling along the temples and jawline. The curls — defined, glossy spiral shapes — cascade from beneath the scarf and intermingle with the fringe strands. Some curls frame the face while others fall behind the ears. The overall texture is dense and dimensional, with the cream fabric providing a neutral backdrop that makes the curl pattern visually pop. Statement earrings add a metallic counterpoint.
Step by step:
- Apply a curl-defining cream (DevaCurl SuperCream or Ouidad Advanced Climate Control Heat & Humidity Gel) to damp hair, scrunching to encourage curl formation.
- Diffuse on low heat until curls are fully set, or let air-dry if time permits — air-drying produces a slightly softer curl edge.
- Once dry, separate any curl clumps that are too large by gently pulling them apart with your fingers.
- Lay the fringed scarf across the crown, positioning it so the fringe falls forward along both sides.
- Bring the scarf ends to the nape, underneath the curls, and tie a firm knot.
- Arrange the curls so they fall over and around the fringe, blending the two textures together.
- Pull out a few curls around the face to frame it and add volume at the temples.
- Finish with a curl-enhancing hairspray (Aussie Instant Freeze or DevaCurl Flexible Hold Hairspray) to maintain definition without stiffness.
Tips and tricks: This look is ideal for naturally curly or wavy hair types (2B through 3C) because the existing curl pattern provides the foundation without requiring heat styling. Straight hair types can achieve it with a curling iron, but the results will require more product to maintain through the day. Fine curly hair benefits from a lightweight mousse rather than a heavy cream, which can flatten the curl volume. The fringe scarf works best in cotton or linen; silk fringe tends to slip against curly hair and may not hold its position. For humidity-prone environments, a anti-humidity spray applied after curling will extend the style's lifespan significantly.
23.Leopard Luxe: Silk Bandana Glam
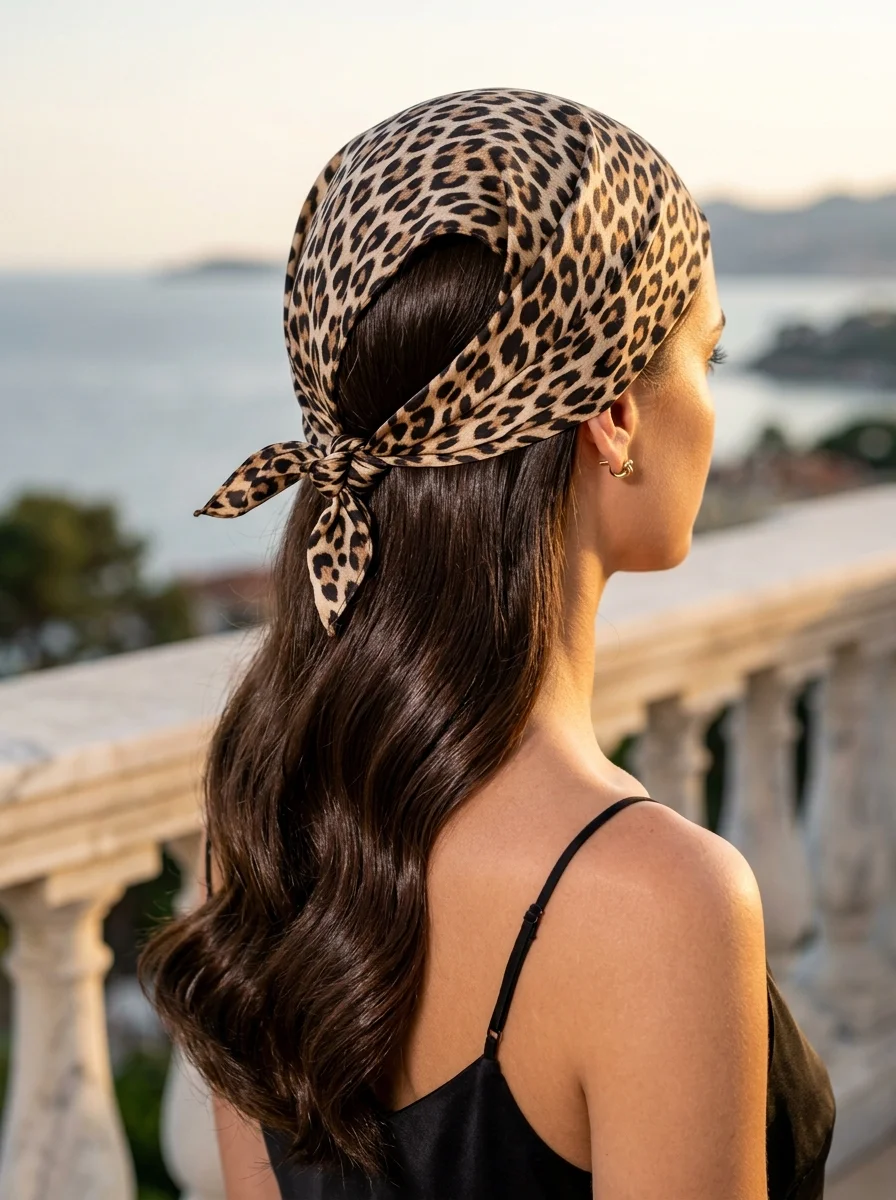
The overview: A square silk scarf with a bold leopard print, folded into a narrow band (roughly 2 to 3 inches wide) and tied at the back of the head with the hair left down in smooth, glossy waves — this is the most formal application of leopard print on this list. The silk fabric has a natural sheen that catches light, which elevates the animal print from casual to cocktail-ready. The band is positioned slightly back from the hairline, creating a clean, open forehead that reads as polished rather than playful.
The hair styling here is intentionally sleek: waves are created with a 1.5-inch curling iron, brushed through minimally, and finished with a shine spray or light oil to create a reflective surface. The gloss of the hair mirrors the sheen of the silk, producing a cohesive visual where both the accessory and the hair texture are working toward the same luxury effect. This is a different energy from the textured, undone waves in items 19 and 22 — here, every strand is controlled and visible.
Why this look is popular: Leopard print on silk reads as sophisticated rather than kitschy when the fabric quality is high and the styling is clean. The narrow band format keeps the print visible without overwhelming the face, and the glossy waves below provide enough visual interest to balance the bold pattern above. It's a look that signals intentionality — the wearer chose this accessory deliberately, and the polished hair reinforces that message.
Where this look is suitable: Cocktail parties, date nights, evening dinners, gallery openings, fashion events, holiday gatherings, and any occasion where the dress code sits between casual and black-tie. The leopard print adds personality without crossing into costume territory, making it versatile across a range of semi-formal settings.
The look: The leopard silk band wraps cleanly across the head with the knot hidden at the nape. The hair falls in glossy, defined waves that catch light at each curve — no frizz, no flyaways, no stray pieces. The waves are uniform in size and direction, creating a controlled, editorial silhouette. The band sits approximately an inch back from the hairline, leaving the forehead open and the overall expression clear. The effect is deliberate and high-contrast: bold print against sleek hair.
Step by step:
- Start with smooth, straight hair; use a flat iron if needed to remove any natural wave or frizz.
- Create uniform waves using a 1.5-inch curling iron, curling all sections in the same direction (away from the face) and holding each for six to eight seconds.
- Let the curls cool completely, then brush through once with a paddle brush to merge them into glossy waves.
- Apply a shine spray (Chi Shine Infusion or Kenra Platinum Silkening Mist) through the lengths for a reflective finish.
- Fold the silk scarf into a narrow band, approximately 2 to 3 inches wide, with clean, folded edges.
- Place the band across the head about an inch back from the hairline, holding both ends at the nape.
- Cross the ends at the nape and tie a tight, flat knot; tuck the ends under the band so they don't show.
- Adjust the band width and position for symmetry, and smooth any hair that escaped during wrapping.
Tips and tricks: Silk scarves are slippery by nature — if the band won't stay in place, a few bobby pins threaded through the fabric at the temples will anchor it without visible hardware. Fine hair benefits from a lightweight volumizing spray at the roots before curling; heavy products will flatten the waves and reduce the glossy effect. Thick or coarse hair can handle a slightly heavier smoothing serum, but avoid anything with too much silicone, which can make the hair look weighed down rather than polished. The leopard print pairs best with solid-color outfits in black, white, cream, or camel — busy patterns beneath a bold scarf tend to compete visually. Store silk scarves flat or rolled (never folded at a crease) to prevent permanent lines in the fabric.
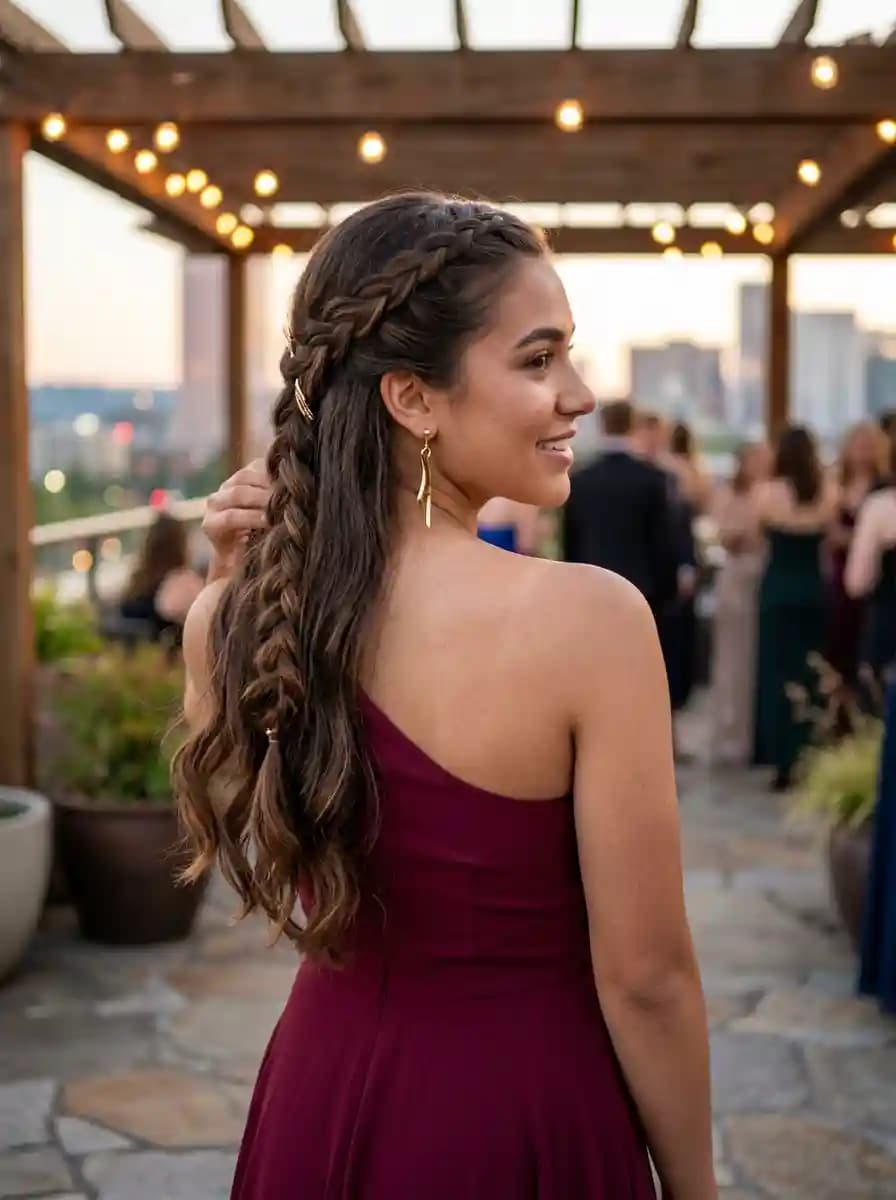
20 Stunning Half Up Half Down Hairstyles for Prom Night 2026 💃✨
24.Velvet Dream: Elegant Headband
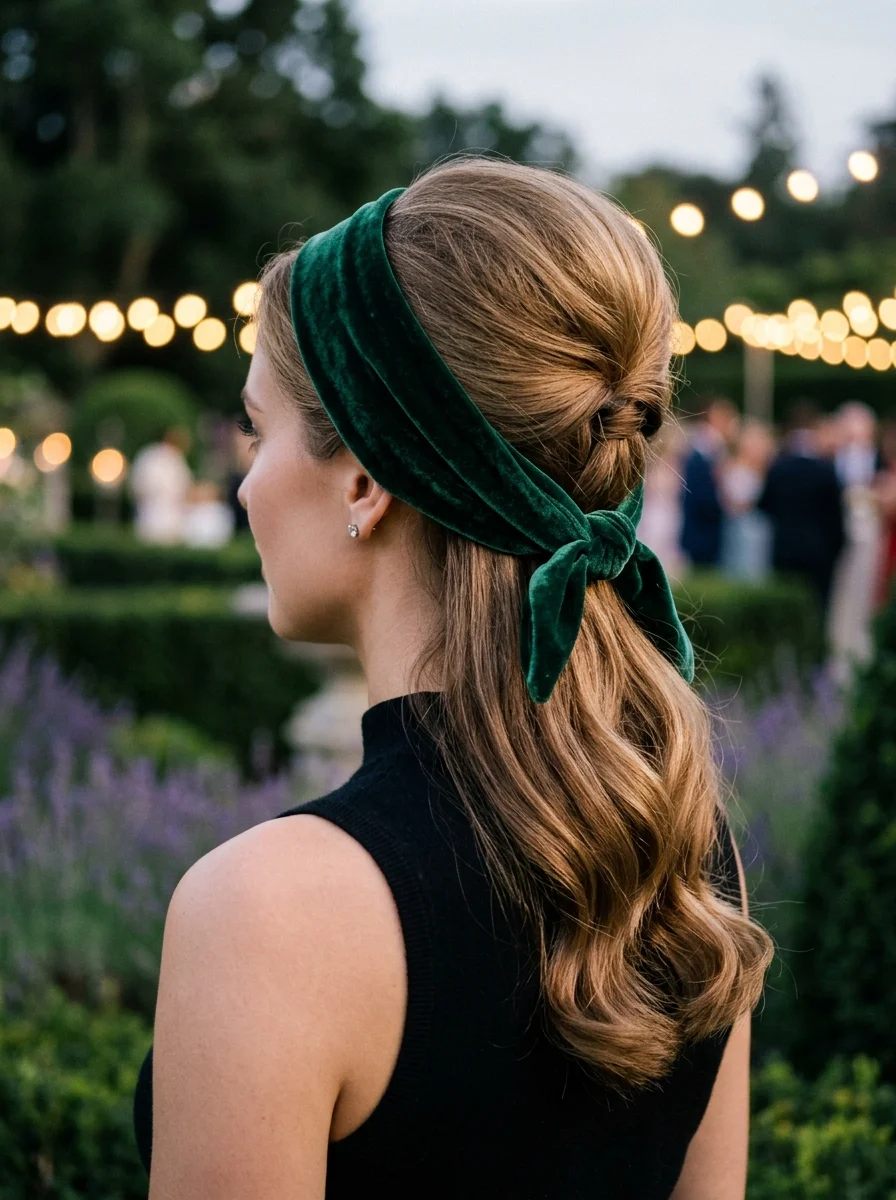
The overview: A wide velvet headband in deep forest green — roughly 3 to 4 inches across, with plush pile that catches and absorbs light differently than silk or cotton — creates a crown-like silhouette that elevates even the simplest hairstyle. Velvet absorbs light rather than reflecting it, which gives the accessory a dimensional, almost three-dimensional appearance on the head. The deep green works across seasons: it reads as autumnal in October and as jewel-toned and festive in December.
Unlike a scarf or bandana, a structured headband provides consistent pressure around the head, which means it stays in place without knots, pins, or adjustments. The tradeoff is that the fit needs to be precise — too loose and it slides back, too tight and it creates headaches after an hour. Most quality velvet headbands have a flexible internal wire or padded band that conforms to the head shape, and the velvet exterior provides enough friction against the hair to resist sliding.
Why this look is popular: Velvet headbands have been a consistent trend since 2019, cycling through color variations each season. The deep green version photographs well because the dark, matte surface creates a strong contrast against most hair colors — light hair pops against it, dark hair blends into it with a tonal richness. The wide band also covers the hairline, which some people prefer for aesthetic or practical reasons (hiding regrowth, covering a receding hairline, or simply creating a cleaner silhouette).
Where this look is suitable: Holiday parties, evening events, winter weddings, cocktail dinners, theater outings, and any setting where a jewel-toned accessory reads as festive rather than casual. The velvet texture also works in autumn and early spring, making it more seasonally versatile than a lightweight cotton bandana.
The look: The wide velvet headband sits across the crown, creating visible height and a regal profile. The front sections of hair are pulled back and twisted or loosely braided, then secured at the nape with bobby pins, allowing the headband to sit flush against the head. The remaining hair falls in soft, romantic waves that cascade over the shoulders. The contrast between the structured, matte velvet and the fluid, glossy waves creates a look that is simultaneously controlled and feminine.
Step by step:
- Create soft waves throughout the hair using a 1.25- to 1.5-inch curling iron, alternating directions for a romantic, slightly undone effect.
- Take the front sections of hair (approximately two inches on each side of the part) and twist them back toward the crown.
- Secure the twisted sections at the nape with bobby pins, crossing two pins over each other for extra hold.
- Slide the velvet headband onto the head from the front, positioning it about an inch above the ears and slightly back from the hairline.
- Gently press the headband into place, ensuring it sits evenly on both sides and doesn't push the twisted sections out of position.
- Adjust the waves in the loose hair to fall naturally around the face and shoulders.
- Check that the headband covers any flyaways at the crown and create a smooth, polished frame for the face.
Tips and tricks: The headband works best on medium to long hair — shorter bobs and pixies may not have enough length for the twisted sections to reach the nape. Fine hair gains density and grip from a texturizing powder worked into the roots before styling; without it, the twists may unravel under the headband's weight. Thick or curly hair benefits from a lightweight smoothing cream on the twists to keep them neat and prevent flyaways. The velvet pile crushes easily, so store the headband in a soft pouch or hang it rather than tossing it into a drawer. If the pile does flatten, a quick pass with a garment steamer (held six inches away) restores the texture without damaging the fabric. The deep green pairs naturally with gold jewelry, warm metallics, and jewel-toned clothing.
25.Tuscan Garden Party: Floral Scarf Braided Bun
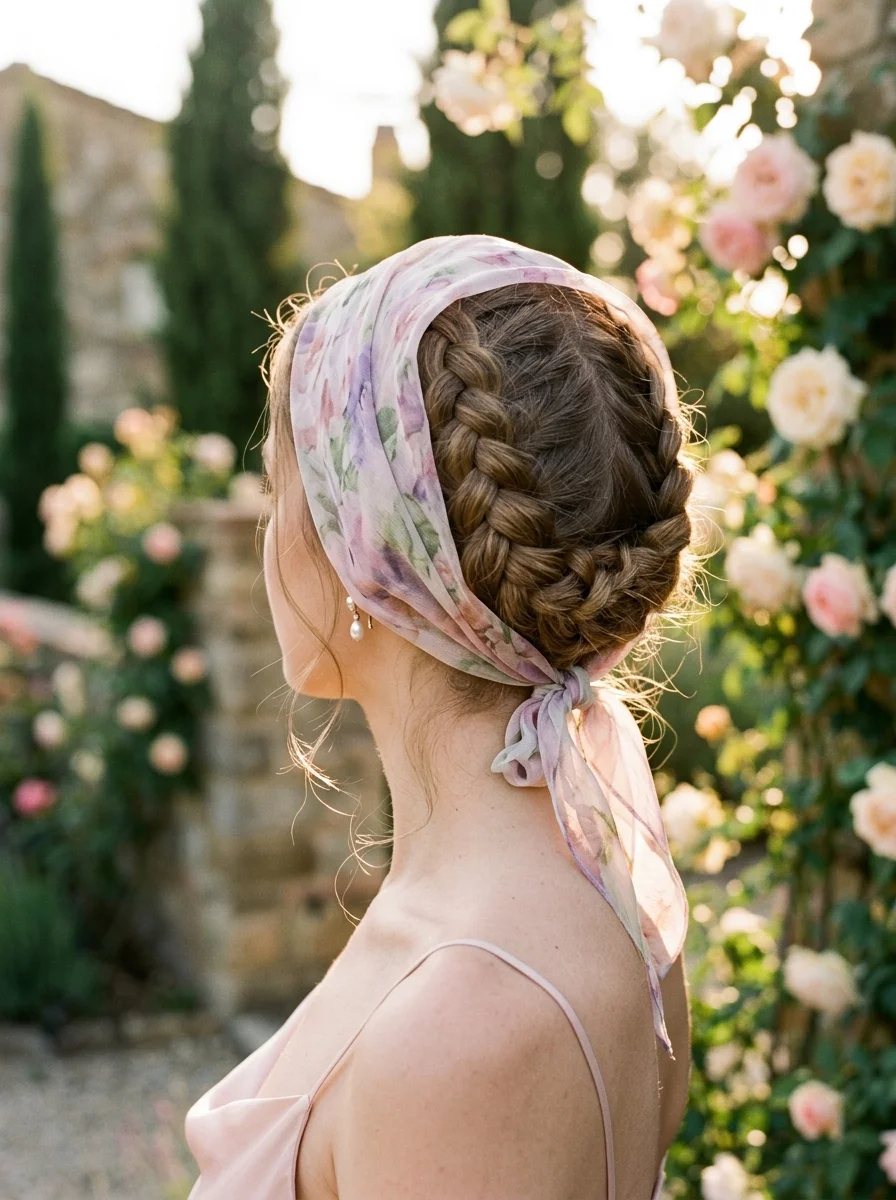
The overview: A three-strand braid that incorporates a pastel floral scarf as a fourth strand, then coils into a low chignon at the nape. The scarf reads as a continuous ribbon of color woven through the braid rather than an afterthought — a detail that elevates a basic braided bun into something you would see on a Tuscan-inspired editorial spread. The technique requires medium to long hair (at least collarbone length) and works best on second-day hair that holds a braid without slipping.
The floral print here leans pastoral — soft pinks, muted greens, and lavender tones on a cream base — which is exactly why it photographs so well against outdoor backdrops. Light fabrics like chiffon or silk organza keep the braid from feeling bulky, and the patterned ends left cascading from the bun add movement in photos. This is a style that rewards patience: the slower you braid, the more even the scarf distribution, and the more polished the final result.
Why this look is popular: The woven-scarf technique creates visual depth that reads beautifully in photographs — the braid catches light at different angles, and the scarf pattern adds color without requiring any hair dye. It photographs particularly well in natural light settings where the floral print can echo the surrounding greenery.
Where this look is suitable: Garden weddings, vineyard brunches, outdoor baby showers, spring polo matches, or any daytime event with a semi-formal dress code. It pairs naturally with linen and cotton dresses in neutral tones.
The look: A thick, three-strand braid with pastel floral fabric running through each section, coiled into a low bun at the nape. A few face-framing wisps soften the hairline, and the scarf tails hang from the bun like trailing ribbons. The braid itself reads as a woven tapestry of hair and fabric.
Step by step:
- Part hair down the middle or on the side. If your hair is freshly washed, mist it with a light-hold texturizing spray like Oribe Dry Texturizing Spray for grip.
- Fold a lightweight floral scarf (approximately 36" x 36") into a long, narrow strip about 1.5 inches wide.
- Divide hair into three equal sections. Drape the scarf strip over one section so it doubles the strand.
- Begin a standard three-strand braid, treating the scarf-with-hair section as one unit. Cross outer sections over the center, keeping even tension throughout.
- Braid to the ends, then secure temporarily with a small clear elastic.
- Coil the finished braid into a low bun at the nape and pin with bobby pins, tucking the ends underneath.
- Tie the remaining scarf tails around the bun base in a small knot or bow, letting the patterned ends cascade.
- Pull out a few fine tendrils around the temples and ears. Mist with a flexible-hold hairspray like R+Co Vicious Strong Hold Flexible Hairspray.
Tips and tricks: Fine or slippery hair benefits from a dry shampoo applied before braiding — it adds texture that keeps the scarf from sliding out. If your hair is shorter than shoulder length, clip-in extensions can provide the bulk needed for a convincing bun. A sheer or lightweight scarf is key; anything too thick will make the braid unwieldy and the bun overly heavy. For very thick hair, use a scarf that's slightly narrower to keep proportions balanced.
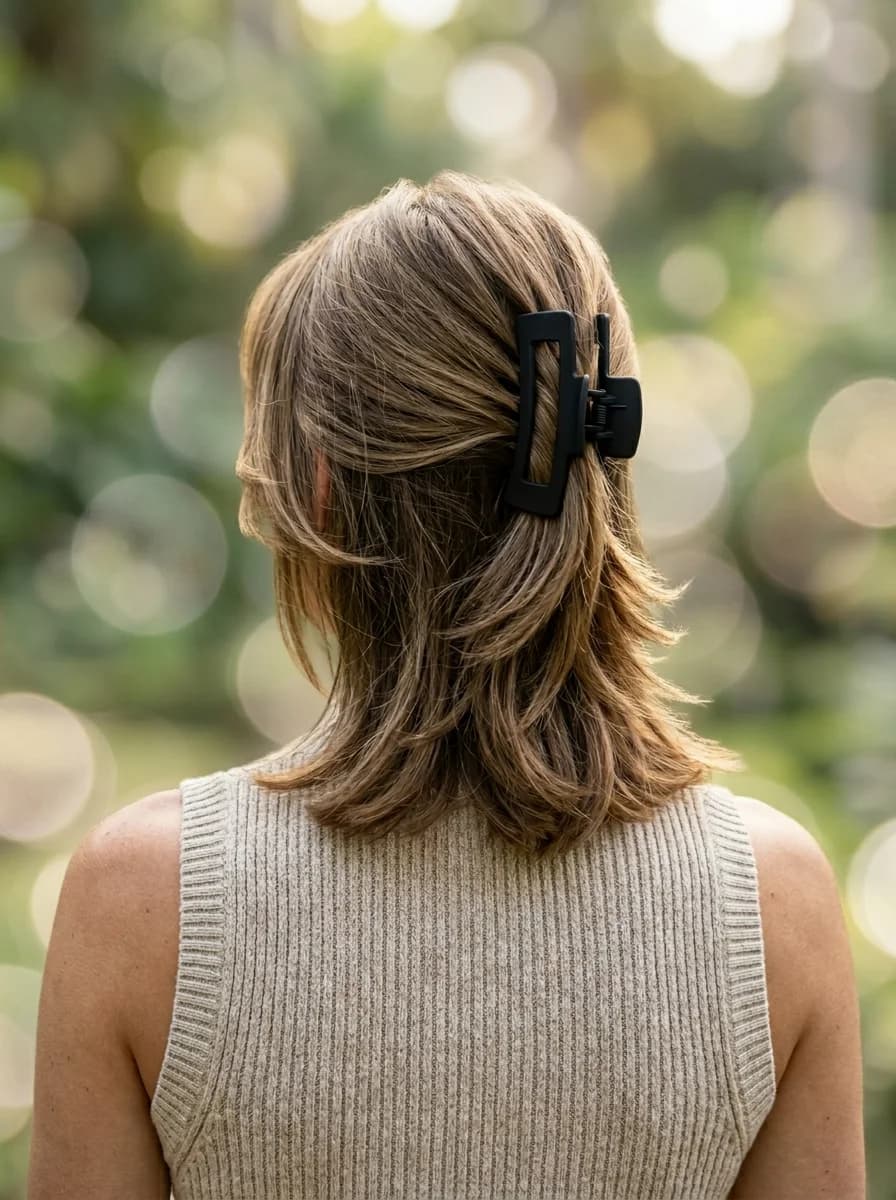
30 Stunning Summer Hair Trends for 2026 ☀️🌊
26.Boho Curls: Psychedelic Print Headband
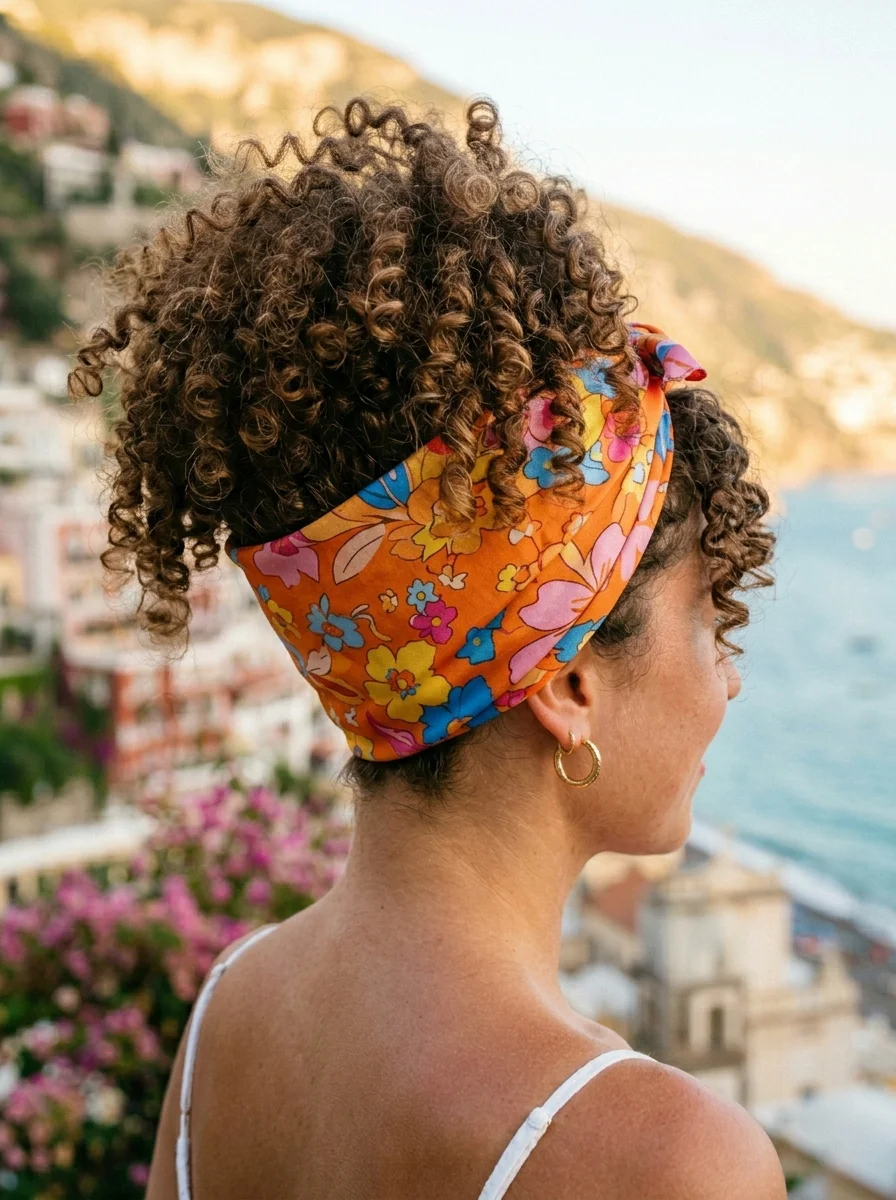
The overview: A wide headband cut from a psychedelic-print scarf — think saturated oranges, electric pinks, and acid yellows — paired with voluminous natural curls left free above and below. The headband sits roughly two inches above the ears, holding back the front section while letting the curls do the talking. This is a straightforward style that takes under five minutes but delivers significant visual impact, particularly on type 3 and type 4 curl patterns.
The scarf material matters here. A silk or satin-backed scarf will reduce friction against the hair cuticle, which means less frizz throughout the day. Cotton prints tend to absorb moisture from the hair and can leave curls feeling dry by afternoon. A square scarf folded into a triangle, then rolled into a 3-to-4-inch band, gives you the width needed to actually hold hair back rather than slipping underneath it.
Why this look is popular: The contrast between the bold, graphic headband and the organic shape of natural curls creates a visually dynamic composition. The headband acts as a frame that draws attention to the face while celebrating texture rather than concealing it — a key reason this style has resonated in the natural hair community.
Where this look is suitable: Music festivals, beach outings, weekend farmers' market runs, casual brunch dates, or any warm-weather setting where you want color and personality without a complicated styling routine.
The look: Defined, bouncy curls — type 3b to 4a — with a wide psychedelic headband sitting across the crown. The headband compresses the front curls slightly while the sides and back retain full volume. The print is loud and intentional, not a subtle accent.
Step by step:
- Start with clean, moisturized curls. Apply a curl-defining cream like SheaMoisture Curl Enhancing Smoothie to damp hair and allow to air-dry or diffuse on low heat.
- Fold a square scarf (silk or satin preferred) into a triangle, then roll from the pointed end into a band approximately 3 to 4 inches wide.
- Position the center of the band at the nape of your neck, underneath the hair.
- Bring both ends forward, crossing them at the top of the forehead, then wrap them back to the nape.
- Tie a secure knot at the nape, or double-knot for extra hold. Tuck the loose ends under the band.
- Gently lift and separate curls to restore volume where the headband compressed them. A pick or wide-tooth comb works well at the roots.
Tips and tricks: Those with type 3a or looser waves may find the headband slides backward — a few bobby pins placed behind the ears on each side anchor it in place. Fine hair can benefit from a volumizing mousse applied at the roots before drying. If you have very thick, dense curls, choose a scarf with some stretch or fold it slightly narrower to avoid a bulky knot at the back. A silk scarf will also help your curls retain moisture longer than cotton, which is worth considering for all-day wear.
27.Lavender Fields Forever: Floral Scarf Twist
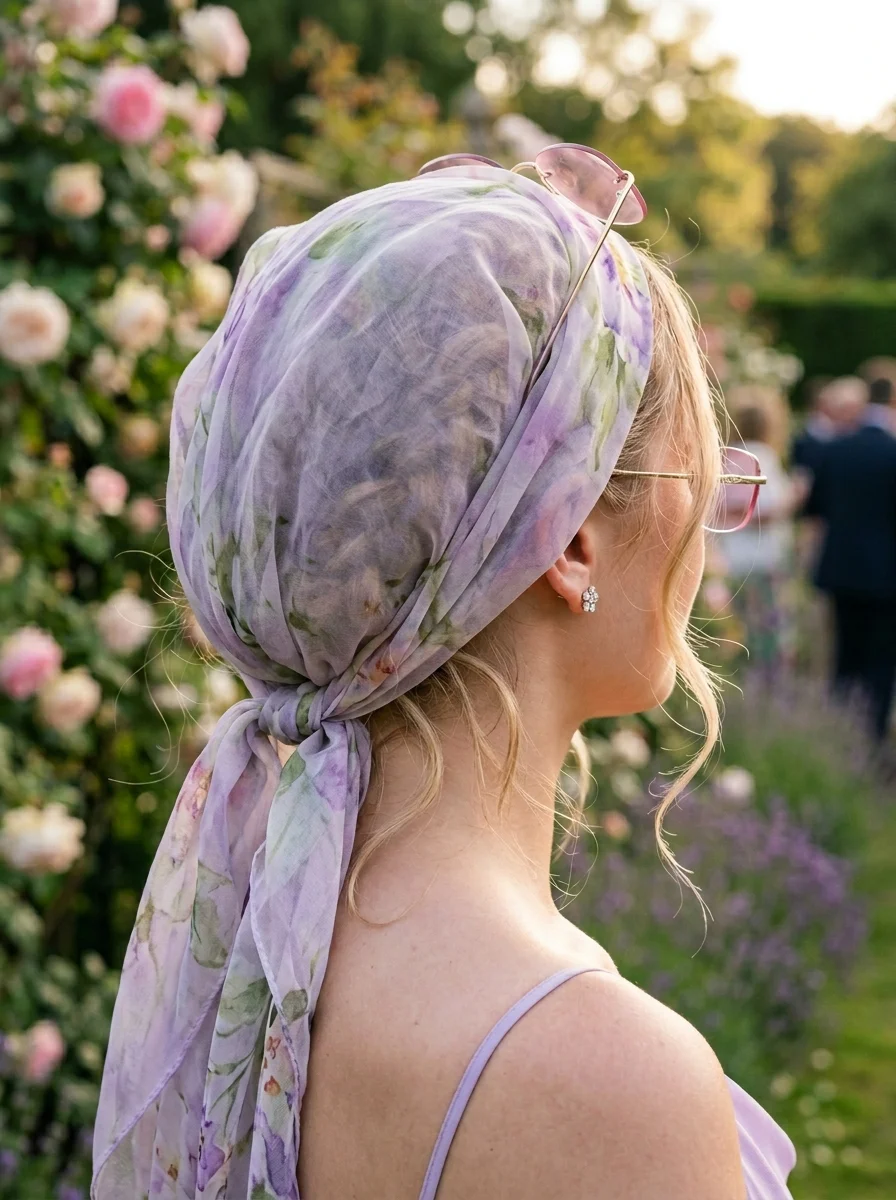
The overview: A sheer floral scarf — watercolor lavender and sage tones on a translucent base — folded into a narrow band and tied at the nape, with the remaining hair falling in loose, undone waves. The key distinction from a standard headband wrap is the placement: the scarf sits slightly further forward on the crown, with the pointed triangle edge framing the forehead, giving the style a vintage kerchief quality rather than a sporty one.
The sheer fabric is what makes this version work. A heavier scarf would sit on top of the hair like a hat; a sheer one lets the hair texture show through, creating a layered, dimensional effect. The watercolor floral print — no hard outlines, just soft washes of purple and green — reads as romantic and painterly. This is a style that photographs well from every angle because the scarf has visual interest from the front, sides, and back.
Why this look is popular: The combination of sheer fabric and floral print taps into the broader trend toward romantic, soft-focus aesthetics. It photographs with a dreamy quality — the translucent scarf catches light and adds a subtle glow to the hair underneath. The simplicity of the tie also means it stays in place through hours of wear without constant adjustment.
Where this look is suitable: Outdoor weddings as a guest, spring garden parties, afternoon tea events, romantic date nights, or anywhere the dress code leans feminine and polished.
The look: A sheer scarf with a watercolor lavender print tied at the nape, with soft, tousled waves flowing underneath. Face-framing tendrils escape at the temples. The scarf reads as a delicate accent rather than a structural element — it decorates the hairstyle without reshaping it.
Step by step:
- Create soft waves using a 1.25-inch curling iron (like the T3 SinglePass Curl). Wrap sections away from the face and leave the last inch uncurled for a more natural finish.
- Let waves cool completely, then gently brush through with your fingers to break them up.
- Fold a sheer scarf (chiffon or silk organza) into a triangle, then fold the triangle into a narrow band approximately 2 inches wide.
- Place the center of the folded edge at your front hairline, letting the triangle point fall toward the back of your head.
- Bring the ends back along the sides of your head, just above the ears, and tie a single knot at the nape.
- Adjust the scarf so the floral print is visible and the fabric lies smooth against the head.
- Pull out a few fine strands at the temples. Set with a light mist of flexible-hold hairspray.
Tips and tricks: Straight hair will need a curling iron or flat-iron waves to achieve the soft, undone texture this style depends on. If your hair resists holding a wave, spritz sections with a setting spray like Kenra Volume Spray 25 before curling. Chiffon scarves can be slippery — a tiny clear elastic tied at each end before you begin wrapping prevents the knot from loosening. For a more dramatic effect, choose a scarf with a slightly larger print scale; tiny florals can read as busy from a distance.
28.Midnight Glamour: Royal Blue Satin Wrap
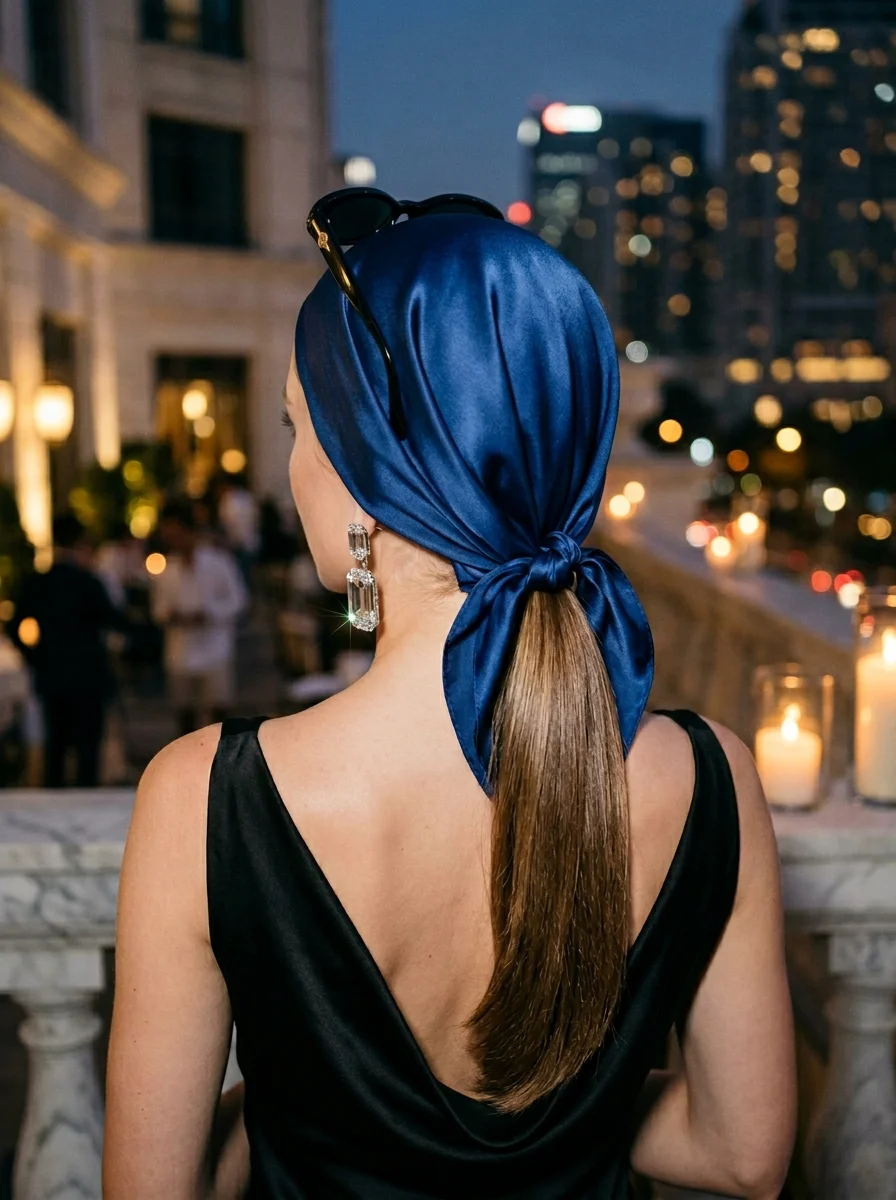
The overview: A full-coverage head wrap in royal blue satin, sculpted into a voluminous knot at the crown. Unlike a simple scarf tie, this wrap involves multiple folds and tucks that build dimension on top of the head, creating a silhouette that reads as both architectural and luxurious. The satin fabric — which has a natural sheen — catches light in a way that matte fabrics cannot, giving the wrap a jewel-toned luminosity even in low lighting.
This is a technique-driven style. The wrap covers all of the hair, which makes it a practical solution for bad hair days, protective styling, or any situation where you want a polished look without heat styling. The construction requires a large square scarf (at least 36" x 36") to have enough fabric for the sculpted volume at the crown. The folds are smoothed and layered deliberately — this isn't a thrown-on wrap.
Why this look is popular: The satin finish photographs with a richness that flatters every skin tone, and the sculpted shape creates a strong silhouette in both profile and head-on shots. It also eliminates the need for any hair styling at all — the wrap is the entire look, which makes it appealing for events where you want maximum impact with minimal prep time.
Where this look is suitable: Black-tie galas, evening cocktail parties, formal dinners, theater nights, upscale holiday parties, or any occasion where the dress code calls for something elevated.
The look: Royal blue satin completely covering the hair, sculpted into a smooth, voluminous knot at the crown with clean, folded layers radiating outward. The hairline is fully concealed, and the overall shape is rounded and polished. Crystal drop earrings complement the formality.
Step by step:
- Smooth hair flat against the head — a low bun, flat twists, or simply brushed down with a small amount of edge control like Eco Styler Olive Oil Gel.
- Take a large square satin scarf and fold it diagonally into a triangle.
- Drape the triangle over the back of your head with the long edge along the front hairline and the point hanging down your back.
- Bring the two side ends forward, crossing them over each other at the center of your forehead.
- Twist the crossed ends and wrap them around the base of the wrap, building upward to create volume at the crown.
- Tuck the remaining ends underneath the wrapped layers. Secure with a few strategically placed bobby pins if needed.
- Smooth the outer layer of fabric with your palms, shaping the knot into a rounded, even form.
- Pair with statement earrings — crystal drops or gold hoops — to complete the look.
Tips and tricks: Satin is inherently slippery, so the wrap may shift during wear. A satin bonnet or scarf liner underneath provides grip without adding visible bulk. If you have very long or thick hair, make sure the base bun is flat and tight — any bumps underneath will show through the satin. Store the scarf rolled rather than folded to minimize creases in the fabric. For a different effect, try this technique with a jewel-toned velvet scarf in cooler months.
29.Yacht Club Ready: Black Headband Tie
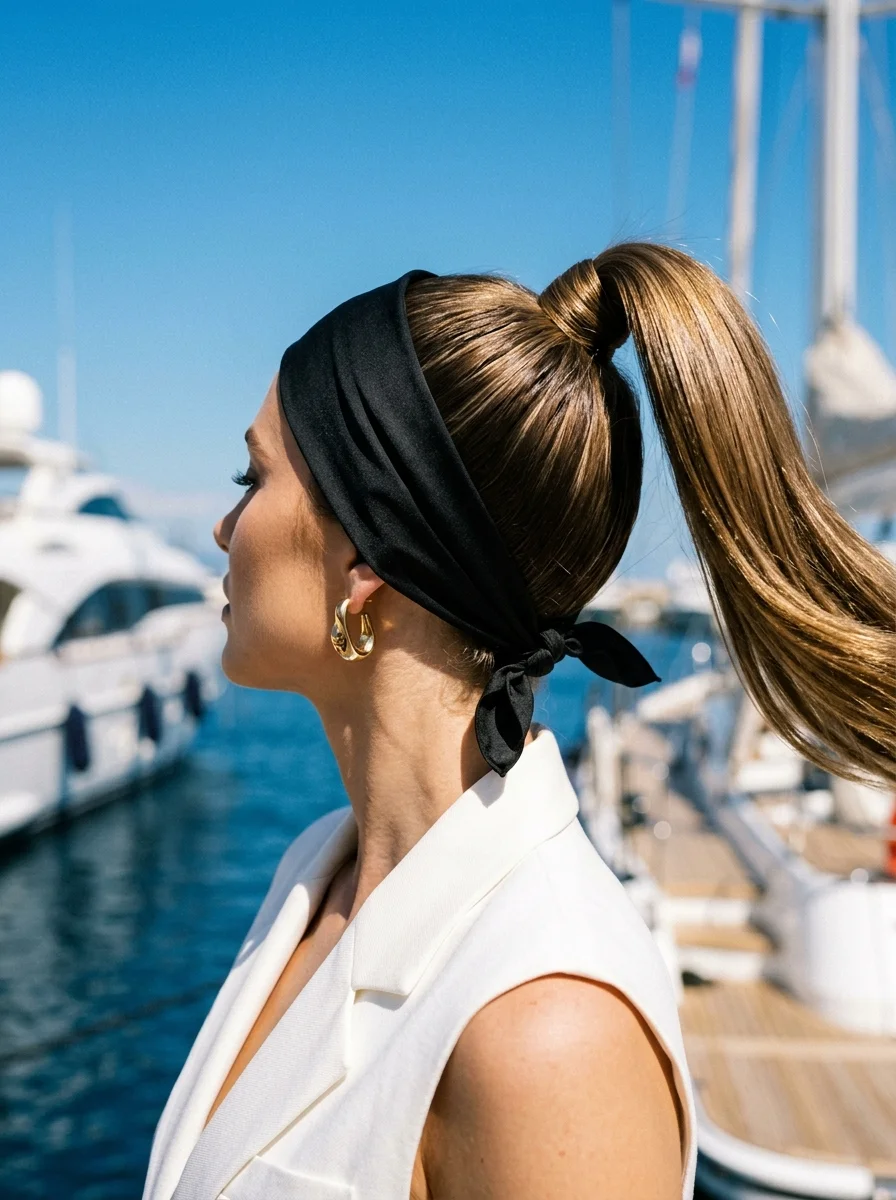
The overview: A high, taut ponytail with a wide black fabric headband wrapped around the base and knotted at the back. The ponytail itself is the focal point — pulled back smoothly with no flyaways, secured tightly at the crown, and left to fall straight or with a slight bend at the ends. The headband conceals the hair tie completely and adds a graphic, modern element to an otherwise straightforward style.
The appeal is functional as much as aesthetic. This is one of the few scarf-based styles that genuinely works in wind and active conditions. The tight ponytail combined with the wrapped headband stays put through a full day, which makes it a practical choice for outdoor sports, sailing, or any activity where you need your hair contained but still want to look intentional. The black-on-black palette — black headband, dark hair — creates a sleek, unified look that reads as polished without being formal.
Why this look is popular: The clean lines and minimal color palette make this style incredibly versatile — it works with athletic wear, casual weekend outfits, and even smart-casual evening looks. The silhouette is strong and modern, which photographs well in urban and outdoor settings alike.
Where this look is suitable: Yacht outings, country club events, tennis matches, casual outdoor dinners, coastal weekends, or any setting where preppy-meets-practical is the goal.
The look: A high ponytail at the crown, pulled tight and smooth, with a wide black fabric headband wrapped around the base and knotted at the back. The ponytail falls cleanly — straight or with a minimal wave — and the black headband creates a sharp, deliberate line against the scalp.
Step by step:
- Brush hair straight back using a boar bristle brush (like the Mason Pearson Popular Mixture) for maximum smoothness. Apply a small amount of smoothing cream or pomade — Bumble and bumble Sumo Tech works well — to control flyaways.
- Gather hair into a high ponytail at the crown and secure with a strong elastic (Scunci No-Damage Claw Clip Elastics hold well without pulling).
- Wrap a wide black fabric headband around the base of the ponytail, covering the elastic entirely.
- Tie the ends of the headband in a flat knot directly below the ponytail base. Ensure the knot lies flat and doesn't create a bump.
- Smooth the ponytail with a flat iron if desired — a single pass on low heat creates a polished, straight finish.
- Mist the hairline with a fine-tooth hairspray and use the back of a comb to press any remaining flyaways flat.
Tips and tricks: Fine hair may need a volumizing powder like OSIS+ Dust It at the roots before brushing back to prevent the ponytail from looking flat. If your hair is very thick, use a headband with some stretch — a rigid fabric will feel tight and may cause headaches over several hours. For an extra-sleek finish, wrap a small section of ponytail hair around the base (over the headband knot) and pin it underneath. This style also works with a low ponytail at the nape for a more understated version.
30.Braided Beauty: Scarf Accent Braid
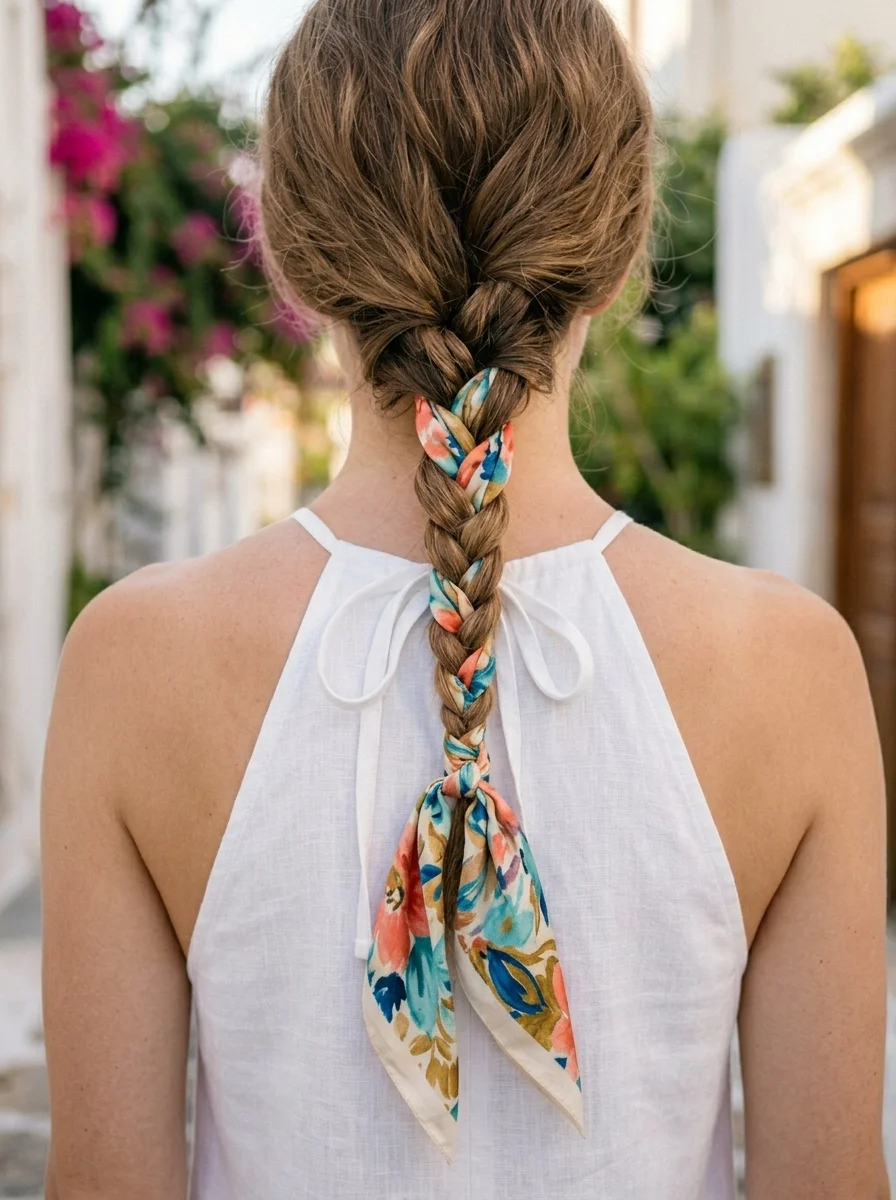
The overview: A classic three-strand braid with a floral silk scarf woven through as a visible fourth strand. The scarf — coral, teal, and gold on a warm base — is incorporated from the very first cross of the braid, so the color runs evenly from crown to ends rather than appearing as a surface decoration. The braid is then gently pancaked (pulled wider at the edges) for a fuller, more relaxed appearance.
What distinguishes this from other scarf-braid combinations is the visibility. In some styles, the scarf sits underneath or behind the hair; here, it is woven directly into the pattern, making it an equal component of the braid itself. The technique is forgiving — slight unevenness in the scarf distribution actually adds to the handmade, artisanal quality. A standard three-strand braid is the easiest entry point for anyone new to incorporating accessories into braids.
Why this look is popular: The woven scarf adds color and dimension that a plain braid cannot achieve on its own. It reads as creative and personalized without requiring advanced braiding skills. The style also holds well throughout the day because the scarf adds friction between the hair strands, reducing the tendency of braids to loosen over time.
Where this look is suitable: Summer festivals, outdoor concerts, casual weekend outings, farmers' markets, or any daytime event with a relaxed dress code.
The look: A single, thick three-strand braid with a coral-and-teal floral silk scarf woven visibly through each section. The braid is pulled slightly wider at the edges for a relaxed, full appearance. The scarf tails are tied in a small knot at the ends and hang like a tassel.
Step by step:
- Part hair and gather it at the back — either into a low ponytail or loose down the back. Apply a light texturizing spray (like Drybar Full Pull) for added grip.
- Fold a silk scarf into a long, narrow strip approximately 1 to 1.5 inches wide.
- Separate hair into three equal sections. Place the scarf strip over the center section so it lies flat along the strand.
- Braid using a standard three-strand technique, crossing outer sections over the center. The scarf travels with whichever section it's layered on, weaving into the braid naturally.
- Continue braiding to the ends, maintaining consistent tension. Tie off the braid using the scarf ends in a secure knot.
- Starting from the bottom, gently pull the outer edges of each braid section outward — pancaking — to widen and flatten the braid for a fuller look.
- Mist with a light-hold hairspray to set the shape.
Tips and tricks: Very fine hair may struggle to hold the scarf in place during braiding — a light mist of dry shampoo on each section before you begin adds the necessary texture. Silk scarves are smooth and can slide; if this happens, try folding the scarf strip slightly narrower or using a cotton-blend fabric that grips better. For a thicker, more dramatic braid, double up: use two scarves in complementary colors and alternate them through different sections. This style also works as a side braid for a slightly different silhouette.
31.Soft Updo: Elegant Satin Wrap
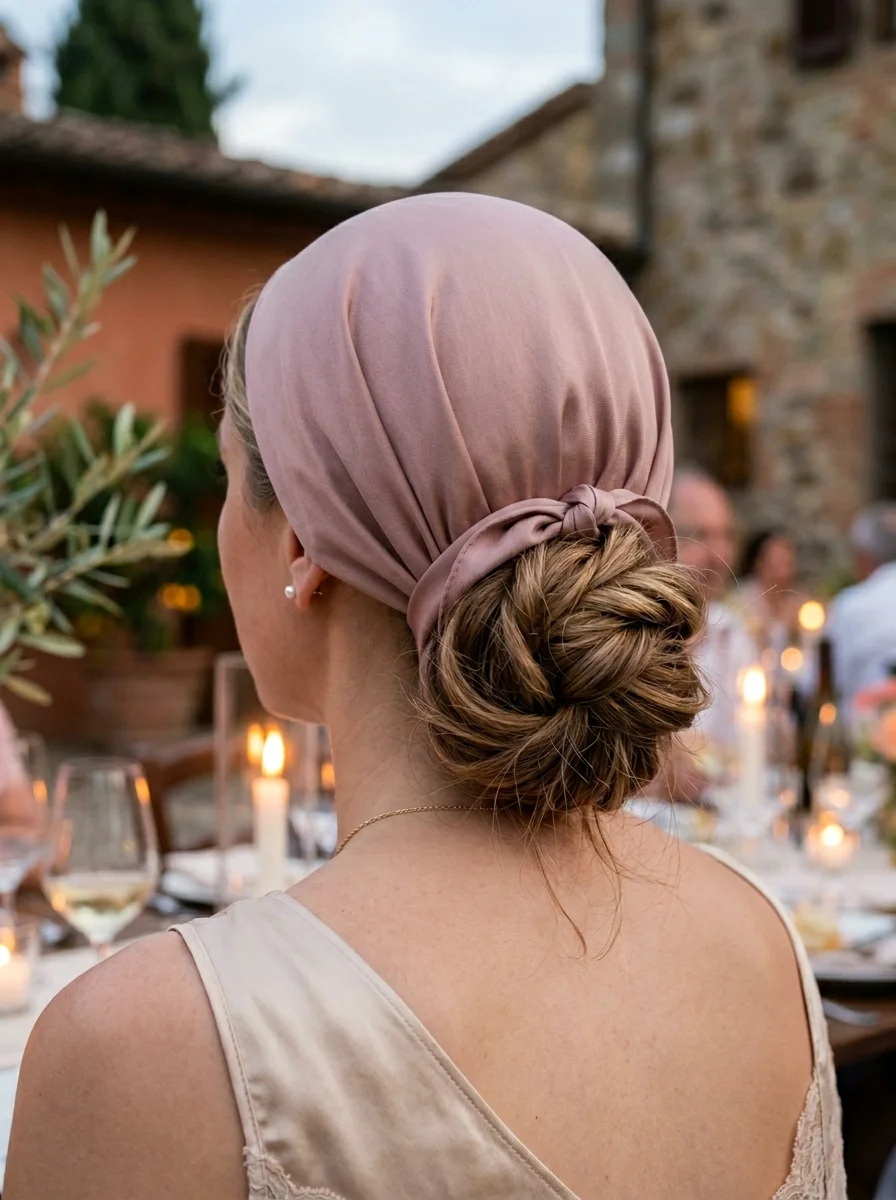
The overview: A low, loosely twisted bun at the nape, encased in a dusty rose satin scarf that wraps from the crown down and ties underneath the bun. The satin provides a smooth, luminous surface that contrasts with the deliberately undone texture of the hair inside. This is a structural style — the scarf isn't just decorative; it physically holds the bun in place, which means it functions as both accessory and anchor.
The dusty rose shade is a strategic choice. It sits in the same tonal family as most skin tones, which means it doesn't compete with your outfit or makeup — it complements. The satin fabric drapes without wrinkling and has enough body to hold its shape around the bun without collapsing. For formal settings, this reads as intentionally elegant rather than casually thrown together, despite the ease of the technique.
Why this look is popular: The combination of a structured wrap and a loose bun creates a tension between polished and effortless that many people find appealing. It looks like it took considerably more effort than it actually does, which is the hallmark of a successful hairstyle. The satin finish also photographs with a warmth and glow that flatters the wearer.
Where this look is suitable: Wedding guest attire, formal dinners, anniversary celebrations, cocktail parties, or any evening event where the dress code leans elegant without being strictly black tie.
The look: A dusty rose satin scarf wrapped from the top of the head down to the nape, where it ties around a soft, textured low bun. The bun peeks out from beneath the scarf, showing loose twists and a few escaped strands. The scarf drapes smoothly, with a subtle sheen that catches ambient light.
Step by step:
- Create a soft, textured bun at the nape. Twist the ponytail, wrap it into a loose coil, and secure with bobby pins. Imperfection is intentional — a slightly messy bun has more character.
- Fold a satin scarf (approximately 20" x 60" for adequate length) into a long, narrow band about 3 inches wide.
- Place the center of the band at the crown of your head, with the ends hanging down on either side.
- Smooth the fabric down the sides of your head, following the contour from crown to nape.
- Cross the ends underneath the bun at the nape, then bring them back up and tie a small knot or bow over the bun.
- Tuck any remaining fabric ends underneath the wrap for a clean finish.
- Gently pull a few wispy strands free around the face and ears. Mist with a flexible-hold spray.
Tips and tricks: A hairnet over the bun before wrapping provides extra security, especially for events that involve dancing or extended wear. If your hair is very fine, backcombing the ponytail lightly before twisting it into a bun adds volume that prevents the bun from looking flat under the scarf. For longer hair, the extra length can be braided loosely before coiling — this adds texture that peeks out from under the scarf in a visually interesting way. Dusty rose works for most skin tones, but if you have very warm undertones, a blush or champagne satin may be more flattering.
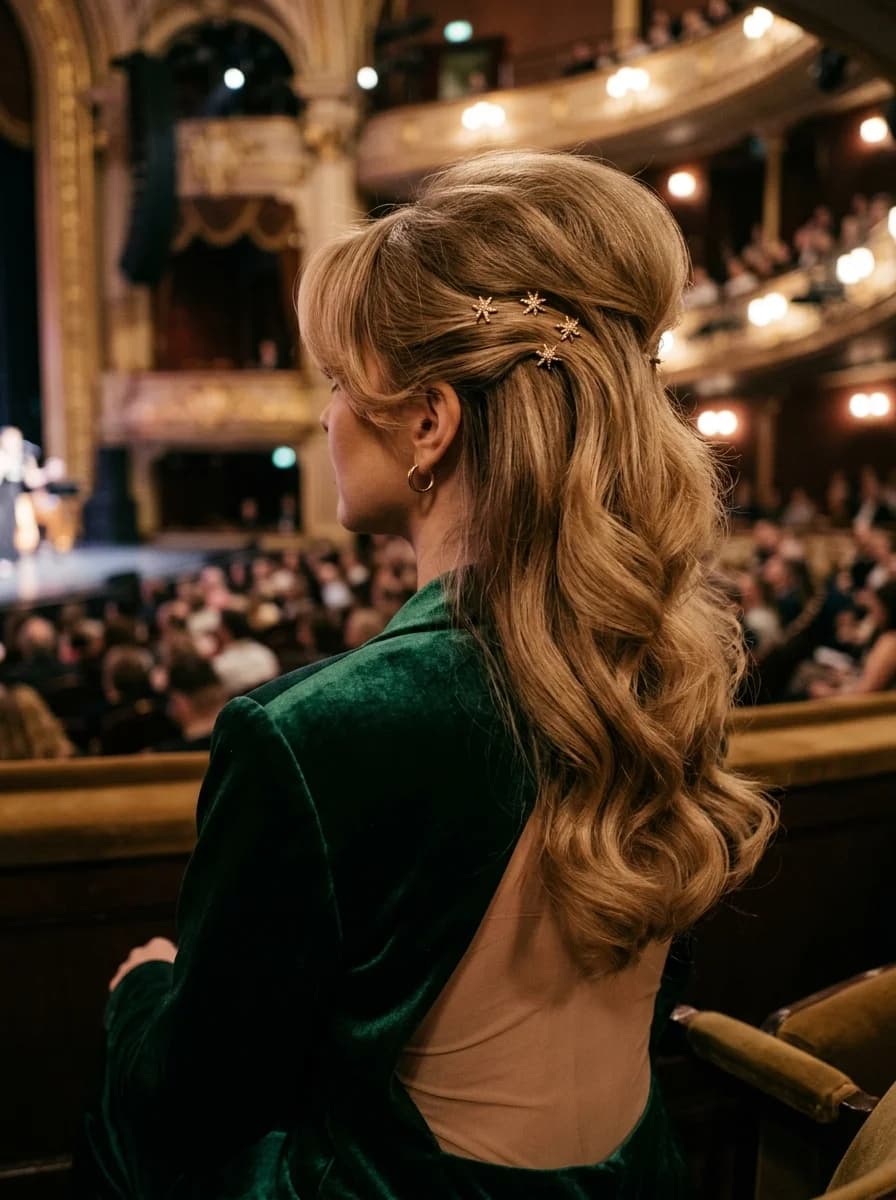
21 Stunning Concert Hairstyles for Women 2026 🎶✨
32.Greek Isles Chic: Scarf Fishtail Braid
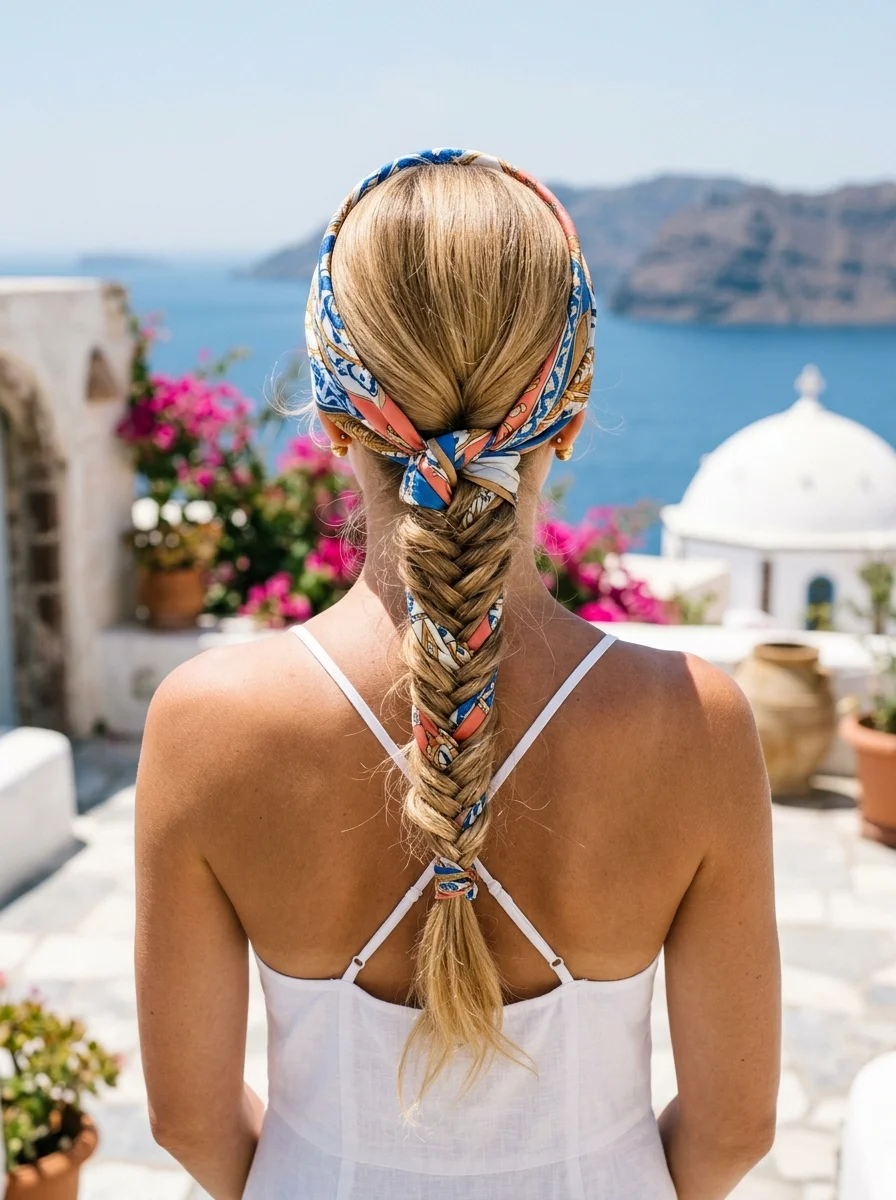
The overview: A fishtail braid with a Mediterranean-patterned silk scarf woven through every cross-section. The scarf — blue, orange, and white in a tile-like geometric print — is folded into a narrow strip and treated as a continuous strand within the two-section fishtail structure. Unlike a standard braid where the scarf might sit on the surface, the fishtail's small, tight crosses mean the fabric integrates at a much finer granularity, creating a more intricate, mosaic-like effect.
Fishtail braiding with a scarf does require more patience than a three-strand version. The technique involves taking small pieces from the outer edge of each section and crossing them over to the opposite side — adding a scarf into that process means managing three components instead of two. The result, however, is worth the additional time. The braid reads as detailed and artisanal, and the scarf prevents the fishtail from looking flat or one-dimensional. Medium to long hair (past the shoulders) provides the length needed for the braid to read clearly.
Why this look is popular: The fishtail braid is already visually more complex than a standard braid, and adding a patterned scarf amplifies that complexity without requiring advanced technique. The Mediterranean color palette — cobalt, terracotta, white — is inherently photogenic and pairs well with summer wardrobes.
Where this look is suitable: Beach vacations, Mediterranean-inspired events, pool parties, summer weddings in warm climates, boat outings, or any setting where the color palette and style feel contextually at home.
The look: A single fishtail braid with a geometric Mediterranean-print silk scarf woven visibly through each section. The scarf creates a repeating pattern of blue, orange, and white against the hair. The braid is pulled slightly wider at the edges for a relaxed appearance, and the ends are secured with the scarf tails tied in a knot.
Step by step:
- Divide hair into two equal sections down the center back.
- Fold a silk scarf into a narrow strip (about 1 inch wide) and lay it over one section, holding it in place with your thumb at the base.
- Begin the fishtail: take a small piece (about the width of a pencil) from the outer edge of the left section and cross it over to join the right section. Repeat from the right side.
- As you cross each small piece, ensure the scarf travels with it. The scarf will weave in and out of the braid naturally with each cross.
- Continue the fishtail pattern all the way down, maintaining even tension. The braid will be tighter and more detailed than a standard three-strand.
- When you reach the ends, tie the scarf tails around the bottom of the braid in a secure knot.
- Gently pull the outer edges of the braid outward to pancake it for a fuller, more relaxed look.
Tips and tricks: Very curly or coily hair should be smoothed with a flat iron or blow-dried straight before attempting this braid — the fishtail technique requires clean, even sections to read properly. Fine hair benefits from a texturizing spray applied before braiding, which adds grip and makes the scarf less likely to slip. If the scarf feels loose at any point during braiding, secure it with a tiny clear elastic at the base before you begin. For a more dramatic effect, use a scarf with a slightly larger geometric print — small patterns can get lost in the tight fishtail structure. A light mist of shine spray on the finished braid brings out the silk scarf's sheen.
33.Portofino Chic: Equestrian Print Head Scarf
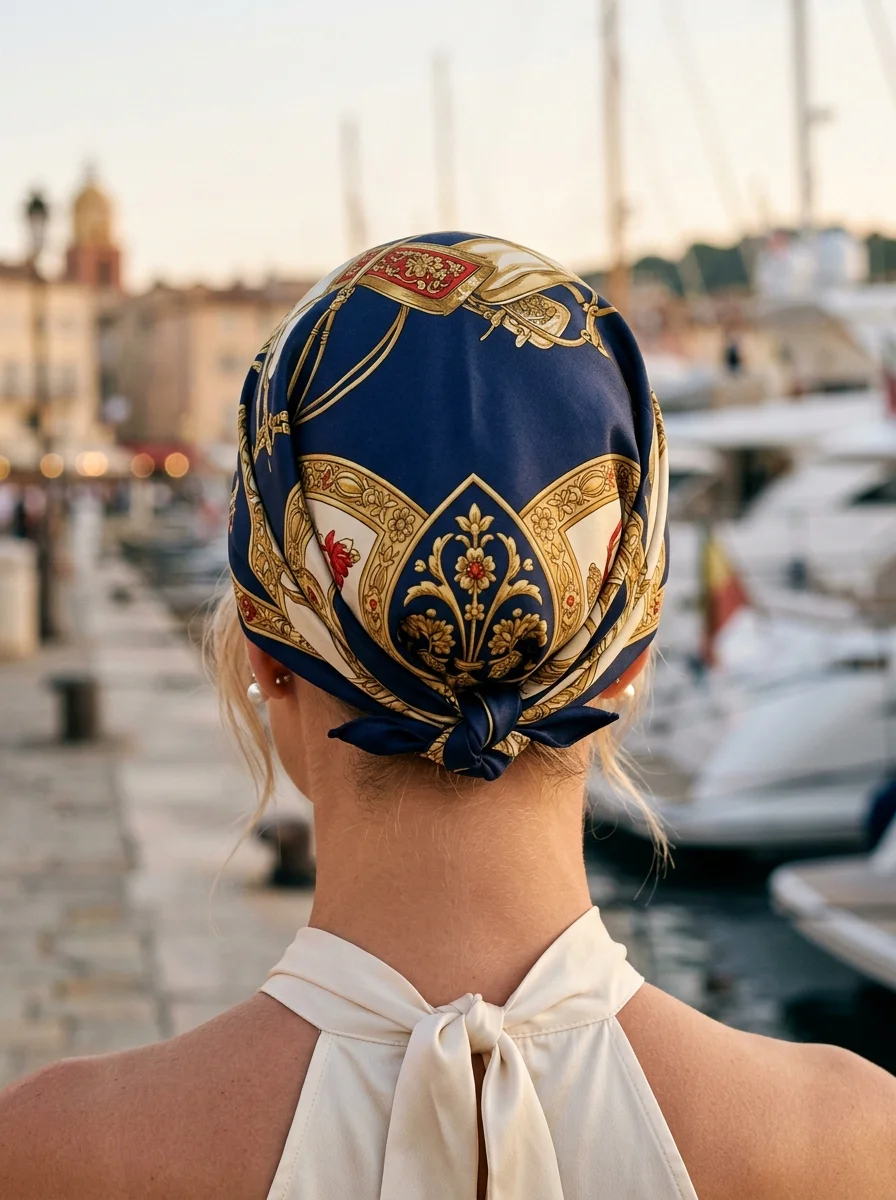
The overview: A navy silk scarf with equestrian motifs—gold chains, ornate bits, and heraldic detailing—wraps the head from front hairline to nape, ends knotted at the back while polished waves cascade below. The style pulls directly from Italian riviera dressing, where a printed scarf over styled hair reads as effortlessly refined rather than overly done.
The construction is straightforward: fold the square into a triangle, drape the longest edge along the hairline, cross the ends over the forehead, wrap them around, and secure with a single knot at the nape. The silk's natural sheen catches light against the dark navy base, and the equestrian print adds visual texture without overwhelming the face. Medium to long hair in any wave pattern works here—the scarf does the heavy lifting stylistically while the hair provides softness around the shoulders.
Equestrian prints have cycled through fashion consistently since the 1960s Hermès campaigns, and the trend shows no signs of slowing. A silk scarf in this motif signals taste without shouting about it, which is precisely why it photographs so well from every angle.
Why this look is popular: The scarf's structured wrap frames the face symmetrically, creating a polished silhouette that reads clearly in both candid and posed shots. The navy-and-gold palette pairs with virtually any outfit color, making it a low-effort coordination win for events where you want to look put-together without overthinking the details.
Where this look is suitable: Garden parties, yacht outings, outdoor weddings, resort dinners, or any setting where Mediterranean-inspired elegance fits the dress code. It transitions well from daytime sightseeing to evening aperitivos with minimal adjustment.
The look: The scarf sits flat against the crown, its triangular point draping slightly at the back. Gold chain motifs arc across the navy field, catching light as the head moves. Soft, polished waves—created with a 1.25-inch curling iron—fall past the shoulders, their movement contrasting the scarf's structured geometry. The overall impression is one of deliberate, classic glamour.
Step by step:
- Prep hair with a heat protectant like Bumble and bumble Hairdresser's Invisible Oil, then create polished waves using a 1.25-inch barrel curling iron, curling away from the face.
- Lightly brush through the curls with a paddle brush to soften them into waves, then mist with a flexible-hold hairspray such as Oribe Superfine.
- Fold your equestrian print silk scarf into a triangle by bringing two opposite corners together.
- Drape the triangle over the back of your head with the longest edge resting along your front hairline, about half an inch back from the forehead.
- Bring both ends forward, crossing them over each other at the center of your forehead.
- Wrap the ends back around toward the nape, pulling them taut so the scarf lies flat against the head.
- Tie a secure knot at the nape, then adjust the scarf so the print displays evenly on both sides.
- Separate the waves around your shoulders and tousle gently for movement.
Tips and tricks: Fine or slippery hair benefits from a light dusting of texturizing powder at the roots before wrapping—this gives the scarf something to grip. For very thick or curly hair, a flatter twist under the scarf prevents bulk at the crown. A tiny dab of Oribe Fiber Groom on the knot keeps it from loosening throughout the day.
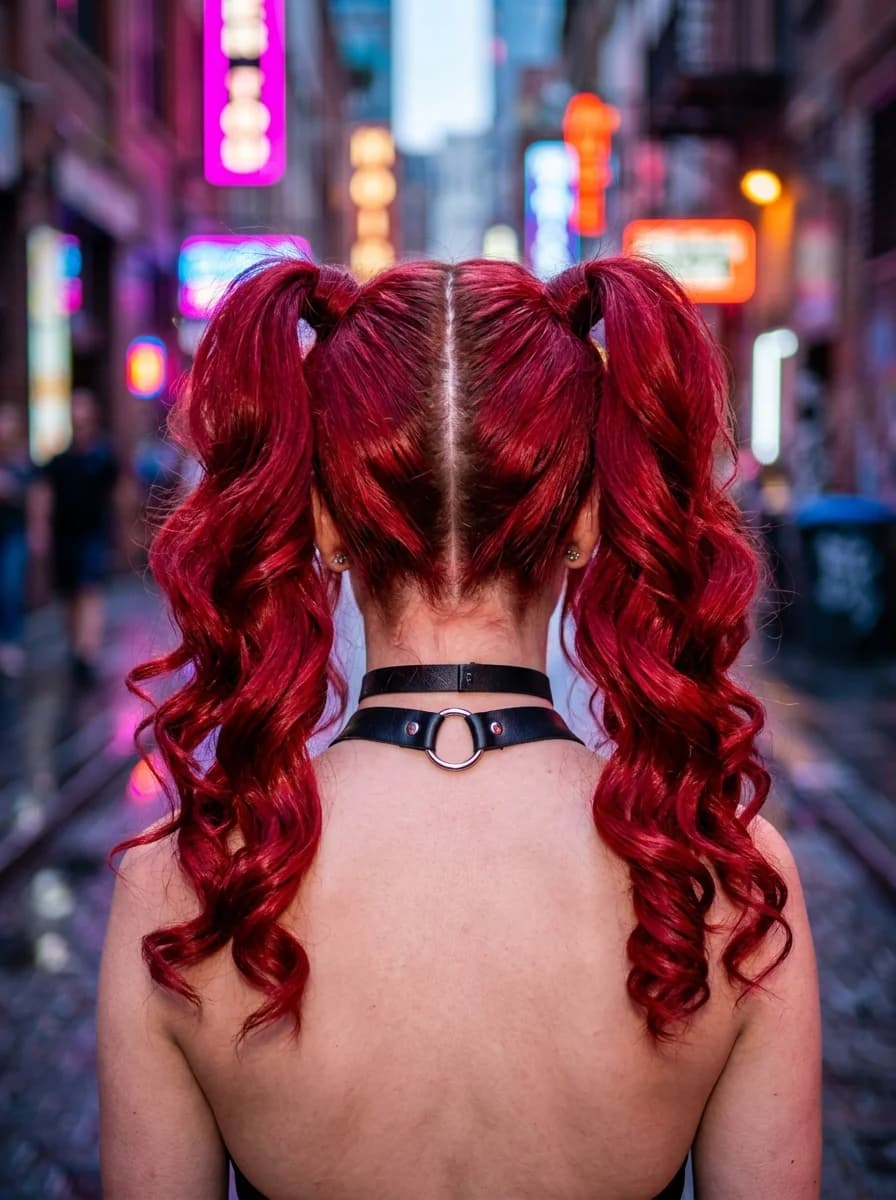
28 Stunning Baddie Summer Hairstyles for 2026 🔥☀️
34.Sunset Waves: Abstract Print Scarf
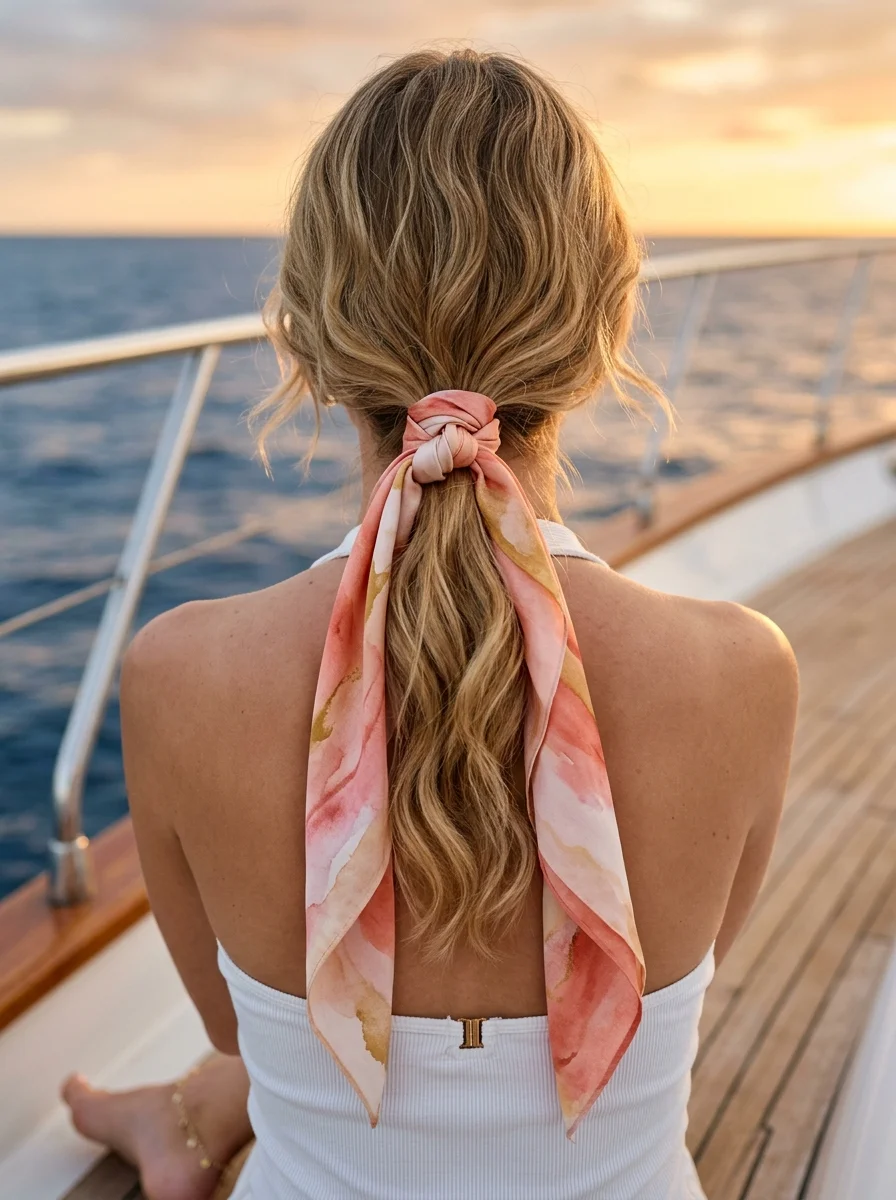
The overview: An abstract-print scarf in soft watercolor hues—pink, peach, and cream—wraps the head as a narrow band, knotted at the nape while loose, natural waves fall freely around the face. The color palette mimics golden-hour light, which is exactly why this combination reads as relaxed yet intentional rather than thrown together.
The scarf is folded into a band roughly two to three inches wide, positioned just above the hairline at the back, then crossed and tied at the nape with the ends left to hang. A few soft tendrils are pulled free around the face to break up the line between scarf and skin. The technique takes under five minutes, making it one of the more accessible styles in this roundup.
Abstract prints have surged in popularity as an alternative to traditional paisley or floral bandanas. They offer the same visual interest without the literal pattern associations, which makes them easier to pair with modern, minimalist wardrobes.
Why this look is popular: The soft, blended color transitions photograph beautifully in natural light, particularly during the hours when the sun sits low. The loose waves and relaxed scarf placement create a look that feels candid and approachable, which is why it consistently performs well on social platforms and in vacation photo sets.
Where this look is suitable: Beach brunches, vineyard visits, outdoor concerts, casual date nights, or any warm-weather outing where you want color and texture without formal structure. It works equally well for a farmers market morning or a sunset dinner on a terrace.
The look: The scarf band sits snugly across the forehead, its abstract watercolor pattern blending pink into peach into cream in soft, irregular strokes. Loose waves—achieved with a sea salt spray and scrunching—tumble past the jawline, their tousled texture echoing the scarf's painterly quality. A few face-framing pieces soften the transition between fabric and skin.
Step by step:
- Apply a sea salt spray like Bumble and bumble Surf Spray to damp hair, then scrunch and air-dry or diffuse on low heat to create natural-looking waves.
- Once dry, use your fingers to separate and tousle the waves for a lived-in texture.
- Fold your abstract print scarf into a triangle, then fold the triangle again to create a band approximately two to three inches wide.
- Place the folded band across the back of your head, positioning the folded edge just above your hairline.
- Bring both ends forward, cross them over at the front, then guide them back toward the nape.
- Tie a loose knot or bow at the nape, letting the ends hang naturally over your hair.
- Gently pull out a few face-framing strands using your fingertips.
- Mist lightly with a flexible-hold hairspray to lock the waves in place without stiffness.
Tips and tricks: Silk and satin scarves can slip on fine or straight hair. A light mist of hairspray applied to the inside of the scarf before wrapping adds grip without residue. For coarser textures, a dime-sized amount of leave-in conditioner along the scarf's inner fold prevents friction and keeps the hair underneath smooth.
35.Parisian Cafe: Red Polka Dot Bandana
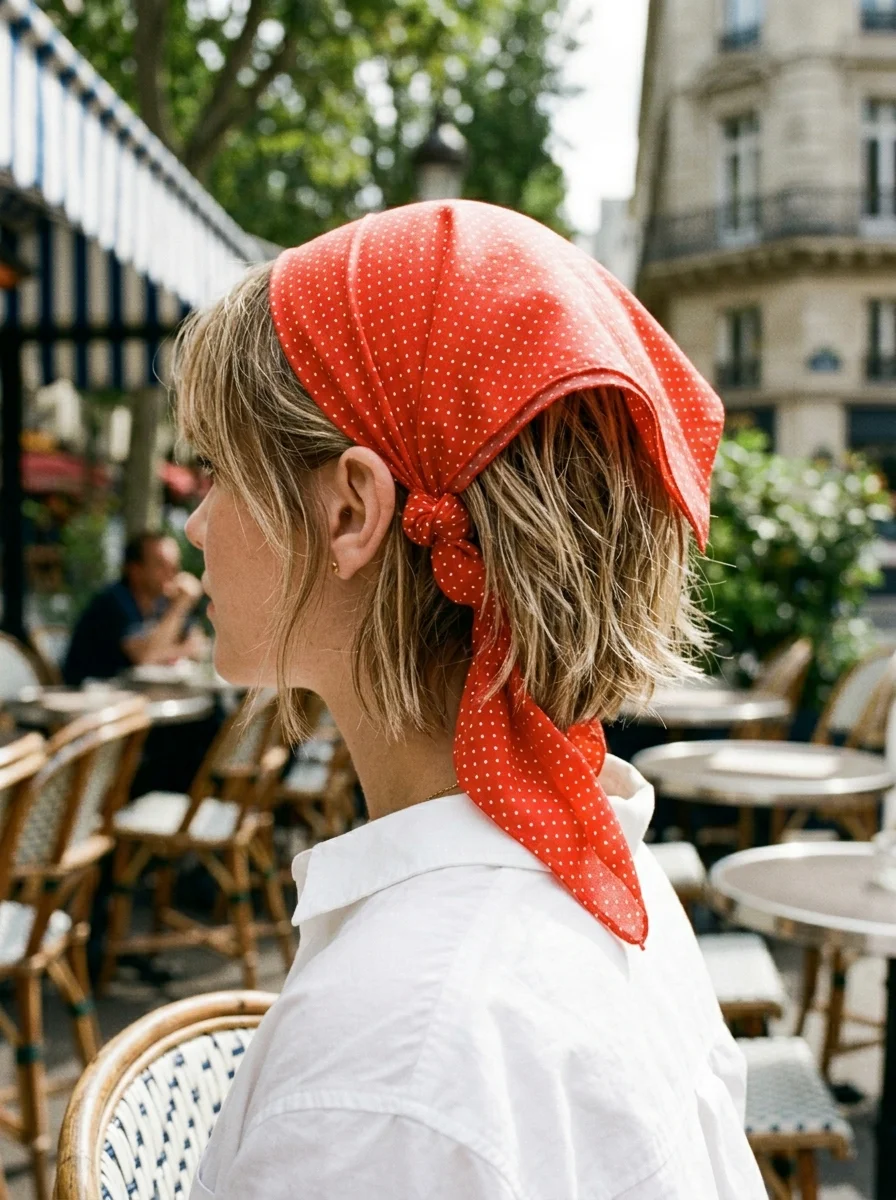
The overview: A bright red bandana with white polka dots wraps a short, textured bob, tied simply at the nape with the ends left to hang. The combination of a bold retro print against a modern, slightly tousled cut creates immediate visual contrast—that is what gives this look its character. The bandana does not compete with the bob; it punctuates it.
The technique is minimal: fold the bandana into a narrow band, position it at the back of the head, bring the ends forward to cross over, then tie at the nape. The entire process takes under three minutes. What makes it work is the proportions—the two-inch band sits proportionally against the jaw-length bob without overwhelming the face or the haircut's shape.
Polka dot bandanas have roots in 1950s Americana and 1940s pinup culture, but the pairing with a textured bob pulls the look firmly into the present. It reads as vintage-inspired rather than costumey, which is the balance this style achieves.
Why this look is popular: Short hair often struggles with accessory compatibility—a scarf that overwhelms longer hair can look perfectly scaled on a bob. The red-and-white palette is inherently photogenic, and the bandana adds a focal point that draws the eye upward, highlighting cheekbones and jawline structure.
Where this look is suitable: Casual city outings, cafe visits, weekend markets, brunch with friends, or any relaxed daytime setting where a pop of color and retro charm feels appropriate. It pairs particularly well with denim, white cotton, or simple black outfits.
The look: The red bandana sits low at the back of the head, its white polka dots crisp against the saturated red base. The bob's textured pieces fall naturally around the face, some tucking slightly behind the ears, others hanging freely at the jawline. The bandana's ends dangle just below the knot, adding movement when you turn your head. The overall impression is playful, polished, and distinctly Parisian.
Step by step:
- Start with your bob styled with natural texture. If your hair is very straight, use a 1-inch flat iron to create subtle bends and movement, or apply a texturizing spray like Oribe Dry Texturizing Spray at the roots.
- Fold your red polka dot bandana into a triangle, then fold it again to create a band approximately two inches wide.
- Place the folded bandana at the back of your head, with the triangular point hanging slightly downward.
- Bring both ends forward along the sides of your head, crossing them over at the front.
- Guide the ends back to the nape and tie a secure knot, keeping the bandana taut but comfortable.
- Let the bandana ends hang loosely over your hair.
- Use your fingers to pull out a few pieces around your face for soft framing.
- Adjust the bandana so the polka dots face outward evenly on both sides.
Tips and tricks: Bobs with layers or an undercut may need extra bobby pins tucked under the bandana to keep short pieces from popping out. For very fine hair, a light volumizing mousse applied before styling gives the bob enough body to hold its shape under the bandana. If the cotton bandana feels stiff, wash it once before wearing—it softens significantly and conforms better to the head.
36.Gatsby Glamour: Twisted Scarf Updo
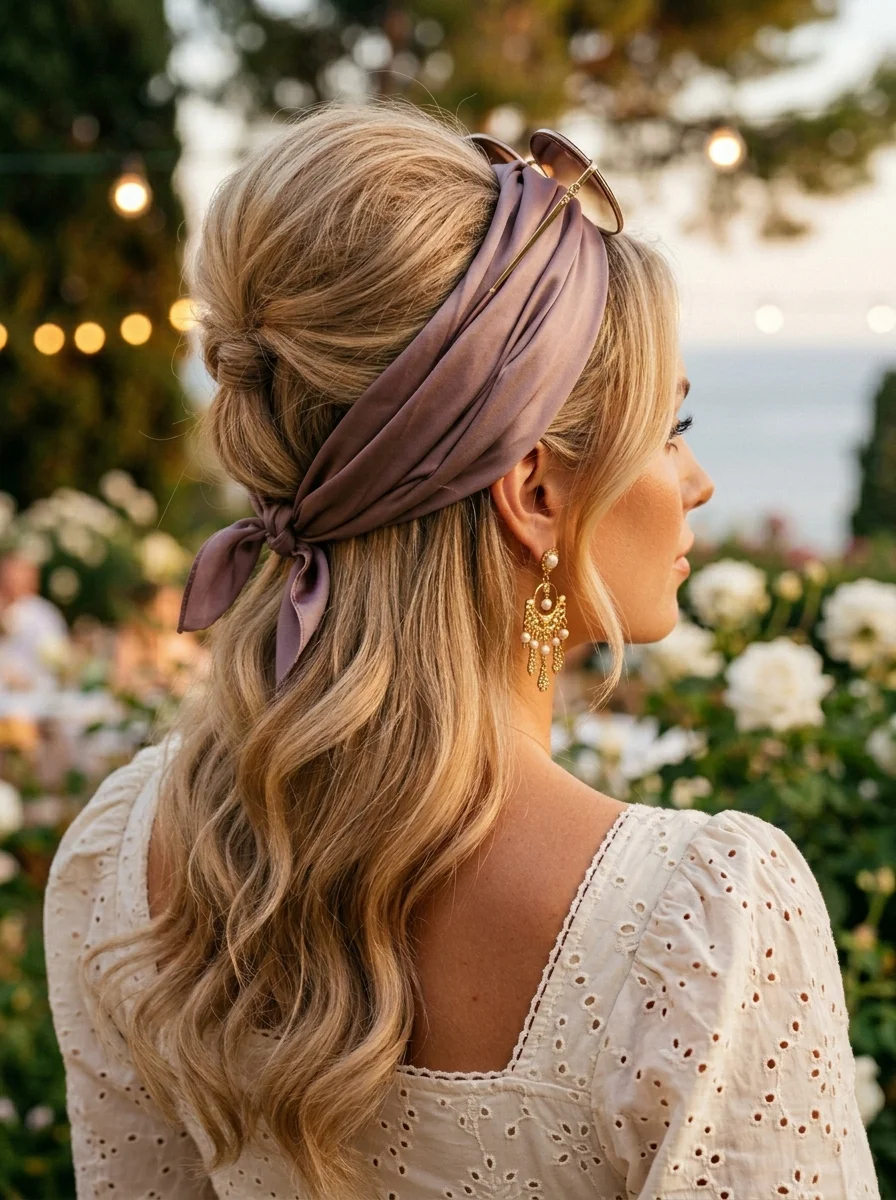
The overview: A dusky purple satin scarf is twisted and sculpted over a soft updo, creating a voluminous, almost architectural shape at the crown. The hair underneath is gathered into a loose chignon at the nape, with the scarf wrapping artfully around it to produce a rosette-like effect. This is one of the more technically involved styles in this list, but the result justifies the effort.
The scarf serves a dual purpose: it adds visual drama and it physically constructs the silhouette. The twisted fabric builds height at the crown, which elongates the face and creates a formal, structured profile. Loose tendrils are pulled free around the face to soften the geometry and keep the look from reading too severe.
The 1920s influence is unmistakable—this is the kind of headpiece styling that defined the era's evening looks. Modern interpretations swap heavy beading for luxurious satin, but the principle remains the same: the scarf is the centerpiece, and the hair supports it.
Why this look is popular: The updo-plus-scarf combination photographs with exceptional clarity from every angle, which is why it appears frequently at formal events and weddings. The satin fabric catches light differently than hair, creating a textural contrast that adds depth to both close-up and full-length shots. It also keeps hair off the neck, which is a practical advantage at warm-weather evening events.
Where this look is suitable: Black-tie events, evening weddings, garden parties, galas, opera nights, or any occasion where a polished, elevated hairstyle is expected. It pairs beautifully with statement earrings and off-the-shoulder or V-necklines.
The look: The dusky purple satin catches light in soft, shifting planes as the head moves. The twisted fabric rises at the crown in a sculpted knot, its folds creating natural shadow and highlight. Below, the hair gathers in a loose chignon, with wispy tendrils escaping around the temples and ears. The overall silhouette is tall, elegant, and unmistakably formal—a modern translation of Jazz Age glamour.
Step by step:
- Apply a strong-hold mousse like Kenra Volume Mousse to damp hair, then blow-dry to create volume at the roots.
- Gather your hair at the nape and twist it into a loose chignon, securing with bobby pins. Leave a few strands free around the face.
- Fold your satin scarf into a long, narrow band, approximately three inches wide.
- Place the center of the band over the top of your head, slightly back from the hairline, and bring both ends down along the sides.
- Cross the ends at the back of your neck, underneath the chignon.
- Bring the ends upward toward the crown, twisting them as you go to create a rope-like effect.
- Wrap the twisted ends around the crown area, building a rosette shape. Tuck the final ends securely underneath the folds.
- Gently pull out a few face-framing tendrils and mist the entire style with a strong-hold hairspray like Kenra Volume Spray 25.
Tips and tricks: Fine hair may not hold the chignon without extra support—backcomb the roots lightly before twisting, and use larger bobby pins (1.5 inch) for better grip. Satin is inherently slippery, so securing the scarf's starting position with two hidden bobby pins at the temples prevents shifting. For very thick hair, the chignon may need to be smaller to maintain proportion with the scarf's volume.
37.Playful Pompadour: Red Bow Accent
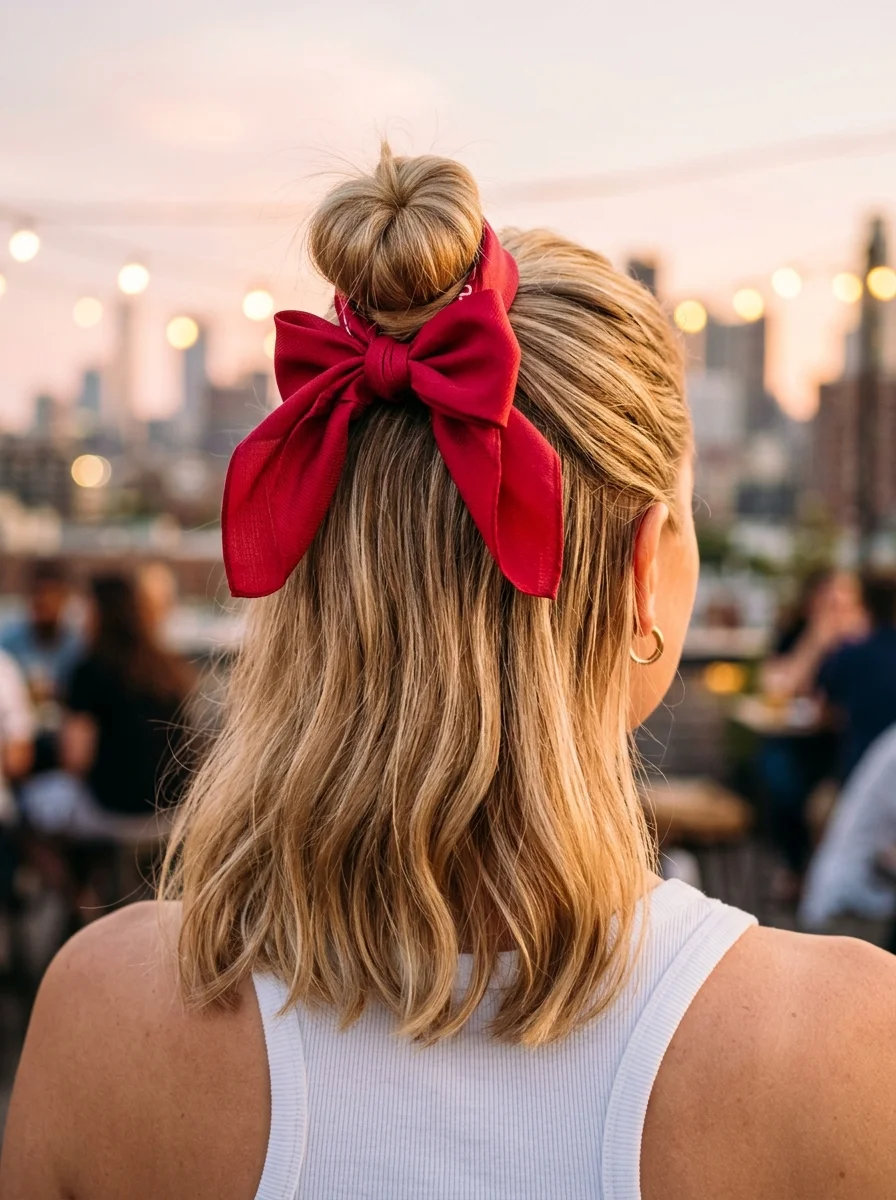
The overview: A high bun at the crown, secured with a large red fabric bow at its base, with soft waves left loose around the face. The bow is not subtle—it is deliberately oversized, which is what makes the combination work. The contrast between the sleek bun and the voluminous, saturated-red accessory creates a focal point that anchors the entire style.
The technique requires no scarf folding or wrapping at all. Instead, a pre-formed bow clips or pins directly around the bun's base, making this one of the fastest styles to execute. The real work goes into the bun itself: gathering the hair smoothly, twisting it cleanly, and positioning it high enough on the crown to give the bow proper visibility from the front.
Red bows have a long history in fashion—Chanel's iconic camellia bow, Dolce & Gabbana's Sicilian pinup aesthetic, and the broader resurgence of hyper-feminine accessories have all contributed to this look's staying power. It reads as youthful without being juvenile, provided the bun is executed with clean lines.
Why this look is popular: The red bow delivers immediate visual impact in photos, particularly from the front and three-quarter angles where it frames the face. It also serves a practical function: it disguises the mechanics of the bun (pins, elastic, flyaways) while adding intentional style. The high bun elongates the neck, which is flattering across face shapes.
Where this look is suitable: Casual outings, weekend shopping trips, lunch dates, birthday celebrations, or any setting where playful femininity fits the mood. It pairs naturally with sundresses, denim jackets, and anything with a romantic silhouette.
The look: The bun sits at the crown, its surface smooth and taut. A large red fabric bow—its loops full and symmetrical—wraps around the base, its tails trailing slightly behind. Around the face, soft waves created with a 1.25-inch curling iron fall past the jawline, their movement contrasting the bun's stillness. The red against dark or light hair creates a striking color contrast that draws every eye upward.
Step by step:
- Apply a smoothing cream like Living Proof Satin Hair Cream to damp hair, then blow-dry straight using a round brush for a sleek base.
- Gather all your hair into a high ponytail at the crown, securing with a strong elastic like Scunci No-Damage.
- Twist the ponytail and wrap it around the base to form a bun. Secure with bobby pins, tucking the ends underneath.
- Take your red fabric bow and clip or pin it around the base of the bun, ensuring it sits centered and the loops are full.
- Use a few extra bobby pins to anchor the bow if the clip alone feels loose.
- Leave a few face-framing pieces loose, or curl them softly with a 1.25-inch barrel iron for a more polished finish.
- Mist with a medium-hold hairspray to keep the bun smooth and the bow secure.
Tips and tricks: Fine hair may produce a small bun that looks disproportionate under an oversized bow—backcombing the ponytail before twisting adds volume. For very thick hair, a doughnut bun filler provides a consistent shape. Look for bows with integrated alligator clips rather than tie-on versions; they grip better and stay centered throughout the day.
38.Retro Riviera: Silk Scarf Twist
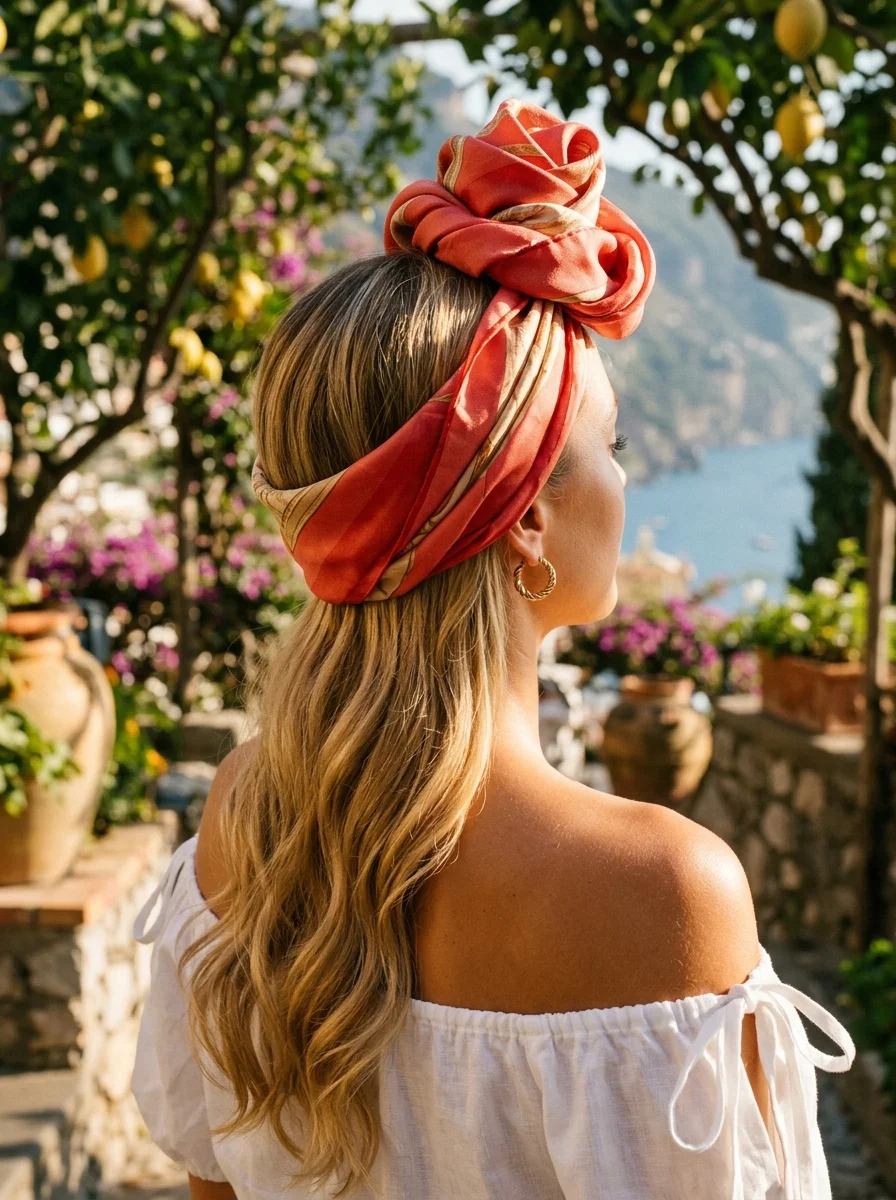
The overview: A large square silk scarf—printed with chains, crests, and ornamental motifs in navy, gold, and burgundy—wraps the head as a band, with the ends brought forward, twisted once or twice, and then tied at the nape. The result is a more elaborate knot than a standard bandana wrap, and that small structural difference elevates the entire look from casual to refined.
The key distinction here is the twist. Rather than simply crossing the ends and tying them, the forward-brought ends receive a single rotation before being secured at the back. This creates a visible rope-like texture along the sides of the head, adding dimension that a flat wrap cannot achieve. It is a minor adjustment with outsized visual impact.
Riviera styling has remained a consistent reference point in fashion because it combines practicality—keeping hair controlled in coastal wind—with luxury materials. The chain-and-crest print pattern specifically evokes 1980s Italian fashion houses, a period when statement scarves were non-negotiable accessories for any well-dressed woman.
Why this look is popular: The twisted knot adds a sculptural element that elevates the style beyond a simple headband. The intricate scarf print provides visual richness that holds up in both close-up portraits and wider shots, and the structured wrap keeps hair tidy in outdoor settings where wind and humidity might otherwise cause chaos.
Where this look is suitable: Coastal vacations, upscale daytime events, outdoor restaurant terraces, museum visits, or any occasion where you want a polished look that still feels relaxed. It transitions smoothly from a day of sightseeing to an evening dinner without requiring a complete restyle.
The look: The silk scarf lies flat across the crown, its navy field adorned with gold chain links, burgundy crests, and ornamental borders. Along the sides, the twisted rope detail adds subtle dimension. Below the scarf, soft, polished waves—created with a 1.25-inch barrel iron—fall past the shoulders, their warm tones contrasting the cool navy of the fabric. The overall impression is one of deliberate, European-inspired elegance.
Step by step:
- Prep hair with a heat protectant, then create polished waves using a 1.25-inch curling iron, alternating curl direction for natural movement.
- Brush through curls gently with a boar bristle brush to smooth them into waves, then mist with Oribe Superfine hairspray.
- Fold your silk scarf into a long, narrow band, approximately two to three inches wide.
- Place the band across the top of your head, slightly back from the hairline, and bring both ends down along the sides.
- Cross the ends over each other at the back of your neck.
- Bring the ends forward again, toward the front of your head.
- Twist the ends together once or twice, creating a visible rope-like texture.
- Guide the twisted ends back to the nape and tie them securely in a knot.
- Adjust the scarf across your head to ensure it is smooth and centered, then let the waves fall naturally around your face and shoulders.
Tips and tricks: Silk scarves are notoriously slippery on straight or fine hair. A discreet application of texturizing powder along the scarf's inner fold creates friction without visible residue. Alternatively, place two bobby pins at the temples, tucked under the scarf, to anchor the starting position. For hair that is very thick or coarse, folding the scarf into a slightly wider band prevents it from riding up throughout the day.
The Slip-Proof Hack
The most frustrating part of wearing a silk headscarf is that it inevitably slides off the back of your head the second you step into a breeze. Silk is inherently slippery—that is what makes it feel luxurious against your skin, but it is also what makes it impossible to keep in place without the right technique. Celebrity stylists have a reliable fix that requires no additional products.
Instead of tying a basic knot at the nape, take both ends forward to your neck, tie a knot, then twist the remaining tails together before wrapping them back up and tucking them into the fabric. That simple twist creates physical friction that stops the silk from sliding against itself and against your hair. Another trick: slide a thin, velvet-covered headband underneath the scarf. The velvet texture gives the silk something to grip without adding bulk or being visible.
The fix? If your hair is freshly washed and too slippery for any scarf to hold, spray a little dry texturizing spray at your roots before wrapping. It adds the grit the fabric needs to stay anchored without leaving visible residue. A product like Oribe Dry Texturizing Spray works well—one spritz at the crown is enough.
The Braided-In Method
If you want to look like you stepped off a fashion week street style shot, skip the basic top-knot wrap and braid the scarf directly into your hair instead. Weaving a narrow silk strip into a three-strand braid, or wrapping it around a low messy bun, turns the fabric into an actual structural part of the hairstyle rather than an accessory sitting on top.
The technique solves every practical problem that comes with silk scarves: it eliminates slipping entirely, adds instant volume to fine hair (the fabric acts as a thickening strand), and creates movement that photographs beautifully. This is the method TikTok creators and editorial stylists have been gravitating toward because it looks intentional from every angle. A scarf braided into a side fishtail or woven through a low chignon reads as deliberate styling rather than a fix for a bad hair day.
The technique? Fold your bandana into a long, skinny strip about an inch wide before braiding. Use it as one of the three strands in a traditional braid. If your hair is fine, position the scarf strand in the center of the braid so the fabric gets wrapped by hair on both sides—this hides the raw edges and makes the braid look fuller. A small clear elastic at the end keeps everything secure. Have a look at Hairstyle No. 30
Find Your Perfect Bandana Vibe
At the end of the day, styling a bandana is all about having fun and expressing your unique personality! Whether you choose a classic paisley print for casual errands, a luxurious silk scarf for a touch of Riviera glam, or a sweet crochet headband for those boho-chic vibes, there are endless ways to make this trend your own. Don't be afraid to experiment with different colors, patterns, and tying techniques until you find the styles that make you feel confident and fabulous. Which of these looks are you going to try first?