Hair Trends
25 Trendy Beach Day Hairstyles for Vacation 2026

You've booked the trip. You've got the swimsuit. Now you need the hair to match. Beach vacations call for hairstyles that can handle salt air, humidity, and a whole lot of sun without looking like you tried too hard. The trick is finding styles that feel effortless but still photograph beautifully against that ocean backdrop.
Whether you're headed to a tropical island or a coastal resort, these 25 beach day hairstyles will keep you looking polished from sunrise to sunset. You'll find everything from loose waves to intricate braids below here, so you can pick the perfect look for every moment of your getaway.
The Pre-Ocean Hack
Nothing ruins a perfect beach day hairstyle faster than the crispy, tangled mess salt water leaves behind. But skipping the ocean is not the answer. The secret to protecting your hair is what stylists call the sponge effect: hair is like a sponge, and if it is already saturated with fresh water or leave-in conditioner, it physically cannot absorb as much salt water or chlorine.
Before you hit the water, soak your hair with fresh water or apply a heavy leave-in conditioner from mid-lengths to ends. This fills the cuticle and creates a protective barrier that stops salt from penetrating and drying out your strands. When you are done swimming, rinse with fresh water as soon as possible — even a quick rinse keeps your beach waves looking soft instead of straw-like.
The trick? Keep a spray bottle of fresh water and a travel-sized leave-in conditioner in your beach tote. A quick mist and scrunch after a swim instantly revives your waves and blocks the salt from baking into your hair under the sun. Products like Kérastase 8 Hour Magic Night Serum or Olaplex No. 6 Bond Smoother work well as lightweight leave-ins that do not weigh hair down.
1.Bohemian Beach Braid Crown with Baby's Breath
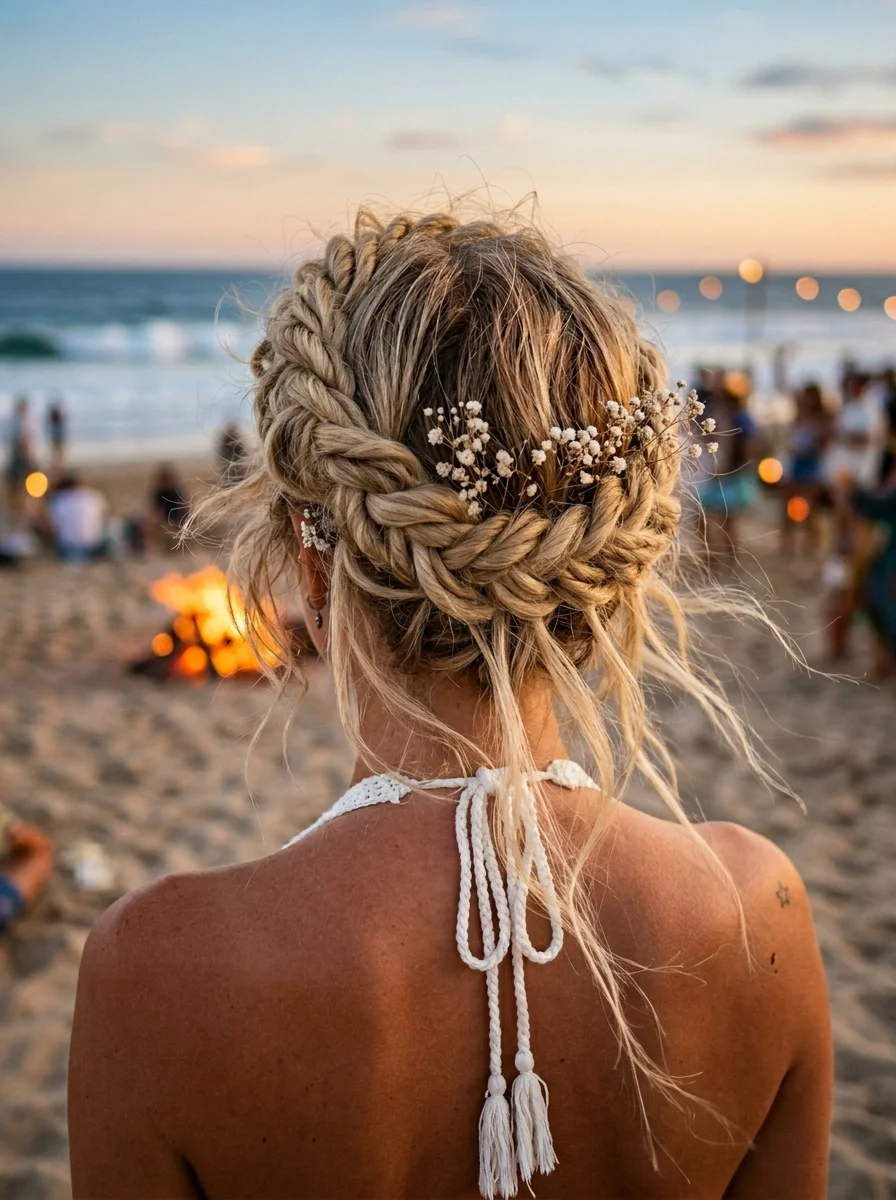
The overview: Golden blonde hair woven into Dutch braids that wrap into a crown bun, then tucked with delicate baby's breath. It's romantic without being precious — exactly what you want when the bonfire light hits just right at golden hour. The braids frame your face like a halo while the flowers add a soft, ethereal touch that catches every flicker of firelight.
This look works because the structured braids keep everything secure against ocean breeze while the baby's breath softens the whole thing. You get the durability of an updo with the romance of loose, flowing hair — minus the actual flowing part that turns into tangles by hour two.
Why this look is popular: The braided crown is one of those styles that looks complicated but is actually just two Dutch braids pinned into a bun. Adding baby's breath takes it from "pretty braid" to "I belong in a field of wildflowers" territory. Works best on medium to thick hair that holds a braid without slipping — fine hair benefits from a texturizing spray beforehand.
Where this look is suitable: Beach bonfires, golden hour photo sessions, romantic seaside dinners. Too formal for a casual swim day, but perfect for any beach occasion where you want to feel a little magical.
Step by step:
- Prep with texture. Mist dry hair with a texturizing spray from roots to ends. Second-day hair holds braids better than freshly washed hair.
- Create a center part. Use the pointed end of a rat-tail comb for a clean line. This is your foundation.
- Dutch braid one side. Starting at the temple, cross strands under (not over) to create the raised braid effect. Add small sections from each side as you braid backward along the hairline.
- Continue to the nape. Once you pass the ear, keep braiding as a regular three-strand braid until you reach the ends. Secure with a clear elastic.
- Repeat on the other side. Mirror the first braid exactly — same tightness, same placement.
- Form the crown bun. Wrap both braids around the back of your head, tucking the ends under each other. Pin securely with bobby pins that match your hair color.
- Add baby's breath. Tuck small sprigs into the braids at irregular intervals. Odd numbers look more natural.
- Set with spray. A flexible-hold hairspray locks everything in place without making the braids look crunchy.
Tips and tricks: Tease the crown area slightly before braiding for a softer, more lifted silhouette. If your hair is fine, backcomb a small section underneath where the bun will sit to create the illusion of volume. Fresh baby's breath wilts fast in heat — use dried flowers or small silk alternatives if you're in direct sun for hours.
26 Stunning Summer Braided Hairstyles for Women 2026 ☀️💇♀️
2.Effortless Braided Claw Clip Updo
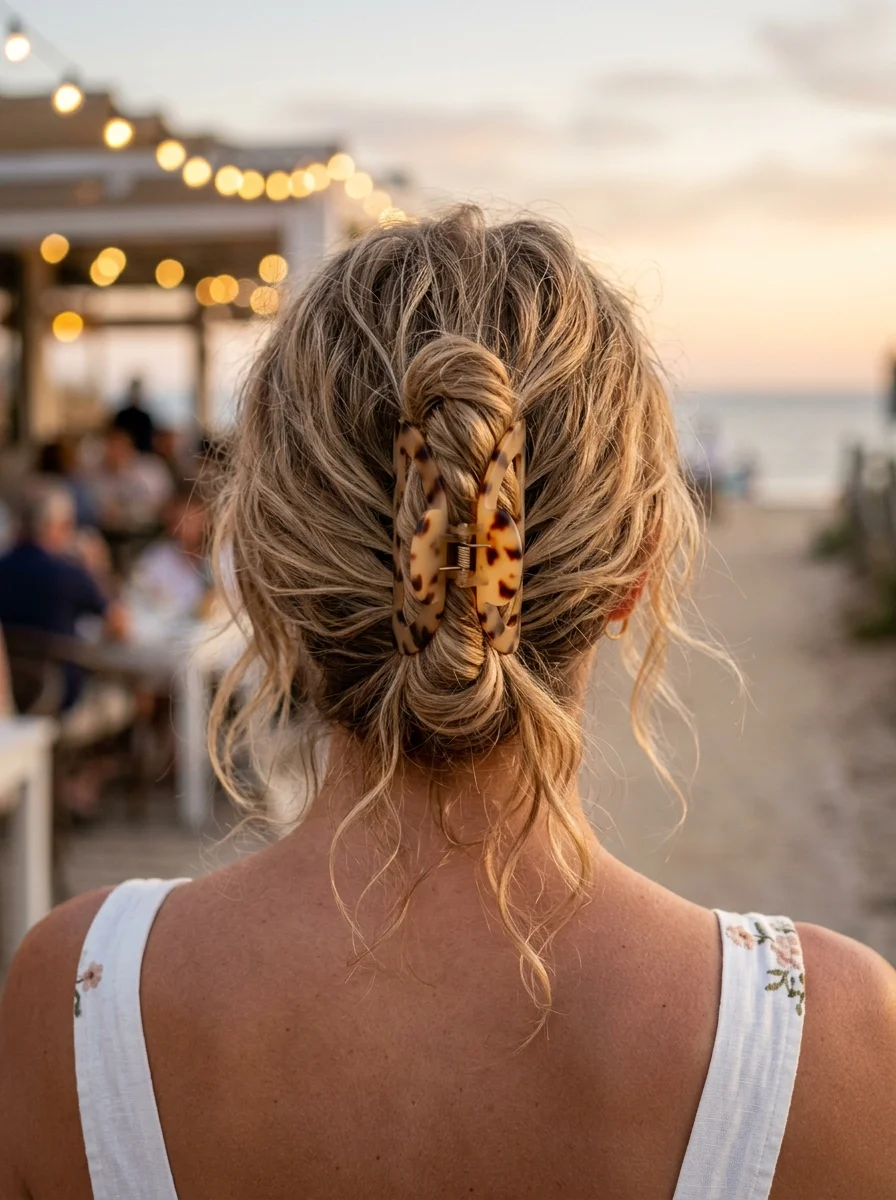
The overview: Ash blonde hair pulled into a loose French braid, then twisted up and secured with a tortoiseshell claw clip. The braid keeps things interesting while the clip does all the heavy lifting. Perfect for that beachside dinner where you want to look put-together but not overdone. The claw clip holds everything in place while the braid adds texture that a simple twist can't achieve.
This is the hairstyle for people who hate fussing with their hair. Braid it, twist it, clip it, done. The French braid gives the updo structure so it doesn't just look like you threw your hair up in a panic — it looks intentional, even though it takes about four minutes.
Why this look is popular: The claw clip comeback isn't slowing down, and this style is exactly why. It transforms a basic updo into something with visual interest without requiring any real skill. The braid adds texture and dimension that a plain twist lacks. Works on medium to long hair — shorter bobs might not have enough length for the braid-to-clip transition.
Where this look is suitable: Beach dinners, casual evening walks, resort dining. Relaxed enough for daytime but polished enough for a nice restaurant with ocean views.
Step by step:
- Start with dry hair. Second-day hair works best here. If hair is freshly washed, spritz with dry shampoo for grip.
- French braid loosely. Start at the crown and French braid downward, keeping the tension relaxed. You want it to look undone, not military-precise.
- Secure the end. Once you reach the nape, continue as a regular three-strand braid for a few inches and tie off with a clear elastic.
- Twist upward. Fold the braid upward against the back of your head. The end should tuck under the base of the braid.
- Clip it. Open the claw clip and secure it over the folded braid. Position it so it grips both the braid and the base hair underneath.
- Adjust face-framing pieces. Pull a few thin sections loose around your temples and ears for a softer, more relaxed finish.
Tips and tricks: The clip matters more than the braid. A flat, barrette-style clip won't grip as well as one with strong teeth. Look for clips around 4-5 inches for medium hair — smaller clips slide out during movement. A light mist of dry texturizing spray on the braid before clipping adds grip and prevents the whole thing from slipping down by dinner.
3.Sleek Low Ponytail with a Delicate Bow
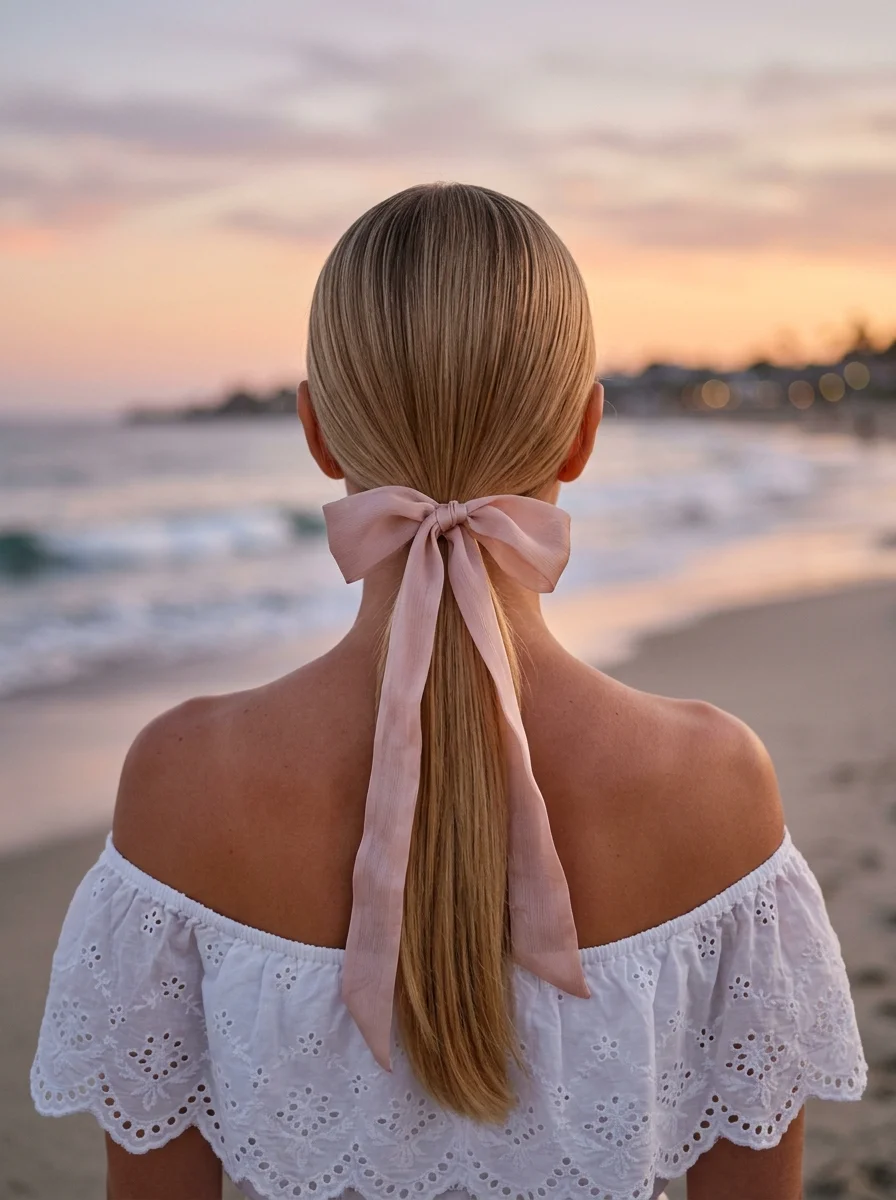
The overview: Ash blonde or silver hair smoothed into a low ponytail at the nape, finished with a blush pink bow. It's the kind of elegance that works just as well at a seaside ceremony as it does at a fancy restaurant. Simple, refined, and always appropriate. The sleek finish catches light like silk, and the bow adds a feminine touch that feels deliberate without being precious.
Low ponytails are having a major moment because they're universally flattering and work on virtually every hair texture. The key here is the finish — smooth, glossy, and bump-free. That requires a little product, but the result is worth it. This is polished beach elegance at its simplest.
Why this look is popular: The low ponytail is the little black dress of hairstyles — it works everywhere, flatters everyone, and never goes out of style. Adding a bow elevates it from "I pulled my hair back" to "I styled my hair." Best on straight to wavy hair that can achieve a smooth finish. Curly hair can work this too with a smoothing serum and a boar bristle brush.
Where this look is suitable: Upscale beach dinners, seaside ceremonies, resort restaurants. Works for both daytime and evening — the bow color determines the vibe (blush for romance, navy for sophistication, white for formal).
Step by step:
- Smooth with product. Apply a smoothing serum or light styling cream to damp or dry hair. Blow-dry with a boar bristle brush for maximum sleekness.
- Create your part. Center part for symmetry, or a deep side part for more drama. Use the pointed end of a comb for precision.
- Gather the ponytail. Brush all hair back and gather it at the nape. Hold with one hand while smoothing the surface with the other.
- Secure tightly. Use a strong elastic that matches your hair color. Wrap it three times for a secure hold.
- Smooth flyaways. Use a small amount of styling cream or edge control on a toothbrush to tame any flyaways along the part and hairline.
- Add the bow. Tie a blush pink ribbon around the elastic, forming a neat bow. Adjust the loops so they're even and hang naturally.
Tips and tricks: A boar bristle brush is essential for the sleek finish — it distributes product evenly and creates shine that a regular brush can't. For stubborn flyaways, rub a small amount of hair wax between your palms and smooth it over the surface. The bow photographs best when the loops are medium-sized — too small and it gets lost, too large and it overwhelms the ponytail.
28 Trendy May Nail Designs for 2026 💅
4.Effortless Beach Waves with Sun-Kissed Highlights
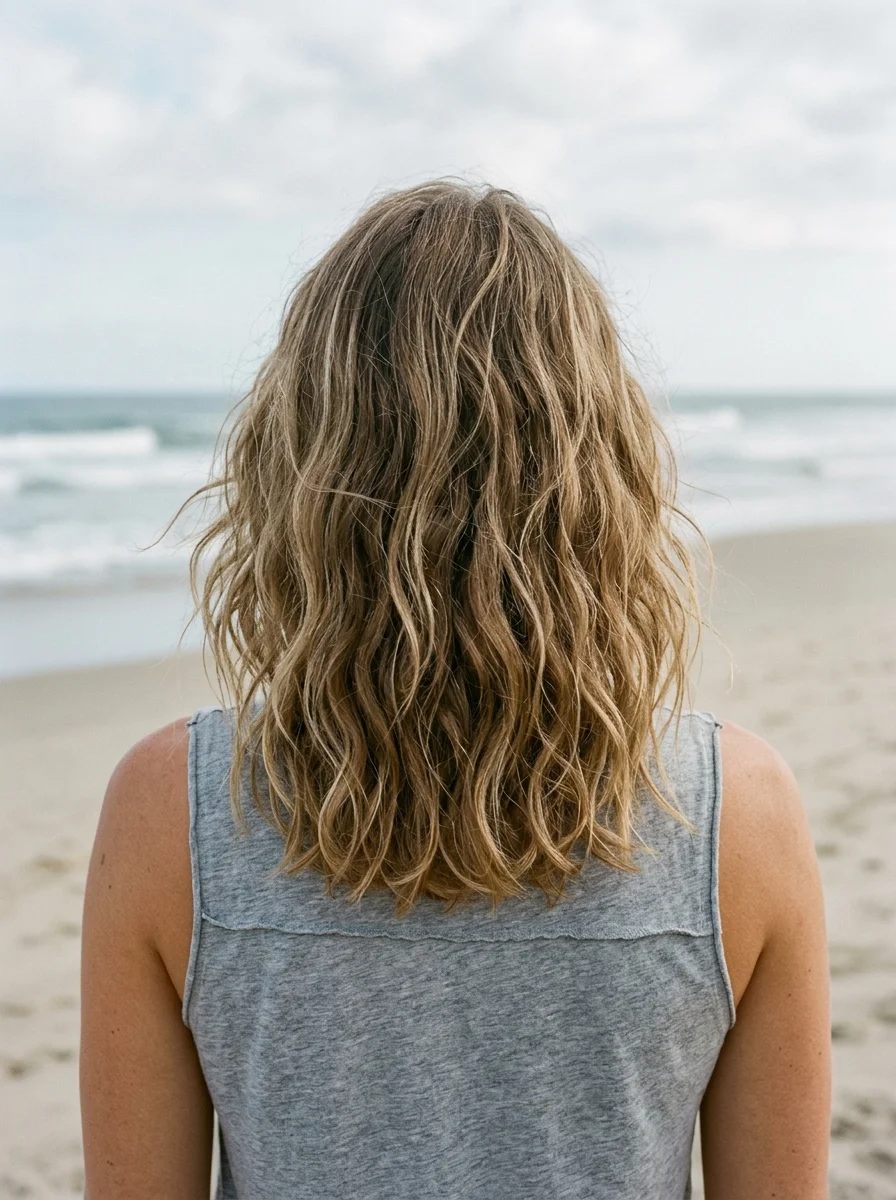
The overview: A sandy blonde lob styled with natural, tousled waves that look like you just stepped out of the ocean. The sun-kissed highlights do most of the work here. This is the hairstyle that says you're on vacation and you're not thinking about your hair at all — which is exactly the point. The waves have that perfectly imperfect quality that actually takes zero effort but looks like you have a personal stylist.
The lob length is key here. Too short and the waves look choppy instead of beachy. Too long and they lose that effortless, just-rolled-out-of-the-ocean quality. This length hits the sweet spot where the waves have room to move without looking styled.
Why this look is popular: This is the default "beach hair" for a reason — it's the one style that actually looks better with a little salt air and humidity. The sun-kissed highlights create dimension that makes the waves look more textured and natural. Works on any hair type, though straight hair needs a curling wand to start.
Where this look is suitable: Everywhere. This is the most versatile beach hairstyle on the list — it works for casual beach days, boardwalk walks, seaside brunches, and even casual evening dinners. It's the hairstyle equivalent of a white t-shirt.
Step by step:
- Spray with salt water. Mist damp hair with a sea salt spray from roots to ends. This creates the foundation texture that makes the waves look natural.
- Air-dry or diffuse. Let hair dry naturally for the most authentic beach wave texture. If you're impatient, use a diffuser on low heat.
- Add definition if needed. If some sections are too straight, wrap 1-inch sections around a 1.25-inch curling wand, leaving the last inch out for a modern, undone finish.
- Break up the waves. Run your fingers through the hair to separate any defined curls into softer, more natural waves. Don't use a brush.
- Add texture. Scrunch the ends upward with your hands to encourage the wave pattern and add volume at the roots.
Tips and tricks: The best beach waves come from hair that hasn't been washed in a day or two. Freshly washed hair is too slippery for natural-looking texture. If you must wash, skip conditioner on the ends — it weighs waves down. A matte texturizing spray gives better results than anything with shine, which can make the waves look styled instead of natural.
5.Rose Bun with a Pearl Pin
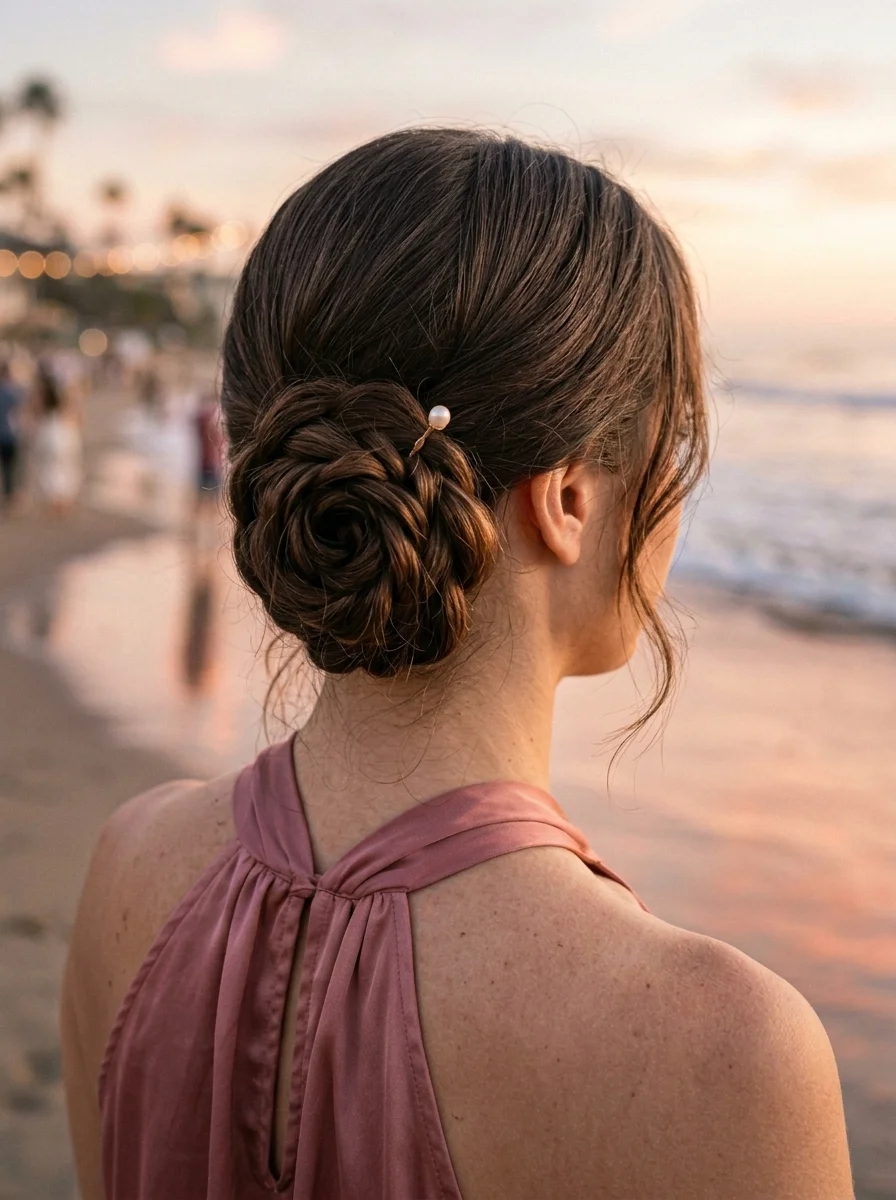
The overview: Warm brunette hair twisted into a rosette-shaped bun, anchored with a single pearl pin. It's structured enough for an upscale beach dinner but soft enough to feel romantic. The pearl adds just the right amount of shine without going overboard. The rosette shape gives the classic bun a sculptural quality that catches light from every angle.
This is the hairstyle that makes people ask "how did you do that?" — and the answer is surprisingly simple. It's just a bun twisted in a specific way to create the petal effect. The pearl pin is the finishing touch that transforms it from "nice bun" to "that's a work of art."
Why this look is popular: The rosette bun is a step up from a basic top knot without requiring a salon visit. The shape is visually interesting from every angle, and the pearl pin adds a single point of elegance that doesn't overwhelm. Works best on medium to thick hair — fine hair may need backcombing at the base to create enough volume for the rosette shape.
Where this look is suitable: Upscale beach dinners, coastal weddings, romantic evenings. Too polished for a casual beach day, but perfect when you want to feel elegant without being overly formal.
Step by step:
- Smooth the base. Apply a light styling cream to dry hair and brush thoroughly for a smooth foundation.
- Create a high ponytail. Gather all hair at the crown and secure with an elastic. The position determines the bun placement.
- Twist the ponytail. Twist the entire ponytail in one direction until it begins to coil on itself.
- Form the rosette. Wrap the twisted ponytail around the base in a circular motion, creating petal-like folds as you go. Tuck the end under the bun.
- Pin securely. Use bobby pins that match your hair color to secure the bun from multiple angles. Push pins inward toward the center of the bun for the strongest hold.
- Add the pearl pin. Insert a single pearl-topped pin into the center or side of the bun. Push it in deep enough to be secure but leave the pearl visible.
- Soften the hairline. Pull a few thin pieces loose around your face and ears for a softer, more romantic finish.
Tips and tricks: Backcomb the ponytail base before twisting to give the rosette more volume and structure. If your hair is very smooth and the bun won't hold, spritz with texturizing spray before twisting — the grip makes a huge difference. For fine hair, use a hair donut as the base and wrap the rosette around it for extra fullness.
24 Stunning Bridesmaid Hairstyles for Weddings 2026 💍✨
6.Effortless Tousled Lob with Beachy Waves
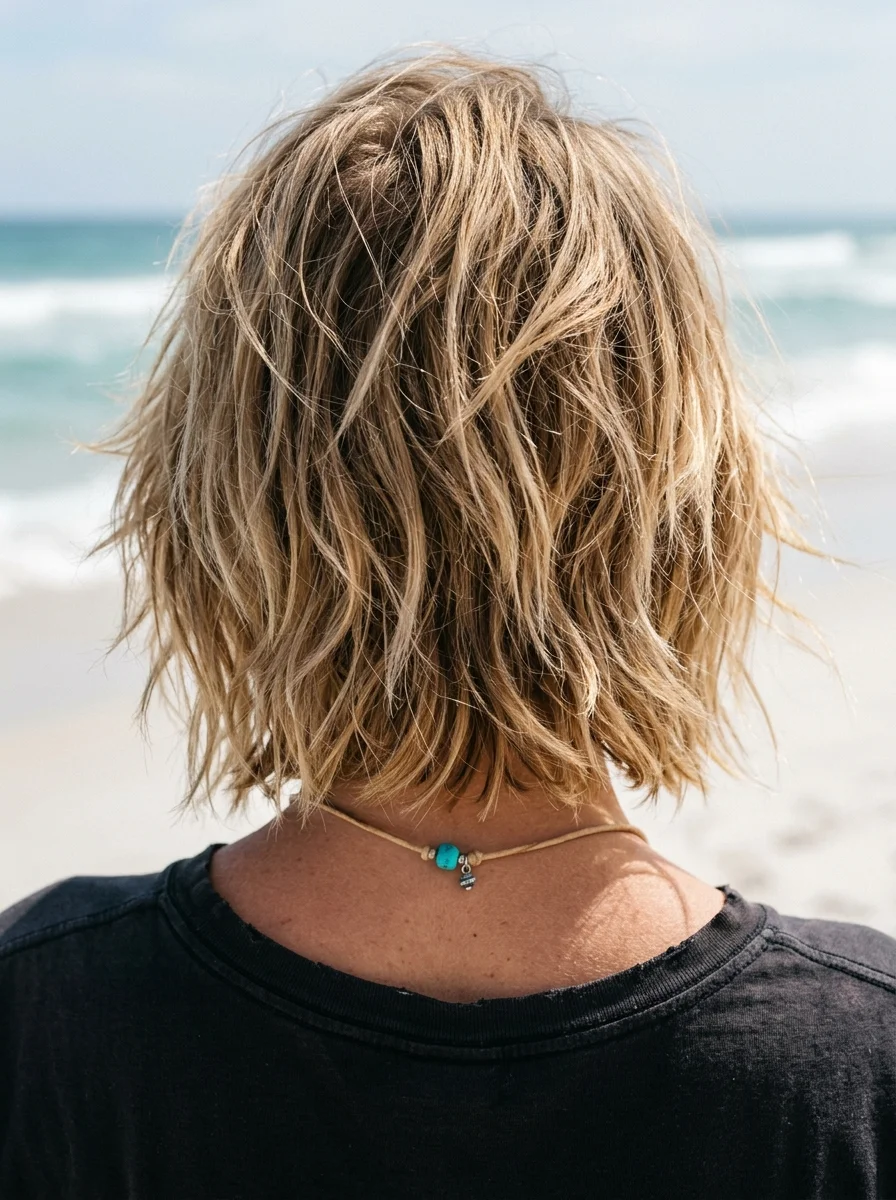
The overview: Sandy blonde hair cut into a textured, choppy lob that practically styles itself. The uneven layers create natural movement that screams surfer girl energy. Low maintenance, high impact — exactly what vacation hair should be. The choppy layers mean you don't need to do anything to them; they fall into place on their own.
This is the hairstyle for people who want to wake up, shake their hair, and be done. The textured lob doesn't require heat styling, product, or effort. It just looks good because the cut does the work. The sandy blonde color enhances the beachy vibe without looking like you tried to go platinum.
Why this look is popular: The tousled lob is the ultimate "I woke up like this" hairstyle. The choppy layers create natural texture that gets better with salt air and humidity. It's the cut that works whether you air-dry it, diffuse it, or let the ocean do its thing. Works on straight to wavy hair — very curly hair may not achieve the same tousled effect without significant straightening.
Where this look is suitable: Casual beach days, surf sessions, boardwalk hangs, anywhere that calls for a relaxed, carefree vibe. This is the hairstyle for people who don't want to think about their hair on vacation.
Step by step:
- Start with damp hair. Apply a lightweight mousse or texturizing cream from roots to ends. Don't overdo it — this style needs to look effortless.
- Scrunch and air-dry. Flip your head upside down and scrunch the hair upward encouraging the natural wave pattern. Let it dry naturally.
- Add definition if needed. If some pieces are too straight, twist small sections around your finger and let them set. Or use a flat iron to create subtle bends.
- Break it up. Shake the hair gently at the roots to add volume and break up any overly defined sections.
- Finish with texture. A light mist of sea salt spray adds that final piecey, surfer-girl texture.
Tips and tricks: The key to this look is restraint with product. Too much mousse or cream makes the waves look crunchy instead of natural. Use a quarter-sized amount at most. For extra volume, flip your hair upside down and blast the roots with a blow dryer for 30 seconds. The cut matters as much as the styling — make sure your stylist knows you want textured, piecey layers, not blunt ones.
7.The Effortless Beachy Updo with a Nautical Bandana
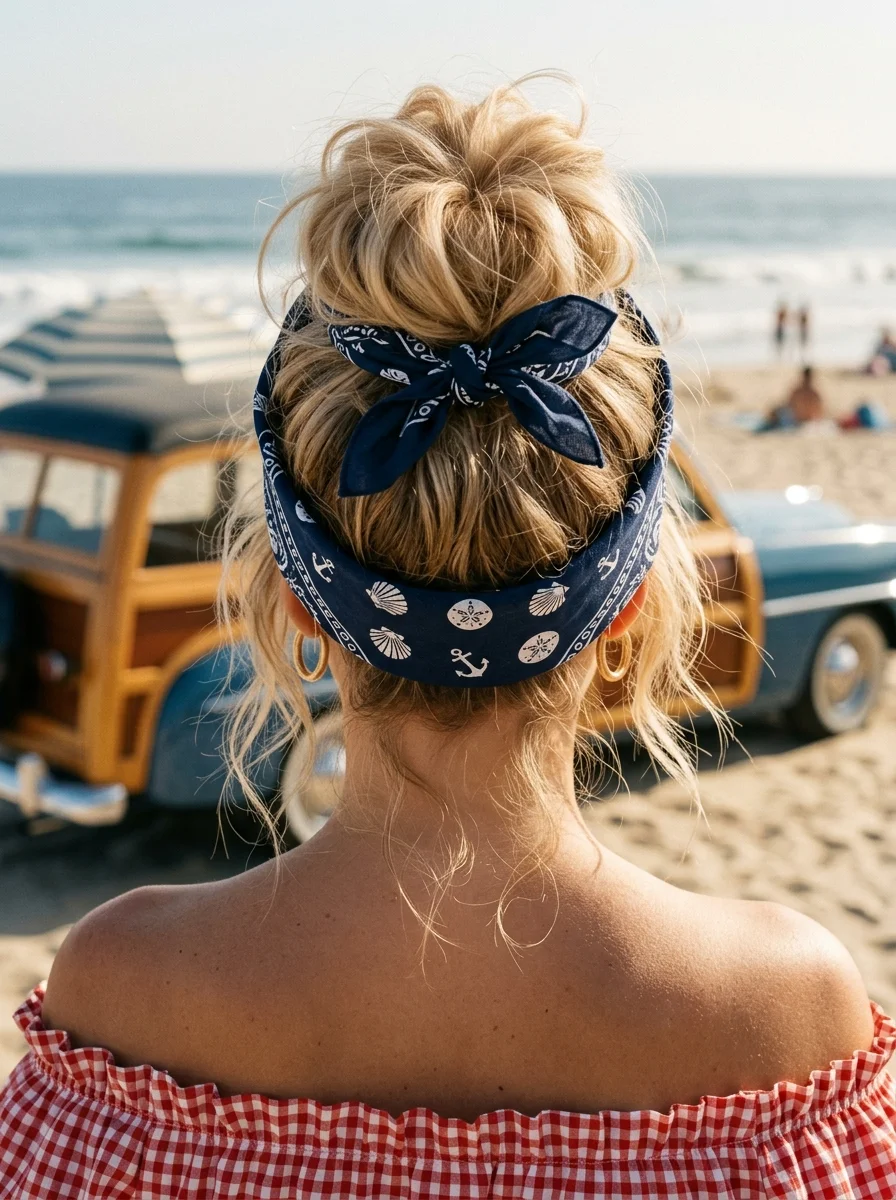
The overview: Golden blonde hair swept into a messy bun, then wrapped with a blue and white nautical bandana. It's classic Americana meets beach vacation. The bandana keeps your hair off your neck while adding a pop of color that photographs beautifully against sand and sea. The messy bun itself is intentionally undone — no perfection required.
This is the hairstyle that says "I'm on vacation and I don't care" — but in the best possible way. The nautical bandana does double duty: it's functional (keeps hair contained) and decorative (adds a thematic, retro-inspired touch that works perfectly at the beach).
Why this look is popular: The messy bun is already the universal vacation hairstyle. Adding a nautical bandana elevates it from "lazy" to "stylishly casual." The blue and white pattern pops against blonde hair and creates a focal point that draws the eye. Works on all hair types — curly hair looks especially good because the natural texture adds volume to the bun.
Where this look is suitable: Casual beach days, boardwalk strolls, seaside picnics, boat trips. The nautical theme makes it particularly appropriate for anything involving water. Not ideal for formal occasions.
Step by step:
- Prep with texture. Spray dry hair with sea salt spray or texturizing spray for grip and volume.
- Gather loosely. Pull all your hair into a high ponytail but don't pull it all the way through on the last wrap — leave it in a loop for a messy bun effect.
- Arrange the bun. Pull and adjust the loop to create the shape you want. Pull out a few pieces around the face and ears.
- Secure with pins. Use bobby pins to anchor the bun in place. Don't worry about perfection — the messier, the better.
- Fold the bandana. Fold a square bandana into a long strip about 2 inches wide.
- Wrap and tie. Place the center of the strip at the front of your head, wrap it back around the bun, and tie it at the nape. Let the ends hang loose or tuck them in.
Tips and tricks: The bandana stays in place better if you fold it into a triangle first, then roll it into a strip. This creates a thicker, more structured band that grips the hair. For finer hair, tease the crown slightly before gathering the bun — it adds volume that makes the whole style look fuller. Choose a bandana with a classic nautical print (anchors, stripes, or sailboats) for the most authentic beach vibe.
27 Gorgeous Mint Green Nails That Are Popular Right Now (2026)
8.Beachy Waves with Delicate Charm
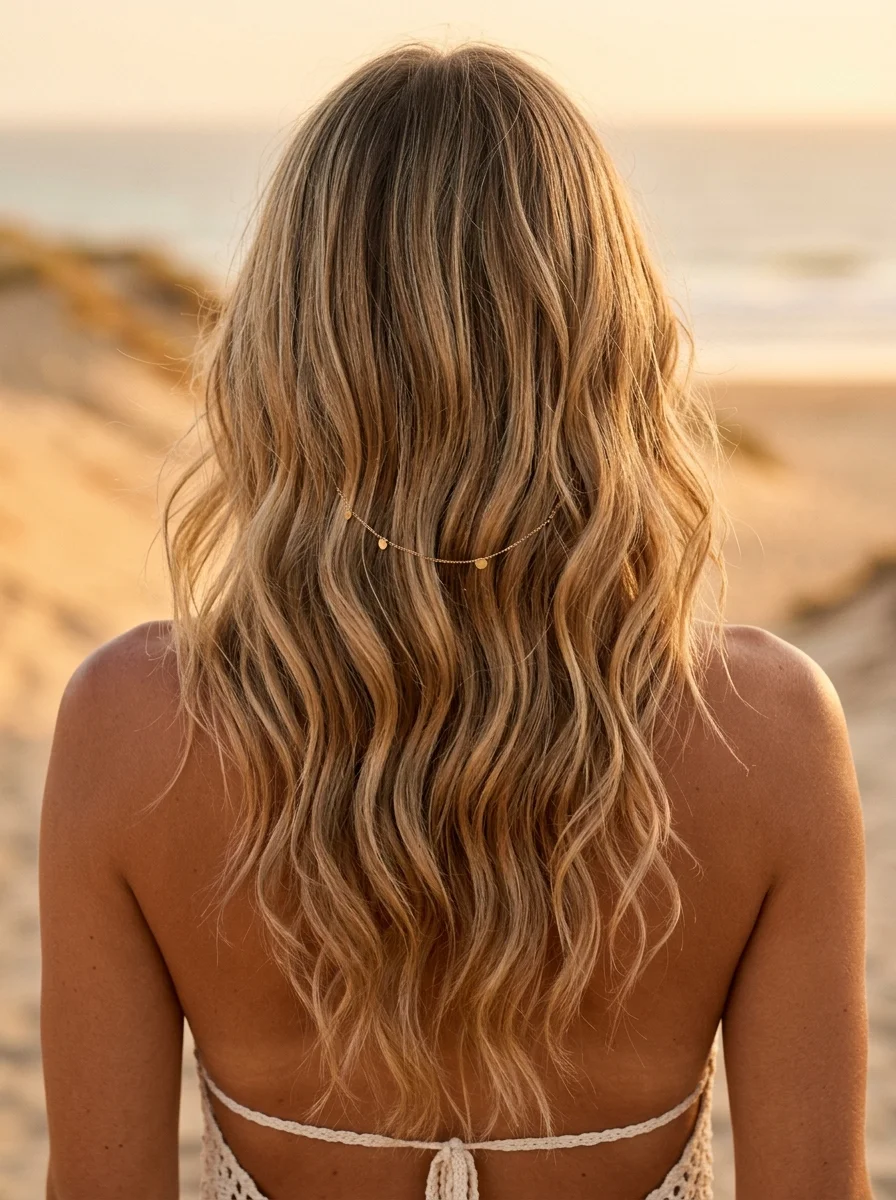
The overview: Golden blonde loose waves accented with a thin gold chain hair chain that catches the light. It's bohemian beach goddess energy without the commitment of permanent accessories. The chain moves with you and catches every ray of sunlight, creating a subtle sparkle that looks expensive but costs almost nothing.
Hair chains are the accessory equivalent of a good pair of earrings — they elevate a simple look without overwhelming it. Against the golden blonde waves, the gold chain creates a tone-on-tone effect that looks rich and intentional. This is the hairstyle for people who want their hair to be part of the jewelry.
Why this look is popular: The hair chain trend has exploded because it's the easiest way to add glamour to beach hair without any styling skill. The waves provide the texture, the chain provides the sparkle, and together they create a look that photographs incredibly well in natural light. Works on any wavy or curly hair type — straight hair needs waves first.
Where this look is suitable: Bohemian beach settings, sunset photo sessions, music festivals near the coast, casual evenings out. The gold chain adds enough sparkle for evening but isn't so flashy that it looks out of place during the day.
Step by step:
- Create the waves. Use a 1.25-inch curling wand on 1-inch sections, leaving the last inch out. Break up with fingers for a natural look.
- Position the chain. Drape a thin gold chain across the top of your head, positioning it where you want it to sit. Common placements are across the crown or along the part.
- Secure the chain. Use small bobby pins that match your hair color to pin the chain in place at a few points. The pins should be hidden under the hair.
- Adjust the drape. Let the chain hang with a slight curve rather than pulling it tight. It should look like it's floating on the hair.
- Blend with waves. Pull a few wave sections over the chain at points to make it look woven in rather than sitting on top.
Tips and tricks: Choose a chain that's lightweight — heavy chains pull on the hair and slide around. Fine, delicate chains work best. If the chain keeps sliding, use a tiny dot of hair wax at each pinning point for extra grip. For a more bohemian look, use two chains of slightly different lengths layered together.
9.Boho Beach Braids with Shells
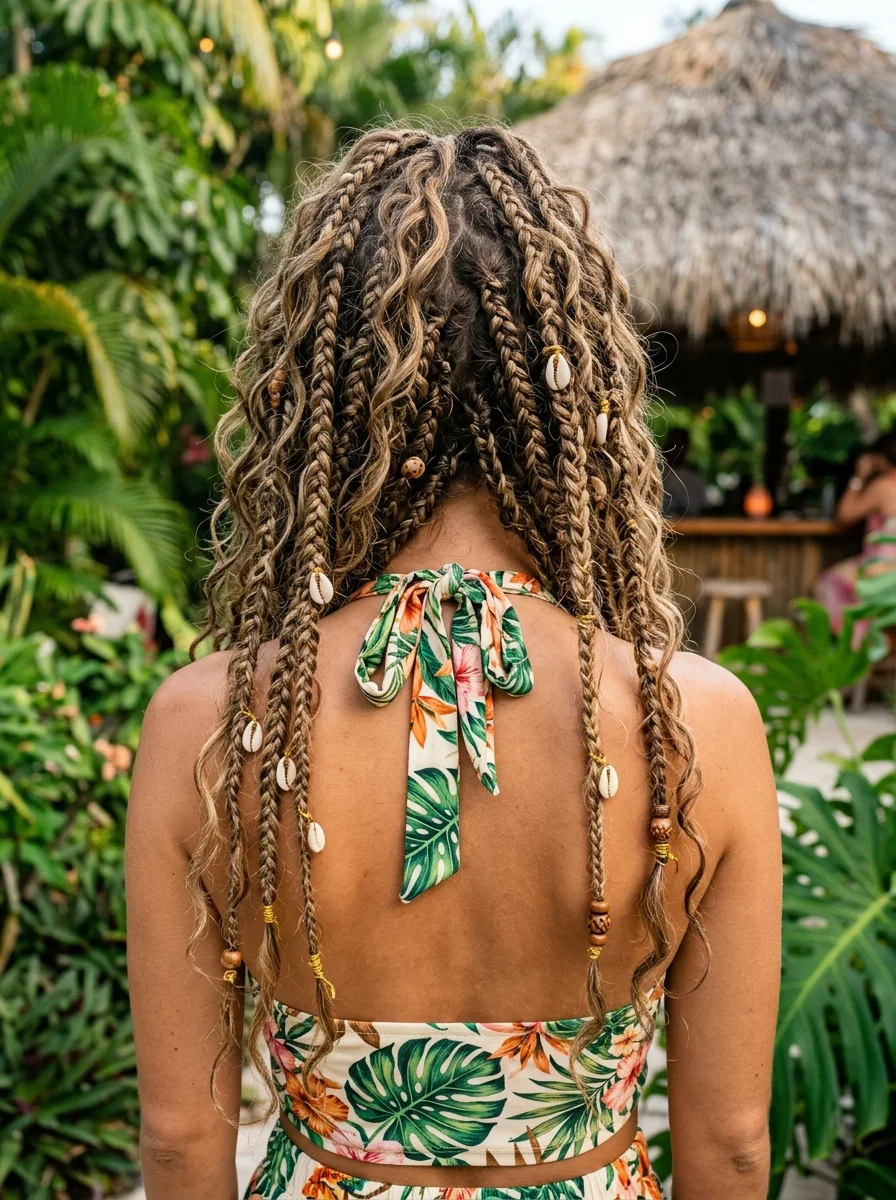
The overview: Bronde hair woven into box braids adorned with cowrie shells and gold thread accents. This is full tropical vacation mode — the kind of style that makes people ask where you got your hair done. Pair it with a linen cover-up and you're set for the whole trip. The shells add an organic, beach-found quality that makes the braids feel like they belong by the ocean.
Box braids with shell accents are the ultimate vacation hairstyle because they're protective, low-maintenance, and get better as the trip goes on. The slight frizz that develops after a few days actually enhances the bohemian vibe. The gold thread woven through adds a touch of luxury that keeps the look from feeling too casual.
Why this look is popular: Shell-adorned braids have a specific vacation appeal that regular braids don't. The cowrie shells are a cultural symbol that carries meaning beyond decoration, and the gold thread adds warmth that complements sun-kissed skin. The style is also incredibly practical — once installed, it lasts through swimming, sleeping, and everything in between.
Where this look is suitable: Full tropical vacations, beach festivals, island-hopping trips, pool parties. This is a committed vacation hairstyle — it's for when you want your hair to match the destination.
Step by step:
- Section the hair. Create clean, even sections using a rat-tail comb. Square or diamond-shaped sections work best for box braids.
- Start braiding. Take a section and divide it into three equal parts. Braid normally, keeping consistent tension. Add gold thread by laying it alongside one strand and braiding it in.
- Thread shells. Before you finish braiding, thread a cowrie shell onto one strand by sliding it up to the desired position. Continue braiding past it to secure.
- Secure the end. Tie off each braid with a small clear elastic. Dip the ends in hot water for a sealed, polished finish if using synthetic hair.
- Repeat across the head. Work section by section until all hair is braided. Alternate shell placement for a natural, organic look.
- Arrange and style. Pull braids to one side, leave them loose, or half-up — whatever suits the moment.
Tips and tricks: Pre-sectioning and clipping each section before you start braiding saves significant time and creates cleaner results. The gold thread should be cut twice the length of each braid — it shortens as you weave it in. If you're new to box braids, start with the back sections where mistakes are less visible. The shells stay more secure if you add a tiny dot of clear nail polish at the thread wrap.
34 Stunning Summer First Date Hairstyles for 2026 💕☀️
10.Bohemian Beach Braid Crown with Daisy Accents
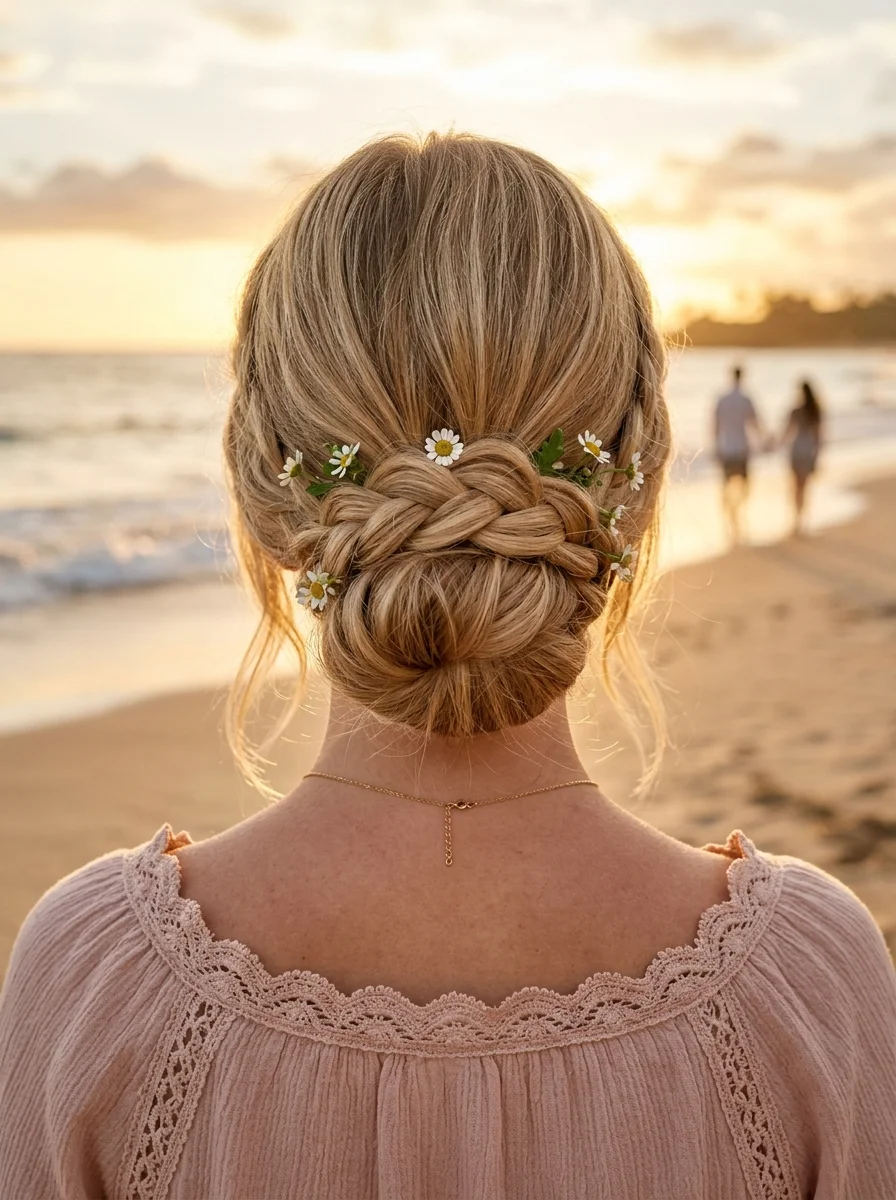
The overview: Honey blonde hair braided into a crown bun and dotted with small white daisies. It's romantic without being fussy — ideal for that sunset walk along the shore where you want to look effortlessly beautiful. The daisies add a fresh, youthful touch that feels like spring meets summer. The braided crown itself is elegant and timeless, but the flowers keep it from looking too serious.
This is the hairstyle that works whether you're walking on the beach, sitting at a seaside café, or watching the sunset from a cliff. The daisies catch the golden hour light beautifully, and the braided crown keeps everything secure against the ocean breeze. It's practical and pretty — the two things vacation hair needs to be.
Why this look is popular: The combination of braids and fresh flowers is timeless for a reason — it works. The daisies specifically feel casual and cheerful, unlike roses which can read too formal. The honey blonde color adds warmth that complements the white petals. Works best on medium to thick hair that can support a braided crown without sagging.
Where this look is suitable: Romantic sunsets, seaside strolls, outdoor dining, coastal garden parties. Too decorated for a swim day, but perfect for any beach moment where you want to feel beautiful.
Step by step:
- Prep the hair. Apply a light texturizing spray to dry hair for grip. Second-day hair holds braids better.
- Create a deep side part. This gives the braid more dimension and a more romantic silhouette than a center part.
- Dutch braid the crown. Starting at the heavy side of the part, Dutch braid along the hairline, adding hair as you go. Continue around the head until you reach the nape.
- Gather the bun. Collect all remaining hair at the nape and twist into a low bun. Tuck the braid tail into the bun and pin securely.
- Add daisies. Pin small white daisies along the braid at irregular intervals. Use 5-7 flowers for a natural look.
- Softening touches. Pull a few thin pieces around your face and ears for a softer, more romantic finish.
Tips and tricks: Use fresh daisies if you can — they last several hours out of water and look more natural than silk alternatives. If using silk flowers, choose ones with wire stems that can be bent to grip the braid. The deep side part is key for the romantic silhouette — a center part makes this look too symmetrical and formal. A light-hold hairspray keeps the braid intact without making it look stiff.
11.Boho Beach Braid with Shell Charms
The overview: Caramel blonde hair styled into a loose side braid, then decorated with cowrie shells and gold rings threaded through the plaits. It's the definition of boho beach vibes — relaxed, a little wild, and perfectly suited for salt air and sandy toes. The side braid keeps things casual while the shell charms add a collected-from-the-shore quality.
This is the hairstyle that makes you feel like a beach wanderer who just happens to look incredible. The loose braid has that perfectly imperfect quality that looks better with a little wind and humidity. The shells and rings are the details that make people stop and look twice.
Why this look is popular: The side braid is universally flattering — it draws the eye along the neckline and creates a graceful silhouette. Adding shell charms and gold rings transforms it from "simple braid" to "curated bohemian statement." Works on all hair types, though thicker hair creates a fuller, more dramatic braid.
Where this look is suitable: Boho beach settings, casual coastal outings, beach markets, island exploration. This is vacation hair at its most free-spirited — perfect for wandering and exploring.
Step by step:
- Texturize first. Spray with sea salt spray or texturizing spray for grip and that lived-in beach texture.
- Sweep to one side. Brush all hair over one shoulder. The side you choose depends on your part and what feels natural.
- Braid loosely. Create a simple three-strand braid, keeping the tension very relaxed. You want it to look undone, not tight.
- Secure the end. Tie off with a clear elastic that won't show against your hair color.
- Pancake the braid. Gently pull the outer loops of each section to widen and flatten the braid. This creates the full, relaxed look.
- Add charms. Thread cowrie shells and gold rings through the braid at irregular intervals. Space them out — less is more.
Tips and tricks: The pancake technique is everything here. Without it, the braid looks thin and basic. Pull gently — you want width, not a completely flat braid. For the shells, use ones with a natural opening that can grip the hair, or attach them to small hair pins for easier placement. The gold rings slide on easier if you slightly widen them with pliers first.
26 Stunning Sunflower Floral Nails for Spring & Summer 2026 🌻
12.Boho Beach Goddess Crown Braid
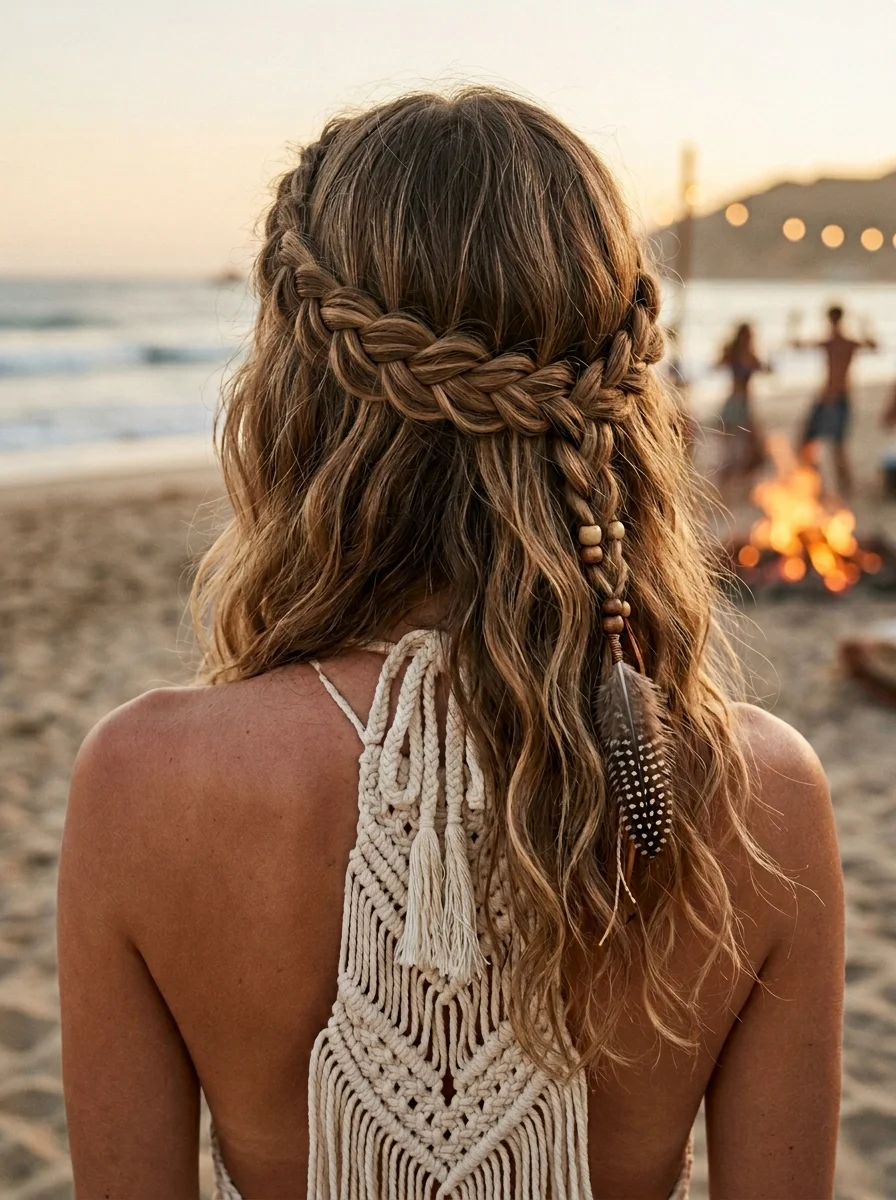
The overview: Brunette and blonde balayage woven into a thick crown braid, accented with wooden beads and a small feather. It's earthy, grounded, and perfect for a beach bonfire where the flames dance and the waves crash in the background. The balayage adds dimension that makes the braid pattern visually striking — the light and dark sections create natural contrast within the plaits.
This is the hairstyle that makes you feel like you belong in a nature documentary — but the glamorous kind. The wooden beads and feather add organic texture that complements the beach setting without looking costumey. The crown braid itself is regal and timeless, grounding the bohemian accessories in classic elegance.
Why this look is popular: The crown braid is one of the few updos that looks equally good from the front, side, and back. The balayage coloring makes the braid pattern more visible and dramatic than solid-color hair. Adding natural materials like wooden beads and feathers creates a specific earthy-bohemian aesthetic that photographs beautifully in natural settings.
Where this look is suitable: Beach bonfires, outdoor concerts near the coast, bohemian-themed events, nature-inspired photo shoots. This is the hairstyle for settings that call for earthy elegance.
Step by step:
- Prep for grip. Apply texturizing mousse to damp hair and blow-dry. The texture helps the braid hold without slipping.
- Create a deep side part. This gives the crown braid a more organic, less symmetrical feel.
- Dutch braid the crown. Starting at the heavier side of the part, Dutch braid along the hairline, adding hair as you go. The balayage will create natural color variation within the braid.
- Continue around. Braid all the way around the head until you reach the starting point. Tuck the tail under the beginning of the braid and pin.
- Gather remaining hair. Any hair not incorporated into the braid can be gathered into a small bun at the nape and pinned.
- Add beads and feather. Thread wooden beads onto the braid by slightly widening the braid loops. Tuck a small feather behind the braid at one temple.
Tips and tricks: The balayage is what makes this look work — without the color dimension, the braid pattern looks flat. If your hair is solid color, add a few clip-in highlights before braiding for the same effect. The wooden beads stay more secure if you thread them onto a small section of hair and then incorporate that section into the braid. Keep the feather small — a large feather looks costume-y.
13.Beachy Waves with a Chic Hair Clip Accent
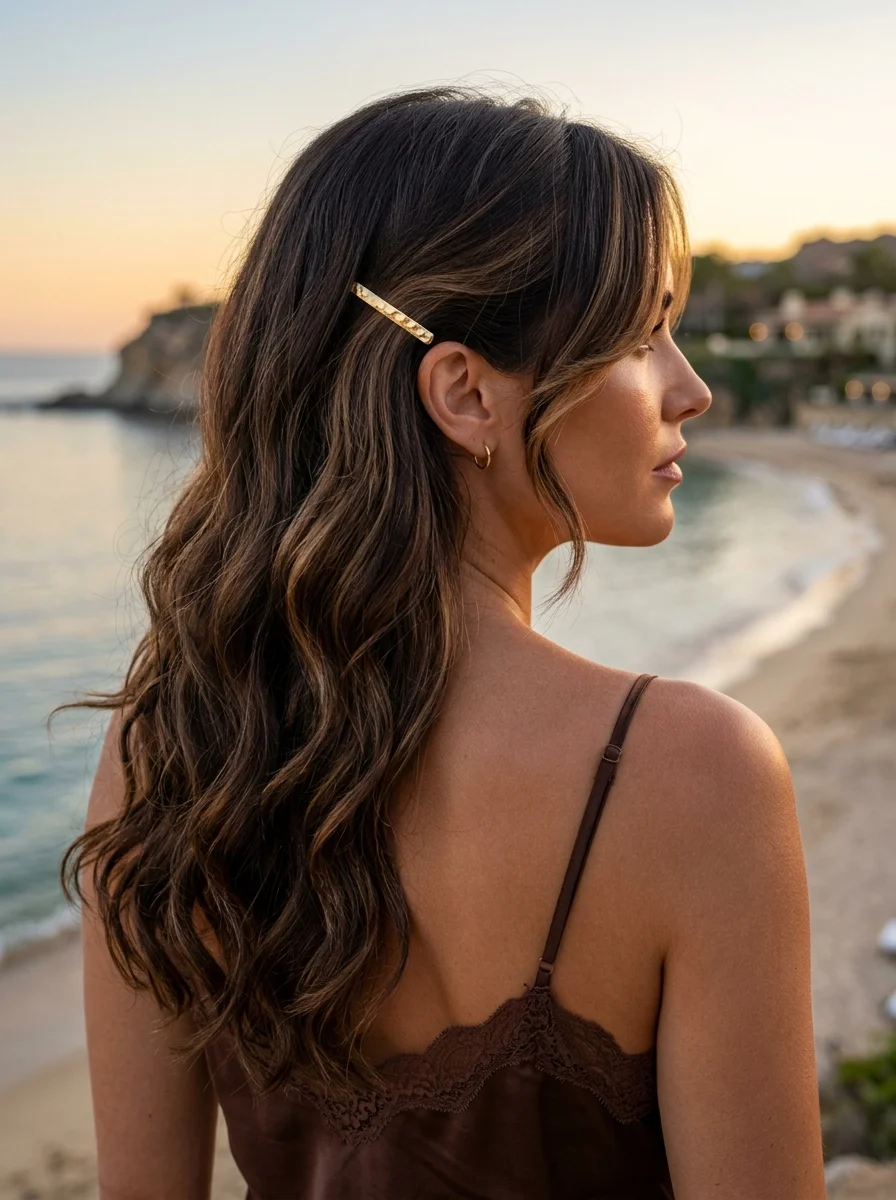
The overview: Dark brunette waves swept to one side and secured with a sleek gold barrette. The contrast between the deep hair color and the bright gold is striking without being loud. It's the effortless sunset look that works for both day and night — the barrette catches the last rays of light while the waves frame your face.
This is proof that a single accessory can transform a hairstyle. The waves on their own are beautiful, but the gold barrette turns them into something deliberate. It's minimal effort with maximum impact — you literally just clip it in and go. The dark hair makes the gold pop in a way that lighter hair colors can't achieve.
Why this look is popular: The single-barrette trend works because it's the easiest way to add polish to beach waves. The gold-on-brunette contrast is particularly striking — it reads as elegant without trying. Works on any wavy hair type, though the waves need enough texture to hold the clip in place without slipping.
Where this look is suitable: Sunset dinners, evening beach walks, coastal restaurants, date nights. The gold barrette elevates the waves enough for evening while the tousled texture keeps it from looking too formal.
Step by step:
- Create the waves. Use a 1.25-inch curling wand on 1-inch sections, leaving the ends out for a modern finish. Break up with fingers.
- Add texture. Spray with a light texturizing spray for that lived-in, beachy quality.
- Sweep to one side. Brush or finger-comb all the hair to one side, creating a deep side part.
- Position the barrette. Place the gold barrette above one ear, securing the swept section. The barrette should sit flat against the head.
- Adjust the waves. Pull a few pieces forward around the face and rearrange the waves so they fall naturally around the barrette.
Tips and tricks: The barrette placement matters — too high and it looks awkward, too low and it doesn't hold. Position it right at the point where the swept section naturally wants to sit. For extra hold, criss-cross two bobby pins underneath the barrette before clipping it on. The gold finish photographs best in warm, natural light — golden hour is this hairstyle's best friend.
31 Stunning Summer Birthday Party Hairstyles for 2026 🎂☀️
14.Bubble Braids with Pastel Elastics
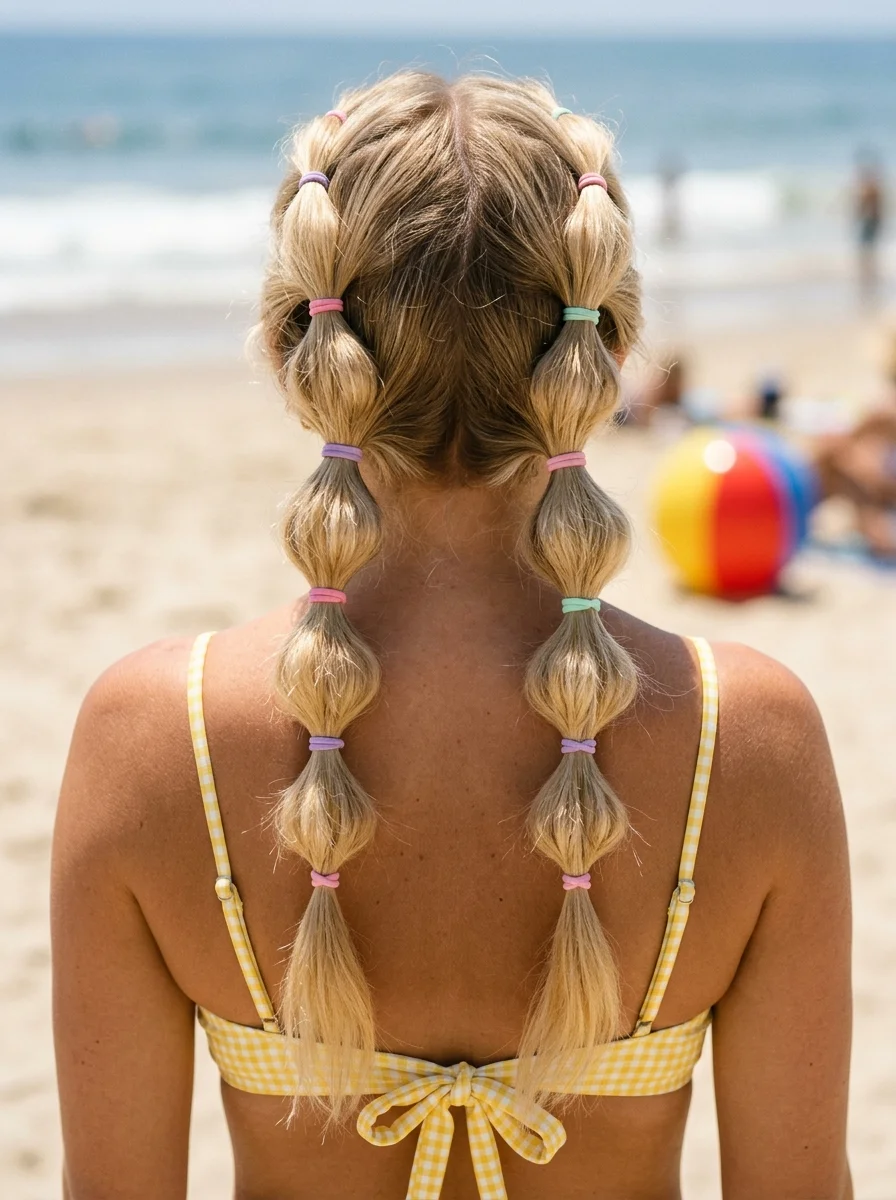
The overview: Platinum blonde hair divided into double bubble braids, each section secured with pastel-colored elastics. It's playful, fun, and perfect for that pool party where you want to stand out. The pastels add a whimsical touch that feels totally vacation-appropriate. Against the platinum blonde, the soft pinks, lavenders, and mints create a candy-colored effect that's impossible to ignore.
Bubble braids are the easiest "braided" hairstyle that exists — you're literally just tying elastics at intervals and pulling the sections apart. No actual braiding skill required. The pastel elastics turn a basic technique into something that looks custom and considered. This is the hairstyle for people who want maximum visual impact with minimum effort.
Why this look is popular: Bubble braids look more complex than they are — most people assume they require braiding skill, but they don't. The pastel elastics add color without requiring colored hair, and the platinum blonde base makes every color pop. Works on any hair type and length from shoulder-length to very long.
Where this look is suitable: Pool parties, playful beach days, festival settings, anything that calls for fun, youthful energy. Not ideal for formal occasions, but perfect for anywhere you want your hair to be a conversation starter.
Step by step:
- Create a center part. Use the pointed end of a rat-tail comb for a clean, symmetrical line.
- Make two high ponytails. Gather each side into a ponytail at the crown. Secure tightly with clear elastics.
- Bubble the first ponytail. Tie a pastel elastic 2 inches down from the base. Gently pull the section between the two elastics to create a rounded bubble.
- Continue bubbling. Add elastics at 2-inch intervals down the length, alternating pastel colors. Pull each section apart as you go.
- Repeat on the other side. Match the bubble size and elastic spacing for symmetry.
- Adjust and fluff. Go back over each bubble and pull the edges gently to make them fuller and rounder.
Tips and tricks: Use clear elastics as a base first, then wrap the pastel ones over them for extra hold. Pastel elastics alone can slip on fine hair. The bubble size should be consistent — mark the elastic positions with small clips before you start to ensure even spacing. For extra volume, gently backcomb each section before adding the next elastic.
15.Beachy Waves Half-Up with a Butterfly Clip
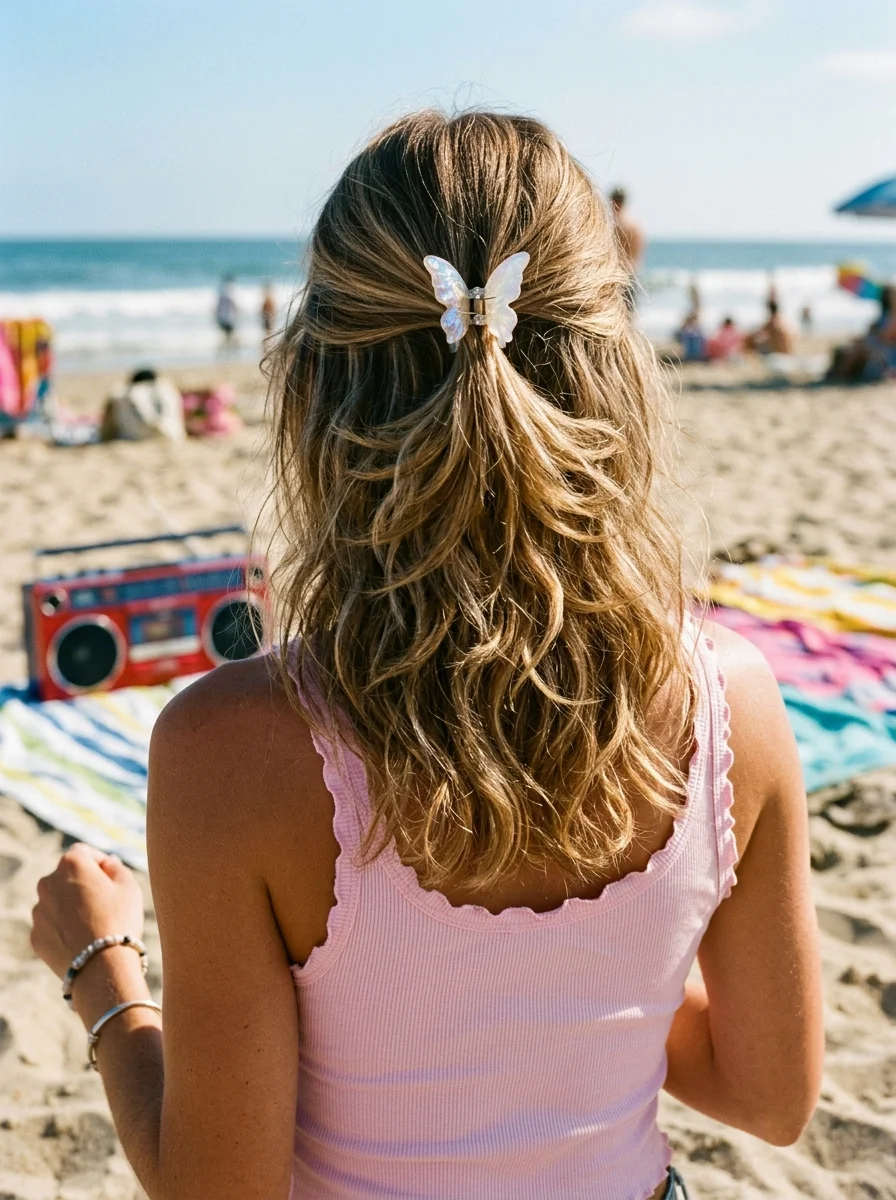
The overview: Caramel blonde waves pulled half-up and secured with a mother- of-pearl butterfly clip. The clip catches the light and adds a romantic, feminine touch to an already beautiful style. It's the kind of detail that makes people lean in and compliment your hair. The half-up style keeps hair off your face while the waves maintain that soft, beachy movement.
Butterfly clips are having a revival, and this is exactly why. They're decorative without being over-the-top, and the mother- of-pearl finish adds an iridescent quality that changes depending on the light. Against the caramel waves, it looks like a piece of the ocean decided to perch in your hair.
Why this look is popular: The half-up style is universally flattering — it opens up the face while maintaining the length and movement of the waves. The butterfly clip adds a focal point that's more interesting than a plain claw clip but less fussy than multiple accessories. Works on medium to long hair with natural or styled waves.
Where this look is suitable: Romantic beach settings, seaside dates, coastal walks, casual elegance occasions. The butterfly clip adds enough decoration for evening while the waves keep it relaxed enough for daytime.
Step by step:
- Create the waves. Use a 1.25-inch curling wand on 1-inch sections, leaving the ends out. Break up with fingers for a natural look.
- Section the top. From your temples, gather the top third of your hair. Keep it loose — tight gathering defeats the purpose.
- Twist slightly. Give the gathered section a gentle twist before securing. This adds dimension and helps the clip grip better.
- Clip it. Secure the gathered section with the butterfly clip at the back of your head. Position it so the wings sit flat and symmetrically.
- Adjust the waves. Pull the remaining waves forward over your shoulders and rearrange any pieces that got flattened during the half-up process.
Tips and tricks: Tease the crown area slightly before clipping for a softer, more lifted silhouette. The butterfly clip looks best when it's the only accessory — don't add earrings that compete with it. For finer hair, clip a small backcombed section underneath the gathered hair to create the illusion of volume. The mother-of-pearl finish catches warm light best — golden hour is the ideal time for this look.
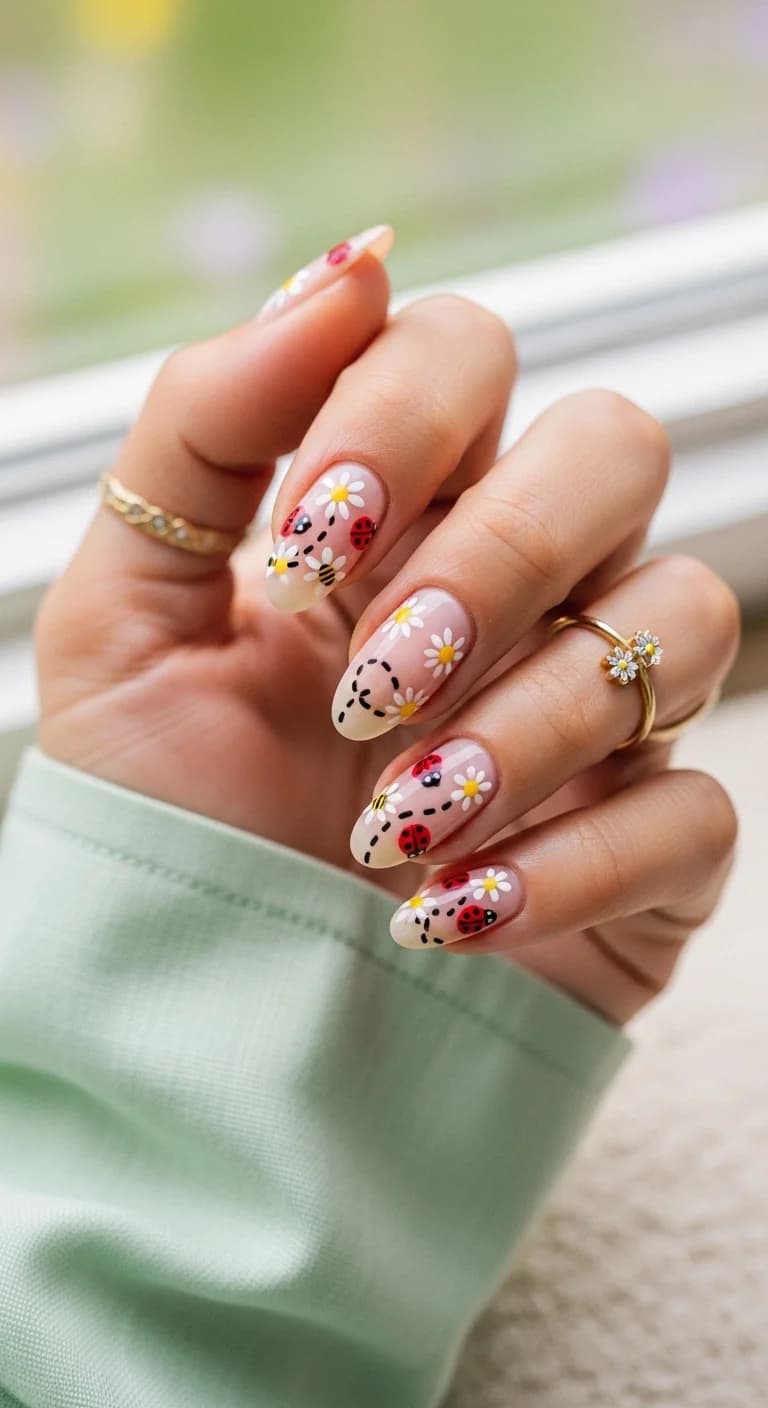
30 Cute Ladybug Nail Trends That Are Taking Over (2026)
16.Sunny Day Curls with a Retro Scarf Tie
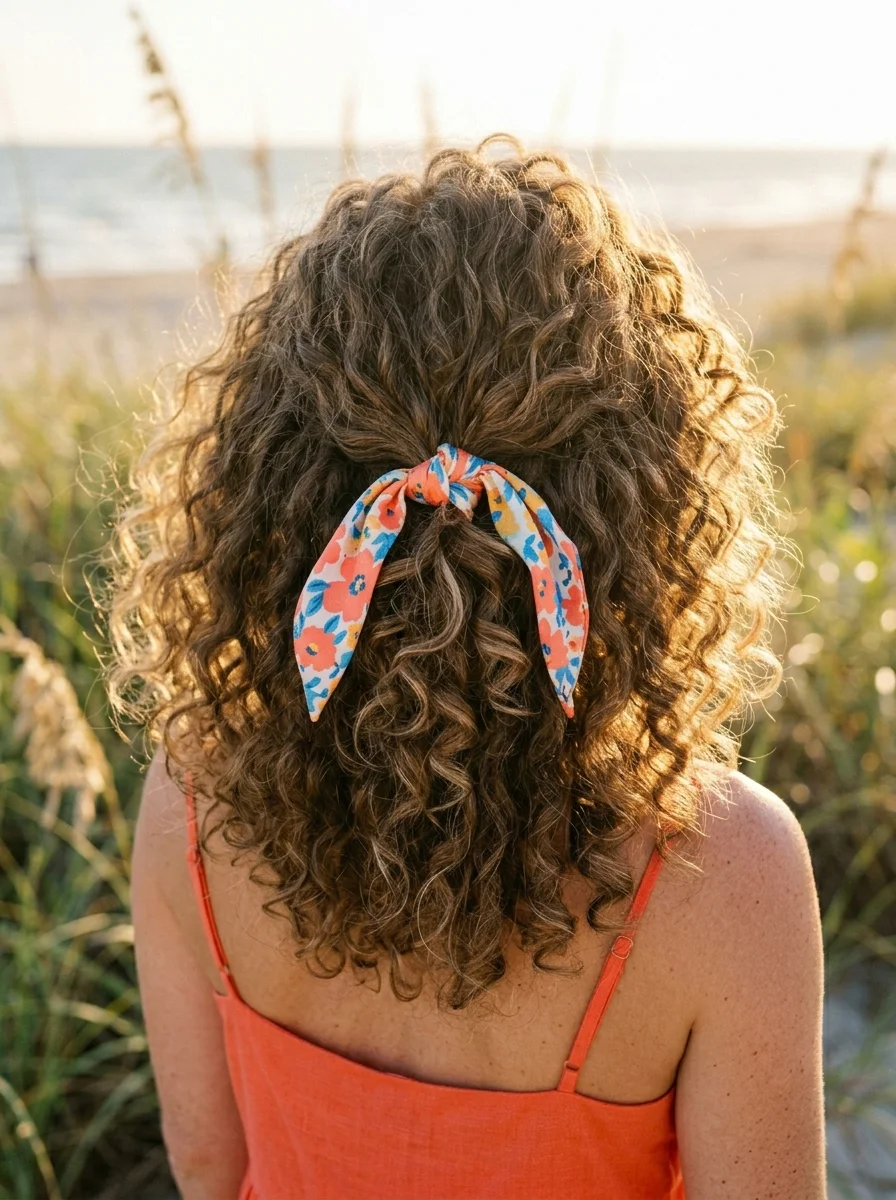
The overview: Dark brown natural 3B/3C curls framed with a coral-colored scarf tied at the nape. It's retro beach energy that celebrates your natural texture. The scarf keeps your curls in place while adding a vintage-inspired pop of color. The coral shade against the dark brown creates a warm contrast that looks incredible in sunlight.
This is the hairstyle that proves you don't need to straighten, smooth, or manipulate your curls to look amazing at the beach. The scarf works with the natural texture, not against it. It's a celebration of what your hair already does — and the retro tie adds a stylistic element that feels intentional and curated.
Why this look is popular: The natural hair movement has made this style increasingly popular because it embraces texture instead of fighting it. The scarf adds color and personality without requiring heat styling or chemical treatments. The 3B/3C curl pattern provides natural volume and shape that makes the whole look feel complete. Works best on naturally curly hair — straightened hair won't hold the same shape.
Where this look is suitable: Retro-themed beach outings, boardwalk walks, vintage-inspired photo shoots, casual coastal days. The coral scarf adds enough color for daytime, and the curls hold their shape into evening.
Step by step:
- Define curls. Apply curl-defining cream to damp hair, section by section. Scrunch upward and air-dry or diffuse on low heat.
- Volume at the roots. Once dry, use a pick or wide-tooth comb to lift the roots for maximum volume. Don't comb through the curls themselves.
- Fold the scarf. Fold a square scarf into a triangle, then roll it into a long band about 2-3 inches wide.
- Position the scarf. Place the center of the band at your forehead, right at the hairline. Wrap it back along the sides.
- Tie at the nape. Cross the ends at the back of your head and tie them in a knot or bow. Let the ends hang loose or tuck them under.
- Arrange the curls. Pull the curls forward and over the scarf, arranging them for maximum volume and shape.
Tips and tricks: The scarf stays in place better if you fold it into a triangle first, then roll it — this creates a thicker band with more grip. For extra curl definition, apply a gel before the cream and scrunch harder. The coral color specifically works best against dark brown hair — it creates a warm, sun-kissed contrast. Avoid satin scarves for this look; cotton or linen grip the hair better and stay in place.
17.Beachy Blonde Bob with a Chic Clip
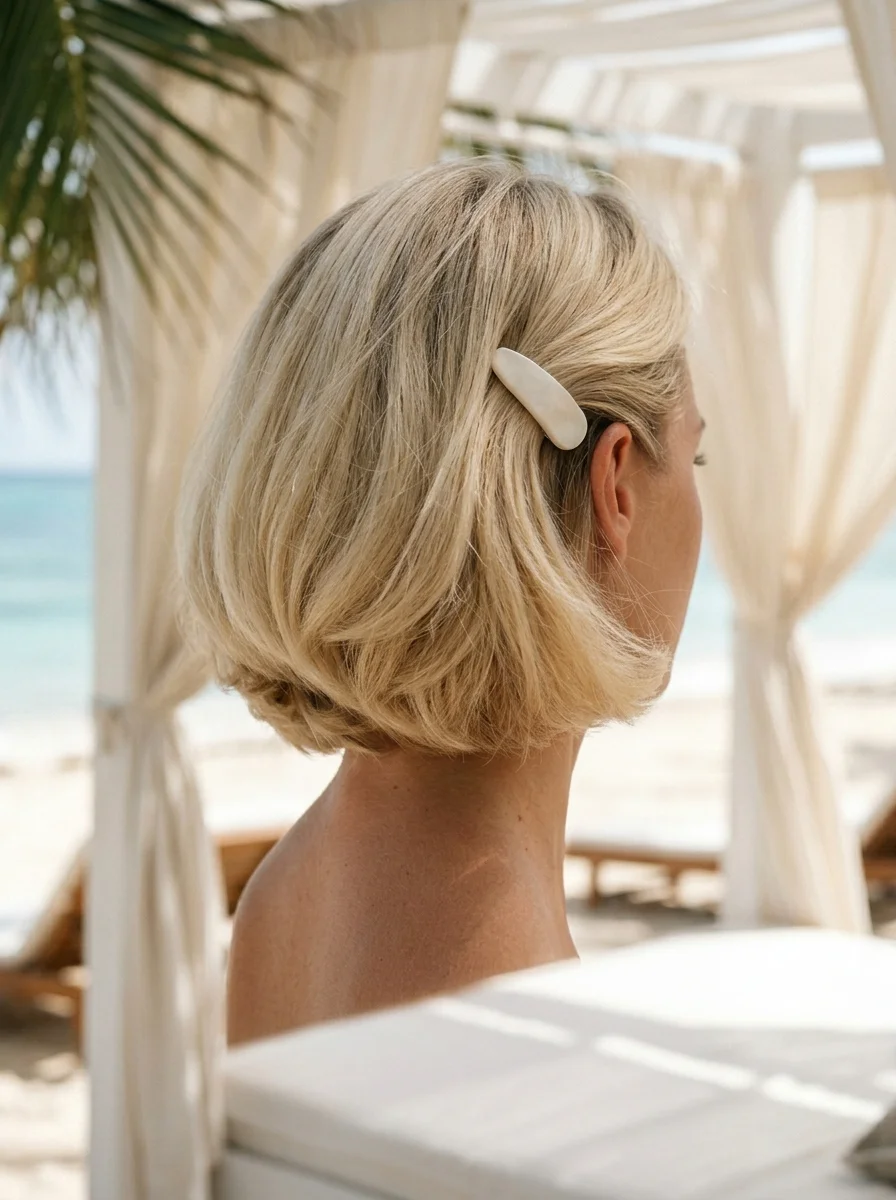
The overview: A platinum blonde bob swept to one side with a cream-colored clip holding everything in place. It's sophisticated beach club energy — the kind of look that works for brunch, shopping, and sunset cocktails. Clean, polished, and effortlessly chic. The bob length keeps things modern while the side sweep adds movement and softness.
Short hair at the beach is underrated. It dries fast, stays out of your face, and requires almost no maintenance. The platinum blonde color catches light like nothing else, and the cream clip adds a neutral accent that complements without competing. This is minimalist beach elegance.
Why this look is popular: The bob is the hairstyle that never goes out of style. The platinum blonde color makes it feel current and bold, while the side sweep adds a feminine touch. The cream clip provides a neutral accent that works with any outfit. Best on straight to wavy hair — very curly hair won't achieve the same sleek bob silhouette without significant heat styling.
Where this look is suitable: Sophisticated beach clubs, brunch spots, coastal shopping, sunset cocktail hours. This is the hairstyle for upscale casual settings where you want to look polished but not overdone.
Step by step:
- Smooth the hair. Apply a smoothing serum to damp hair and blow-dry with a round brush for a sleek finish.
- Create a deep side part. Use the pointed end of a comb for a precise line.
- Sweep to one side. Brush all the hair to one side, following the direction of the part.
- Add a slight wave. If hair is very straight, use a flat iron to create a subtle bend through the mid-lengths. You want movement, not curls.
- Clip it. Secure the swept section above one ear with the cream-colored clip. Position it so it sits flat and doesn't protrude.
- Finish with spray. A light mist of shine spray adds polish without weighing down the bob.
Tips and tricks: The bob needs regular trims to maintain its shape — split ends destroy the clean silhouette. The cream clip works because it's neutral — avoid clips with patterns or bright colors that compete with the platinum blonde. For extra volume at the crown, flip your head upside down and blast the roots with a blow dryer for 30 seconds before styling.
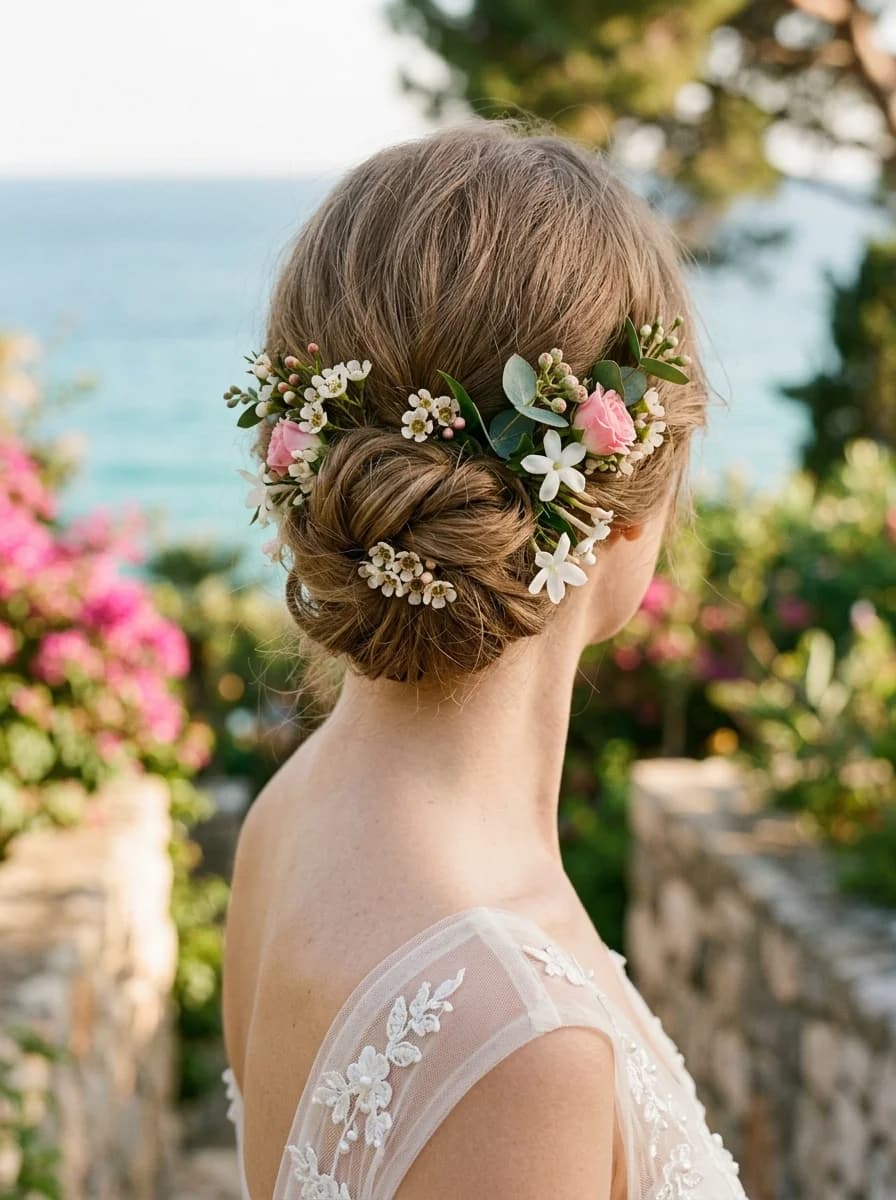
27 Stunning Beach Wedding Hairstyles for Brides & Family 2026 🌊💍
18.Effortless Half-Up Twist with a Chic Claw Clip
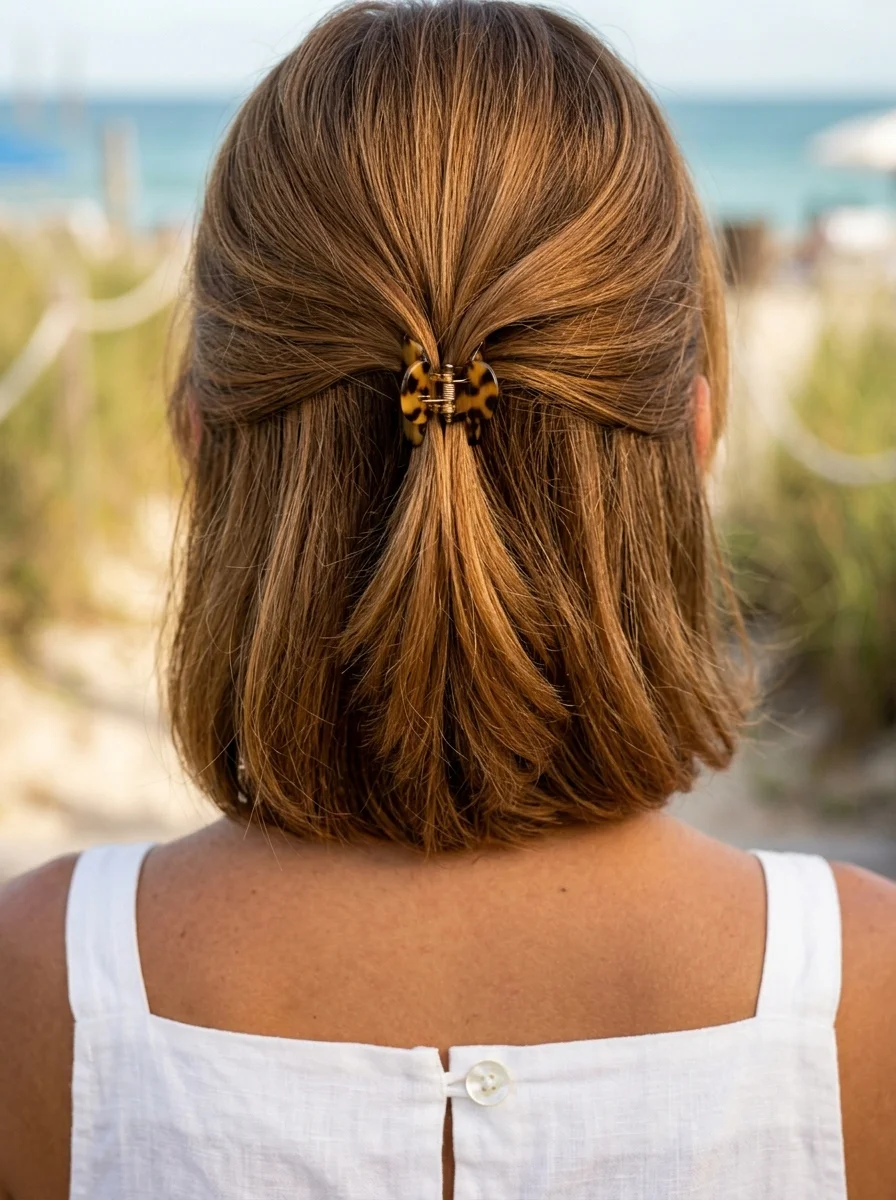
The overview: A warm brown bob twisted half-up and secured with a tortoiseshell claw clip. It's casual elegance at its finest — structured enough to look intentional but relaxed enough to feel vacation-ready. The twist adds dimension without complicating things. Against the warm brown, the tortoiseshell pattern creates a tone-on-tone effect that looks rich and cohesive.
This is the hairstyle for people who want to look put-together without spending more than three minutes on their hair. The half-up twist is the easiest way to get hair off your face while maintaining the bob's shape and movement. The claw clip does all the work — you just twist and clip.
Why this look is popular: The half-up twist on a bob is the perfect compromise between wearing it down and putting it all up. It keeps hair off the face while maintaining the bob's silhouette. The tortoiseshell clip adds a classic, warm accent that works with virtually any outfit. Works on bob to shoulder-length hair — longer hair may need a larger clip.
Where this look is suitable: Casual elegance occasions, resort dining, daytime exploring, beachside cafés. Relaxed enough for daytime but polished enough for a nice lunch.
Step by step:
- Start with dry hair. This works on second-day hair or freshly styled hair. The natural texture is fine.
- Section the top. From your temples, gather the top section of hair — about a third of what you have.
- Twist back. Give the gathered section a gentle twist as you pull it toward the back of your head. Don't twist too tight — keep it relaxed.
- Clip it. Secure the twisted section with the tortoiseshell claw clip. Position it at the back of your head where the twist naturally wants to sit.
- Adjust. Pull a few face-framing pieces loose and rearrange the remaining hair so it falls naturally.
Tips and tricks: The twist doesn't need to be perfect — the slightly undone quality is what makes it look effortless rather than stiff. For a bob that's too short for the clip to grip, use a smaller clip and position it higher on the head. A texturizing spray before twisting adds grip and helps the clip hold. The tortoiseshell pattern works with warm-toned hair colors especially well.
19.Double Dutch Braids with Pearl Pins
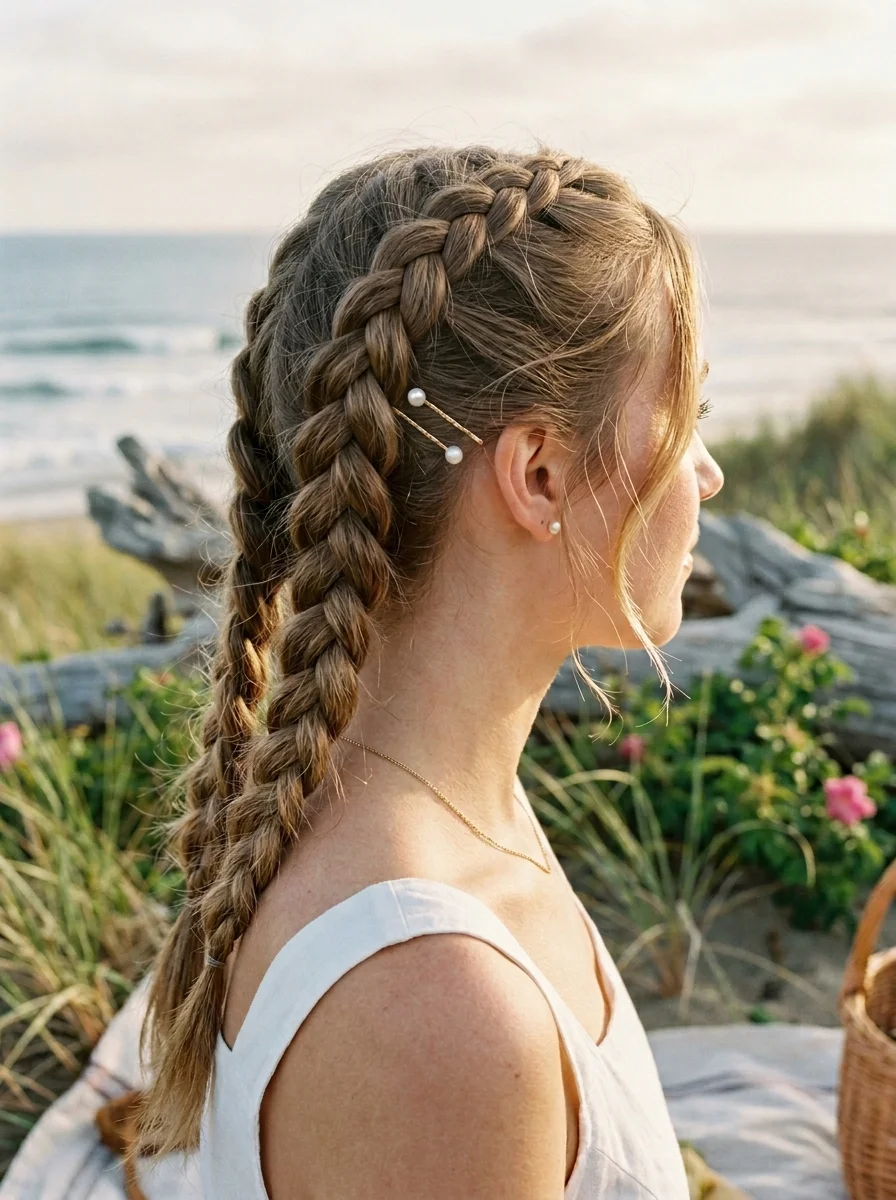
The overview: Light brown and blonde hair woven into neat Dutch braids, then dotted with small pearl pins along the part. It's romantic boho energy that works perfectly for a beach picnic or a coastal garden party. The pearls elevate the braids from casual to refined. The Dutch braid technique creates raised plaits that catch light and create visible texture against the scalp.
Double Dutch braids are one of those styles that look incredibly polished but are actually straightforward to execute. Adding pearl pins along the part is the detail that transforms them from "sporty braids" to "romantic braids." It's a small addition that changes the entire character of the style.
Why this look is popular: Dutch braids (the ones that pop outward) create a 3D texture that photographs better than flat French braids. Adding pearl pins creates scattered points of light that catch attention without overwhelming the design. Works on all hair types — curly hair holds the braids better, while straight hair creates cleaner, more defined plaits.
Where this look is suitable: Romantic beach picnics, coastal garden parties, bridal showers near the sea, elegant daytime events. The pearls add enough formality for special occasions while the braids keep it relaxed.
Step by step:
- Create a center part. Use the pointed end of a rat-tail comb for a razor-sharp line. Check it in a mirror from multiple angles.
- Dutch braid one side. Starting at the hairline, cross strands under (not over) to create the raised effect. Add small sections from each side as you braid backward.
- Continue to the nape. Once you pass the ear, keep braiding as a regular three-strand braid until you reach the ends. Secure with a clear elastic.
- Repeat on the other side. Mirror the first braid exactly — same tightness, same placement.
- Add pearl pins. Insert small pearl-topped pins along the center part at irregular intervals. Odd numbers (5 or 7) look more natural.
- Set with spray. A flexible-hold hairspray keeps the braids defined without making them stiff.
Tips and tricks: The most common mistake is uneven parting. Use the pointed end of a rat-tail comb and check your parts in a mirror from multiple angles before you start braiding. Second-day hair holds braids better than freshly washed hair — the natural oils provide grip. The pearl pins stay more secure if you push them through a small section of braided hair rather than just pinning them to the surface.
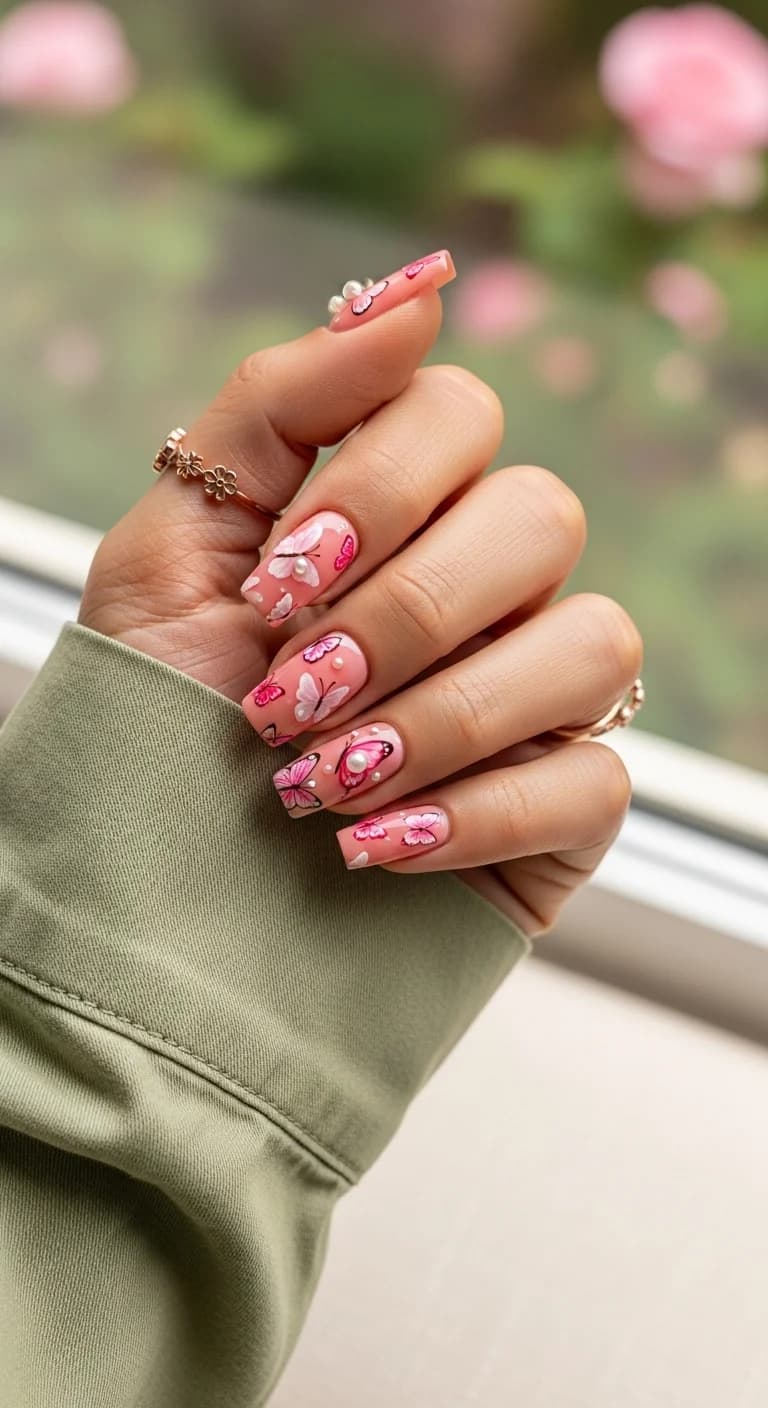
34 Stunning Summer Butterfly Nails for Women in 2026 🦋
20.Golden Beach Waves with Delicate Chain Accent
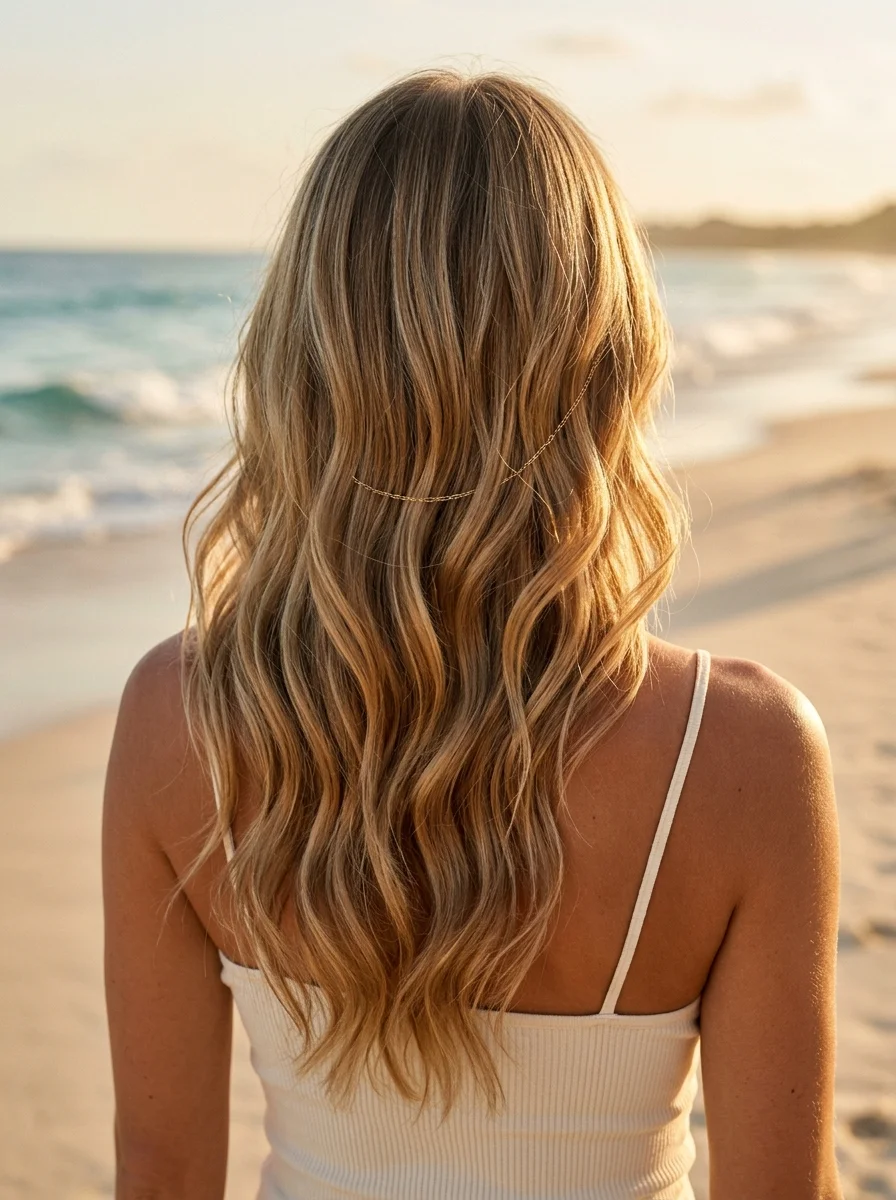
The overview: Golden blonde loose waves adorned with a thin gold chain that drapes across the crown. It catches the golden-hour light like nothing else — literally made for those sunset photos you'll post later. Simple, stunning, and unmistakably vacation hair. The chain sits on the hair like a delicate crown, adding sparkle without weight.
This is the hairstyle that makes golden hour look effortless. The gold-on-gold combination of the blonde waves and the chain creates a monochromatic luxury effect that looks expensive. It's the kind of detail that makes people ask "where did you get that?" — and the answer is that it costs about five dollars and takes thirty seconds to put in.
Why this look is popular: The gold chain accent creates a crown-like effect without the commitment of a headpiece. Against golden blonde hair, it creates a tone-on-tone shimmer that photographs beautifully in warm light. Works on any wavy or curly hair type — the waves provide the texture that makes the chain look woven in rather than sitting on top.
Where this look is suitable: Golden-hour sunset sessions, beach photo shoots, romantic evenings, vacation dinners. This is the hairstyle designed for warm, magical light.
Step by step:
- Create the waves. Use a 1.25-inch curling wand on 1-inch sections, leaving the ends out. Break up with fingers for a natural, undone look.
- Add texture. Spray with a light sea salt spray for that lived-in, beachy quality.
- Position the chain. Drape a thin gold chain across the top of your head, positioning it where you want it to sit. It should follow the natural curve of your head.
- Secure with pins. Use small bobby pins that match your hair color to pin the chain at a few points. The pins should be hidden under the hair.
- Blend with waves. Pull a few wave sections over the chain at points to make it look woven in rather than sitting on top.
- Adjust the drape. The chain should hang with a slight curve, not pulled tight. It should look like it's floating.
Tips and tricks: Choose a chain that's lightweight — heavy chains pull on the hair and slide around. The gold chain photographs best during golden hour, so time your styling accordingly. For a more dramatic look, use two chains of slightly different lengths layered together. If the chain keeps sliding, use a tiny dot of hair wax at each pinning point for extra grip.
21.Sleek Straight Beach Goddess
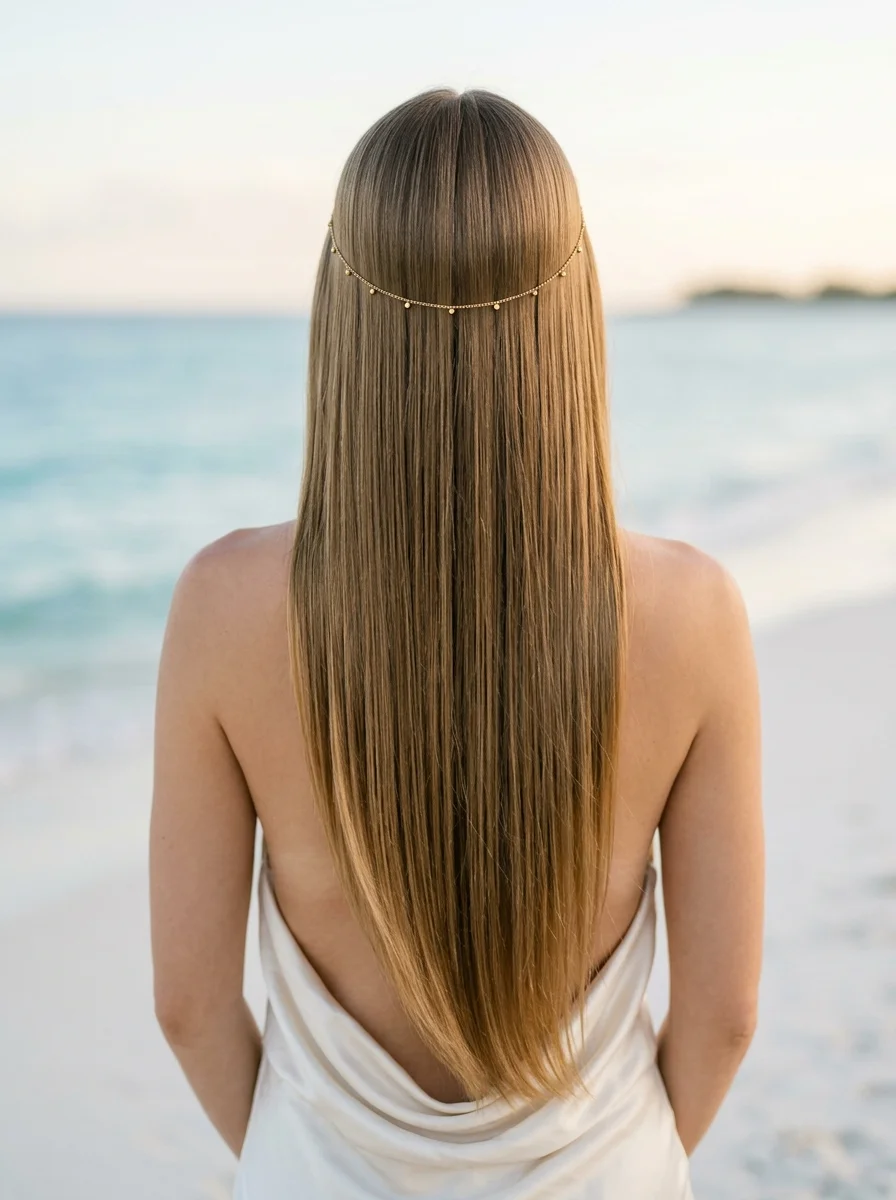
The overview: Honey blonde hair pressed ultra-sleek and straight, finished with a gold chain headpiece that sits across the forehead. It's the beach wedding look that commands attention without demanding it. Polished, powerful, and unforgettable. The straight finish catches light like a sheet of silk, and the headpiece adds a regal element that elevates the entire look.
Sleek straight hair at the beach is a power move. While everyone else is doing waves and braids, you're showing up with glass-like smoothness that stops people in their tracks. The gold headpiece is the detail that makes it feel like a deliberate statement rather than just straightened hair. This is beach glamour at its most refined.
Why this look is popular: The contrast between the relaxed beach setting and the ultra-sleek hair creates visual drama. The gold headpiece adds a focal point that transforms straight hair from simple to statement. Works best on straight to slightly wavy hair — very curly hair requires significant heat styling to achieve this level of smoothness.
Where this look is suitable: Beach weddings, formal seaside events, upscale resort dinners, special occasions. This is the hairstyle for when you want your hair to be the accessory.
Step by step:
- Start with clean, dry hair. Apply a heat protectant spray thoroughly — this level of straightening requires high heat.
- Blow-dry smooth. Using a boar bristle brush and a concentrator nozzle, blow-dry each section straight. Work from the nape upward.
- Flat iron in sections. Use a tourmaline or ceramic flat iron on small sections. Pass through each section once — multiple passes damage the hair.
- Add shine. Apply a lightweight shine serum through the ends. Avoid the roots — it makes them look greasy.
- Position the headpiece. Place the gold chain headpiece across your forehead and secure it at the back of your head with bobby pins.
- Final pass. Run the flat iron through the ends one more time to ensure the headpiece integrates smoothly with the straight hair.
Tips and tricks: The flat iron temperature matters — too low and the hair won't stay straight, too high and you risk damage. For most hair types, 300-350°F is ideal. Work in small sections and use clips to hold the rest out of the way. The headpiece should sit flat against the forehead — if it lifts, secure it with a tiny dot of spirit gum. A final mist of shine spray gives the glass-like finish that makes this look stunning.
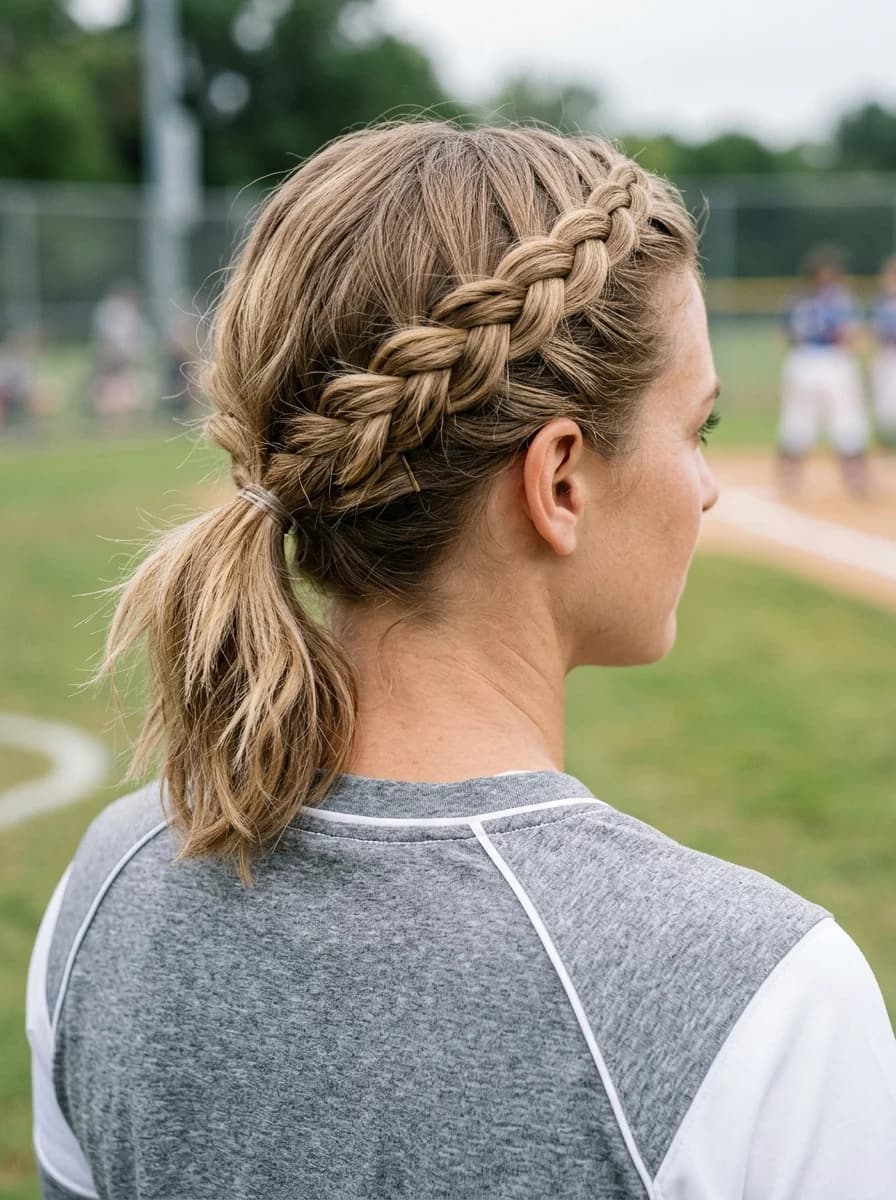
28 Stunning Softball Hairstyle Ideas with Braids for 2026 🥎✨
22.Double Twisted Buns with Gold Cuffs
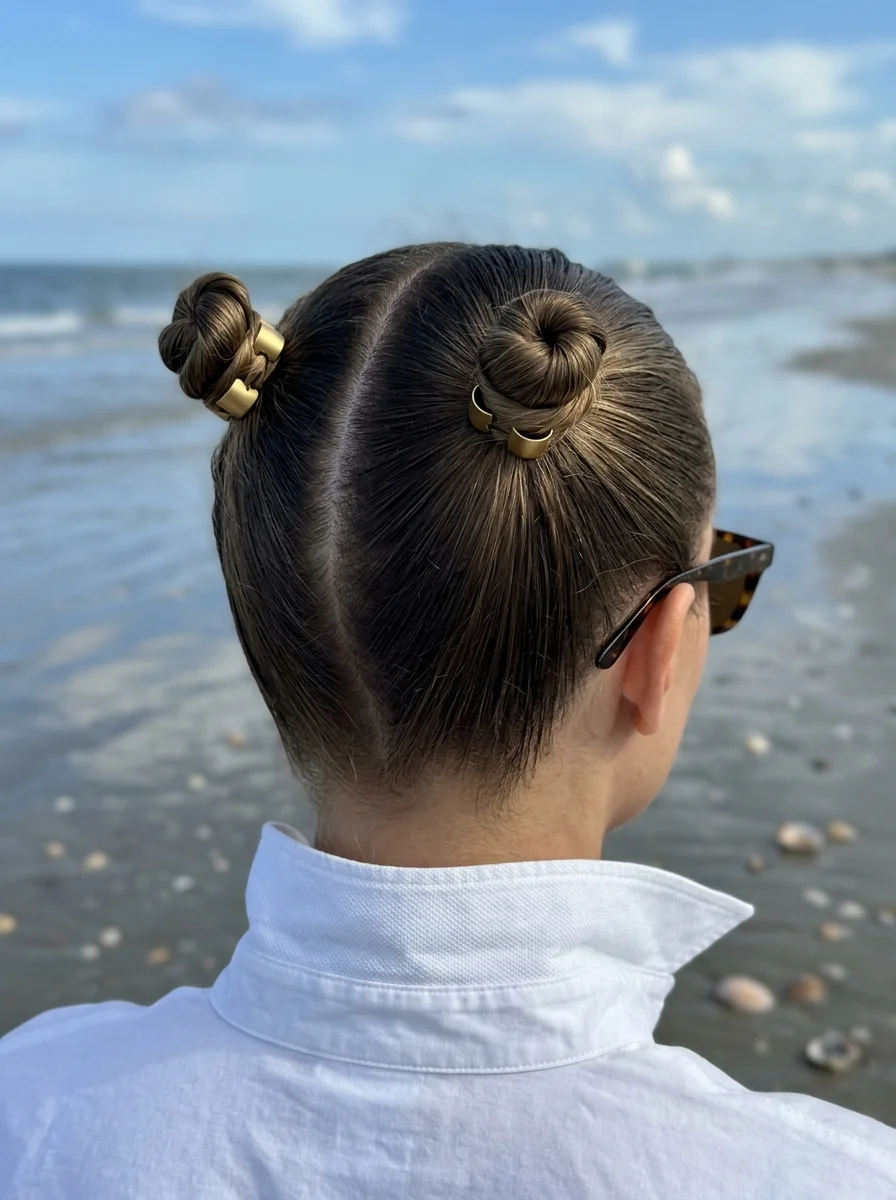
The overview: Dark brown hair parted down the middle, twisted on each side, and folded into two sleek buns secured with gold cuffs. It's active beach day energy — keep your hair completely out of your face while still looking intentional. The gold cuffs add just enough edge to keep it from looking like gym hair. The symmetry creates a clean, graphic silhouette.
This is the hairstyle for people who actually plan to do things at the beach — swimming, volleyball, surfing, hiking the coastal trail. The double buns keep everything secure and contained, while the gold cuffs signal that you put thought into this. It's functional and fashionable, which is the hardest balance to achieve in beach hairstyling.
Why this look is popular: Double buns are the practical answer to "how do I keep my hair out of my face without looking sloppy?" Twisting each section before folding into buns adds texture and visual interest that plain buns lack. The gold cuffs elevate the whole thing from athletic to fashionable. Works on all hair types — twisted buns are actually easier on textured hair because the twist grip better.
Where this look is suitable: Active beach days, water sports, beach volleyball, hiking, any activity where you need your hair completely contained. The gold cuffs make it polished enough for a post-activity lunch.
Step by step:
- Create a center part. From forehead to nape. Symmetry is key for this look.
- Create two seperate ponytails. On both the sides starting from the hairline to the nape.
- Twist one side. Starting from the ponytail, twist tightly down to the ends.
- Repeat on the other side. Mirror the first twisted braid exactly.
- Twist into buns. Wrap each twisted braid around its base to form a compact bun. The bun should sit at the back of the head, not on top.
- Secure with pins. Use bobby pins that match your hair color to anchor each bun from multiple angles.
- Add gold cuffs. Wrap gold metal cuffs around the base of each bun. They should sit snugly against the hair.
Tips and tricks: The braid tightness determines how secure the buns will be during activity. Braid tightly for sports, more loosely for casual wear. The gold cuffs stay more secure if you bend the prongs slightly after placing them — this creates a custom fit. For very active days, add a few extra bobby pins and a strong-hold hairspray before you start moving.
23.Sleek Twisted Chignon with Rope Accent
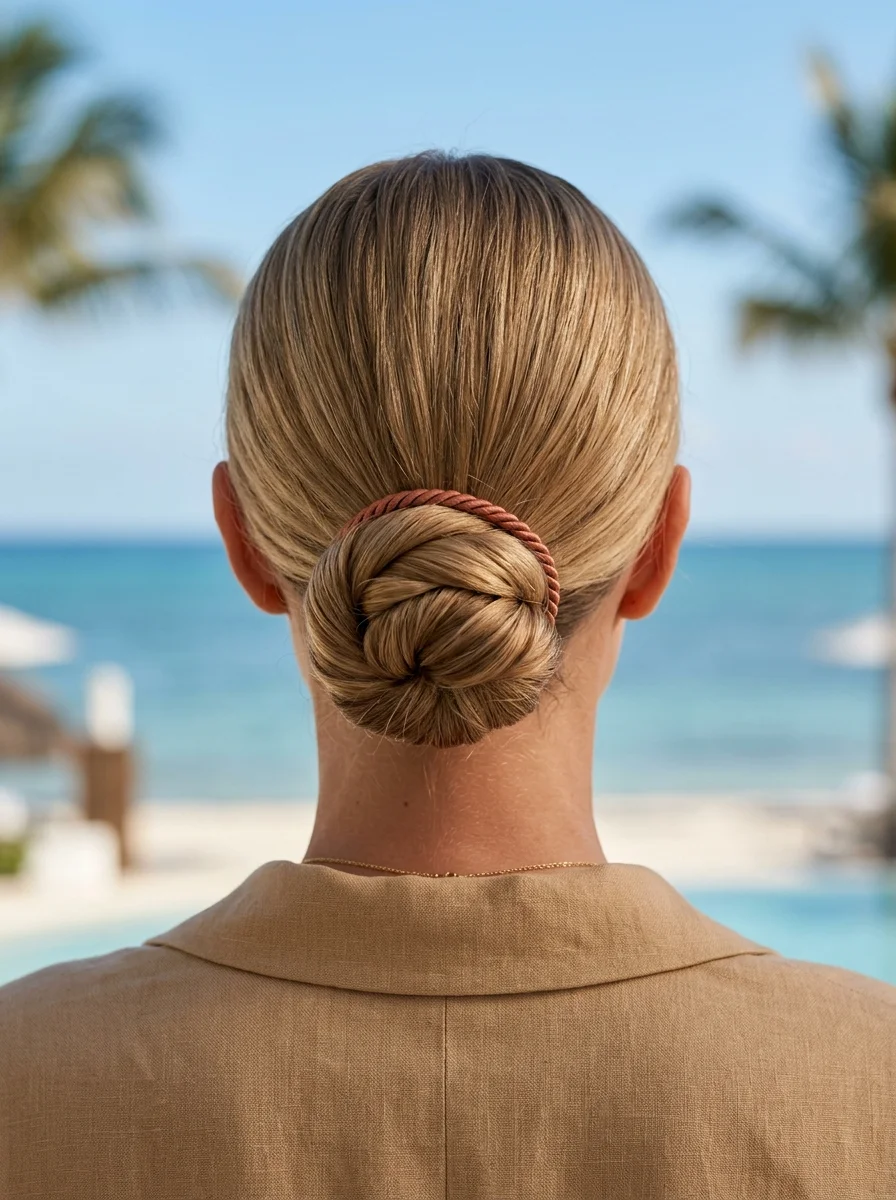
The overview: Multi-tonal blonde hair twisted into a low, sleek chignon and wrapped with a thin copper rope. It's upscale beach dinner elegance — the kind of hairstyle that pairs perfectly with a slip dress and gold earrings. Refined, timeless, and utterly sophisticated. The copper rope adds a warm metallic accent that catches candlelight beautifully.
The chignon is the hairstyle equivalent of a perfectly mixed cocktail — simple ingredients, expert execution, and the result is greater than the sum of its parts. Adding the copper rope transforms it from classic to contemporary. The multi-tonal blonde makes the twist visible and dimensional, preventing the chignon from looking flat.
Why this look is popular: The low chignon is one of the most universally flattering updos — it elongates the neck and creates an elegant silhouette. The copper rope accent is a modern twist that adds warmth and visual interest without overwhelming the classic shape. Works best on medium to thick hair that can support the twist without sagging.
Where this look is suitable: Upscale beach dinners, resort restaurants, formal seaside events, anniversary celebrations. This is the hairstyle for occasions that call for refined elegance.
Step by step:
- Smooth the hair. Apply a smoothing serum to dry hair and blow-dry with a boar bristle brush for maximum sleekness.
- Create a low ponytail. Gather all hair at the nape and secure tightly with a strong elastic.
- Twist the ponytail. Twist the entire ponytail in one direction until it begins to coil on itself.
- Form the chignon. Wrap the twisted ponytail around the base to create a compact, circular bun. Pin securely with bobby pins that match your hair color.
- Add the copper rope. Wrap a thin copper rope around the base of the chignon two or three times. Tie it off and tuck the ends under.
- Refine the surface. Use a fine-tooth comb and a small amount of smoothing cream to eliminate any flyaways along the part and hairline.
- Set with spray. A strong-hold hairspray ensures this stays polished all evening.
Tips and tricks: A boar bristle brush is essential for the sleek finish — it distributes product evenly and creates shine that a regular brush can't. The chignon sits best when the ponytail is positioned right at the nape — too high and it looks casual, too low and it sags. The copper rope stays more secure if you tie it to the elastic underneath before wrapping. For extra-smooth results, blow-dry with a concentrator nozzle pointed downward along the hair shaft.
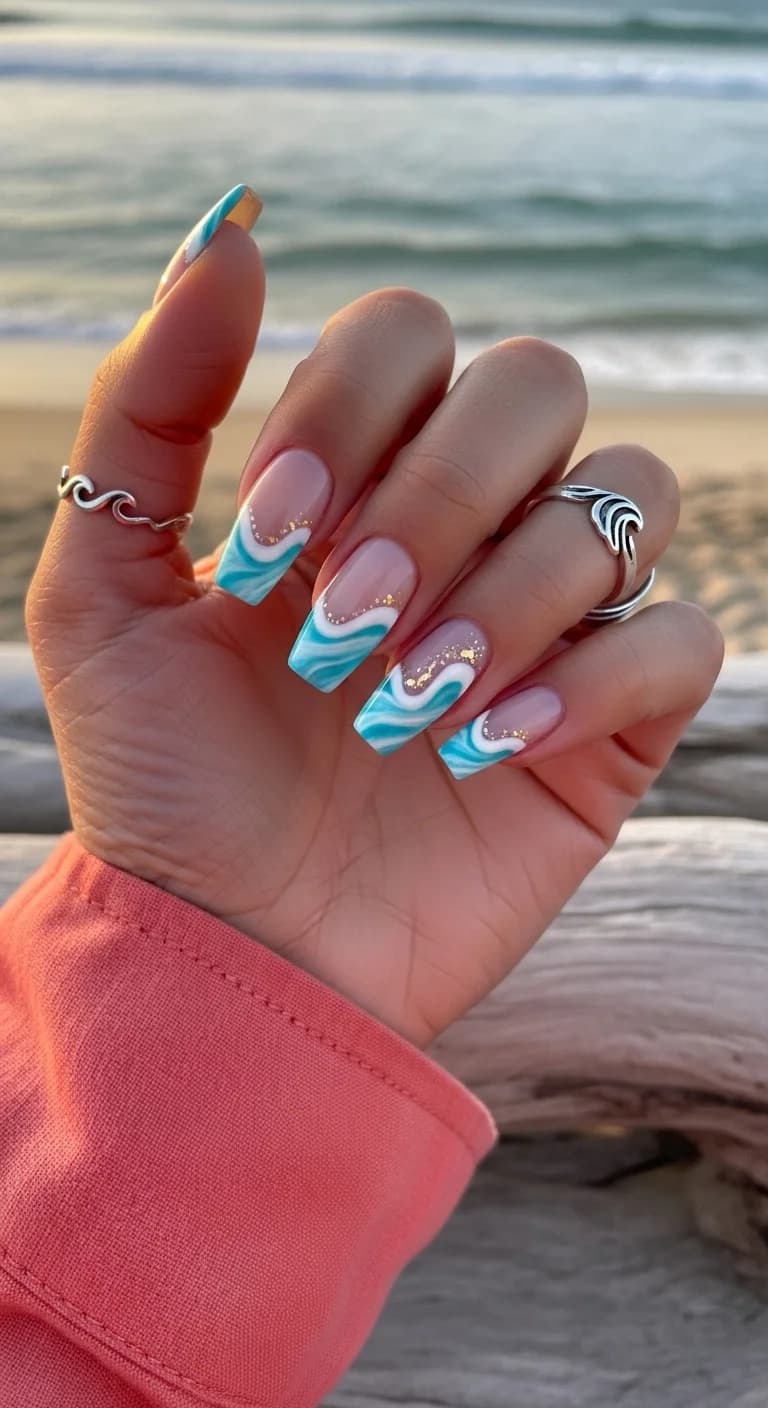
30 Stunning Beach Nail Ideas for the Best Vacation in 2026 🌊
24.Effortless Beach Waves with a Nautical Scrunchie
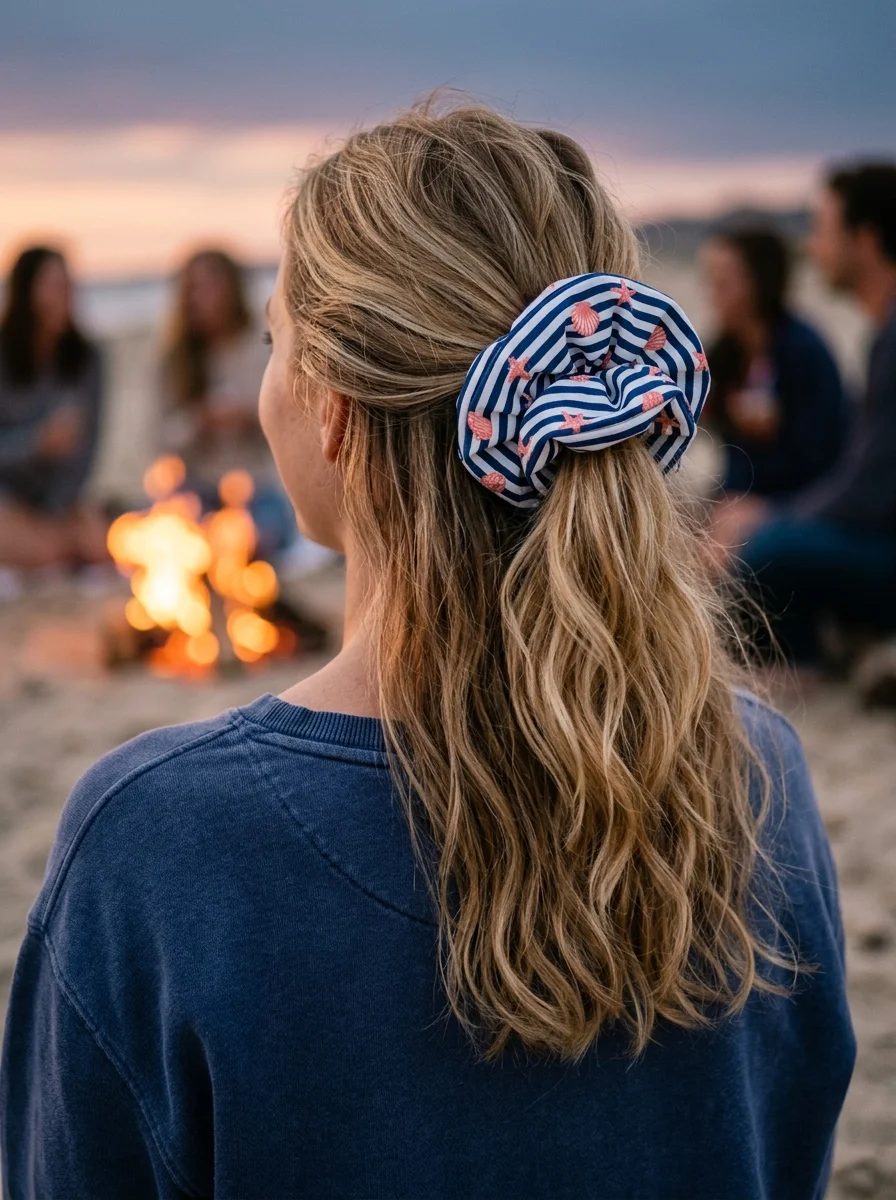
The overview: Dirty blonde waves pulled half-up and secured with a navy and white nautical scrunchie. It's beach bonfire casual — the kind of look you throw together in seconds but still looks like you planned it. The scrunchie keeps things playful and practical. The nautical stripe pattern adds a thematic touch that works perfectly with the beach setting.
Scrunchies have officially earned their place back in the spotlight, and this is exactly why. They're gentler on hair than regular elastics, they don't create creases, and they add a decorative element to any half-up style. The nautical pattern specifically reads as vacation without being costume-y.
Why this look is popular: The half-up style is the easiest way to get hair off your face while maintaining the wave pattern. Adding a scrunchie instead of a plain elastic turns a functional choice into a decorative one. The nautical pattern adds theme without trying too hard. Works on all hair types — dirty blonde is particularly good because the natural dimension enhances the waves.
Where this look is suitable: Beach bonfires, casual coastal evenings, boardwalk walks, seaside camping. This is the relaxed, unfussy hairstyle for low-key beach moments.
Step by step:
- Texturize the waves. Spray with sea salt spray or texturizing spray for a natural, lived-in texture.
- Scrunch and air-dry. If hair is damp, scrunch upward and let it air-dry for natural wave formation.
- Gather the top section. From your temples, pull the top third of your hair back loosely.
- Secure with the scrunchie. Wrap the nautical scrunchie around the gathered section once or twice. Don't pull it too tight — keep it relaxed.
- Adjust the waves. Pull the remaining waves forward over your shoulders and rearrange for natural movement.
Tips and tricks: The scrunchie material matters — cotton or canvas nautical- striped scrunchies grip hair better than satin ones. For finer hair, backcomb the crown area slightly before gathering to add volume. The half-up section should be loose enough that you can see the scrunchie pattern — pulling too tight hides the stripes. This style gets better as the day goes on as the waves naturally relax and the texture develops.
25.Boho Waterfall Braid with Flower Accents
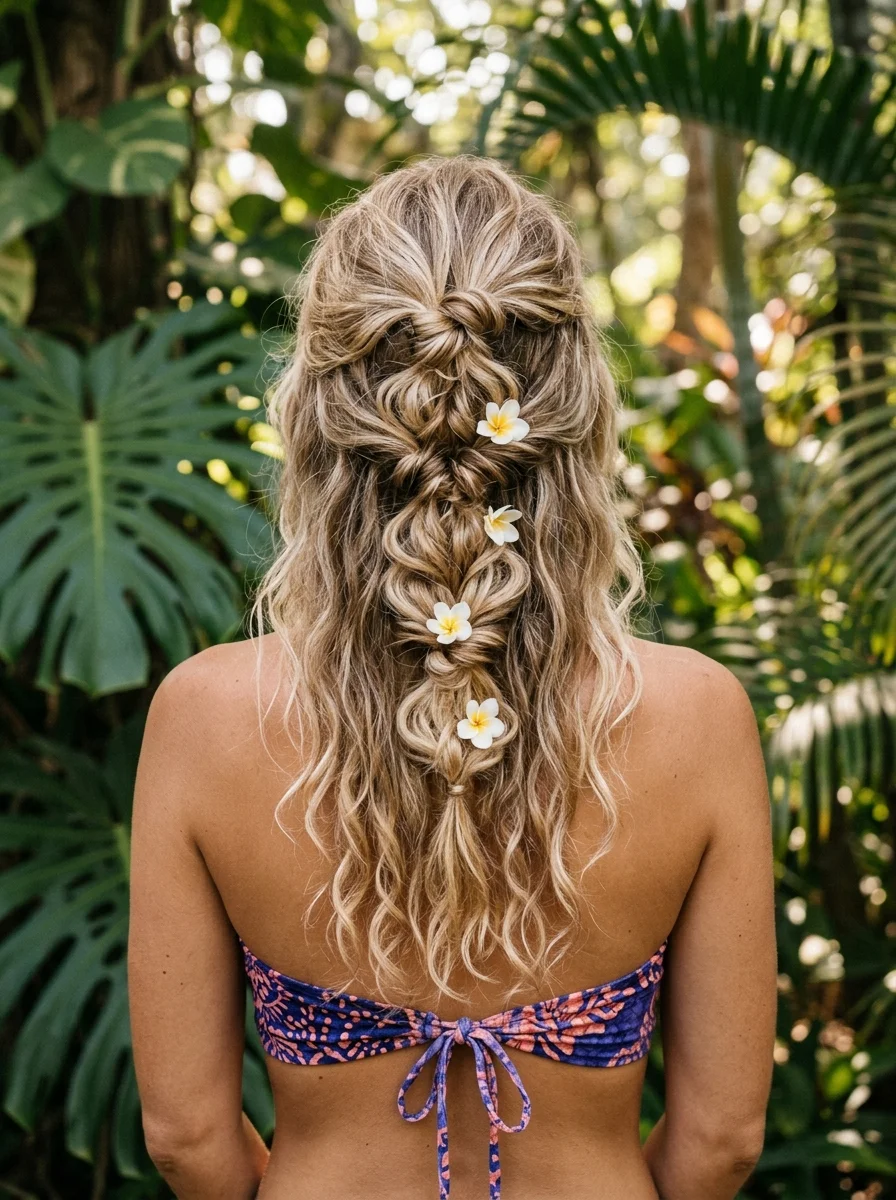
The overview: Dark blonde balayage woven into a waterfall braid, then threaded with small plumeria flowers. It's tropical vacation perfection — the kind of hairstyle that makes you feel like you're in a movie set on an island paradise. Let the flowers and the waves do the talking. The waterfall technique creates a cascading effect that mimics the flow of ocean waves.
The waterfall braid is the most romantic braid style in existence. The dropped sections create a flowing, organic quality that no other braid can match. Adding plumeria flowers — the quintessential tropical bloom — completes the fantasy. This is the hairstyle that makes people stop and stare, then immediately ask where you learned to braid.
Why this look is popular: The waterfall braid creates a visual effect that looks incredibly complex but is actually just a modified French braid where you drop sections instead of holding them. The plumeria flowers add an authentic tropical quality that silk flowers can't replicate. Works best on medium to long hair with enough length for the dropped sections to cascade. The balayage coloring enhances the braid pattern by adding visible dimension.
Where this look is suitable: Tropical vacations, beach weddings, romantic photo shoots, paradise destinations. This is the ultimate vacation hairstyle for settings that feel like a postcard.
Step by step:
- Prep with texture. Spray dry hair with texturizing spray for grip. The waterfall braid needs friction to hold.
- Start the braid. Take a 2-inch section at the temple and divide it into three. Begin a French braid — but instead of holding all three strands, drop the bottom strand each time you cross.
- Drop and replace. Each time you drop the bottom strand, pick up a new section from directly below it to replace it. This creates the waterfall effect.
- Continue along the head. Braid along the hairline, continuing the drop-and-replace technique. The dropped sections should hang freely.
- Secure the end. Once you reach behind the ear, braid a few inches as a regular three-strand braid and secure with a clear elastic. Tuck the end under the hair.
- Add flowers. Thread any small flower blooms into the braid at irregular intervals. Use 4-6 flowers for a natural look.
Tips and tricks: The drop-and-replace technique is the hardest part — practice it on dry hair before you need it. Each dropped section should be the same size for a consistent cascade. Fresh flowers last about 4-6 hours; mist them lightly to keep them fresh. If you can't find plumeria, small white orchids or jasmine work as tropical alternatives. A light-hold hairspray keeps the braid intact without making the dropped sections look stiff.
30+ Chic Pool Party Hairstyles for Summer 2026 🌊👙
Three Wind-Proof Styles
You have been there: twenty minutes curling your hair, one step onto the beach, and a single gust of wind turns it into a bird's nest. If you want a style that actually survives the ocean breeze, you have to work with physics rather than against it. Here are three styles that hold up when the wind picks up.
1. The crown braid. Wraps around your head like a halo, locking the majority of your hair in place while still looking romantic and bohemian. The braided structure keeps flyaways contained, and the halo shape means wind hits the braid rather than loose strands.
2. The sleek high ponytail. Keeps hair off your neck in the heat and stays completely locked in place even when humidity spikes. The key is the finish: smooth the surface with a boar bristle brush and lock it with a strong-hold gel before securing.
3. The textured low bun. Smooth a moisturizing cream through your hair and twist it into a low bun at the nape. It sits flat against the head so wind has nothing to catch, and the texture cream gives it grip that holds throughout the day. For extra insurance, fishtail braids are incredible for keeping hair intact during high humidity — the tight weave prevents frizz from taking over. A side-fishtail tucked behind the ear reads as intentional and holds up against anything the beach can throw at it.