Hair Trends
28 Back to School Hairstyles for Every Hair Type 2026
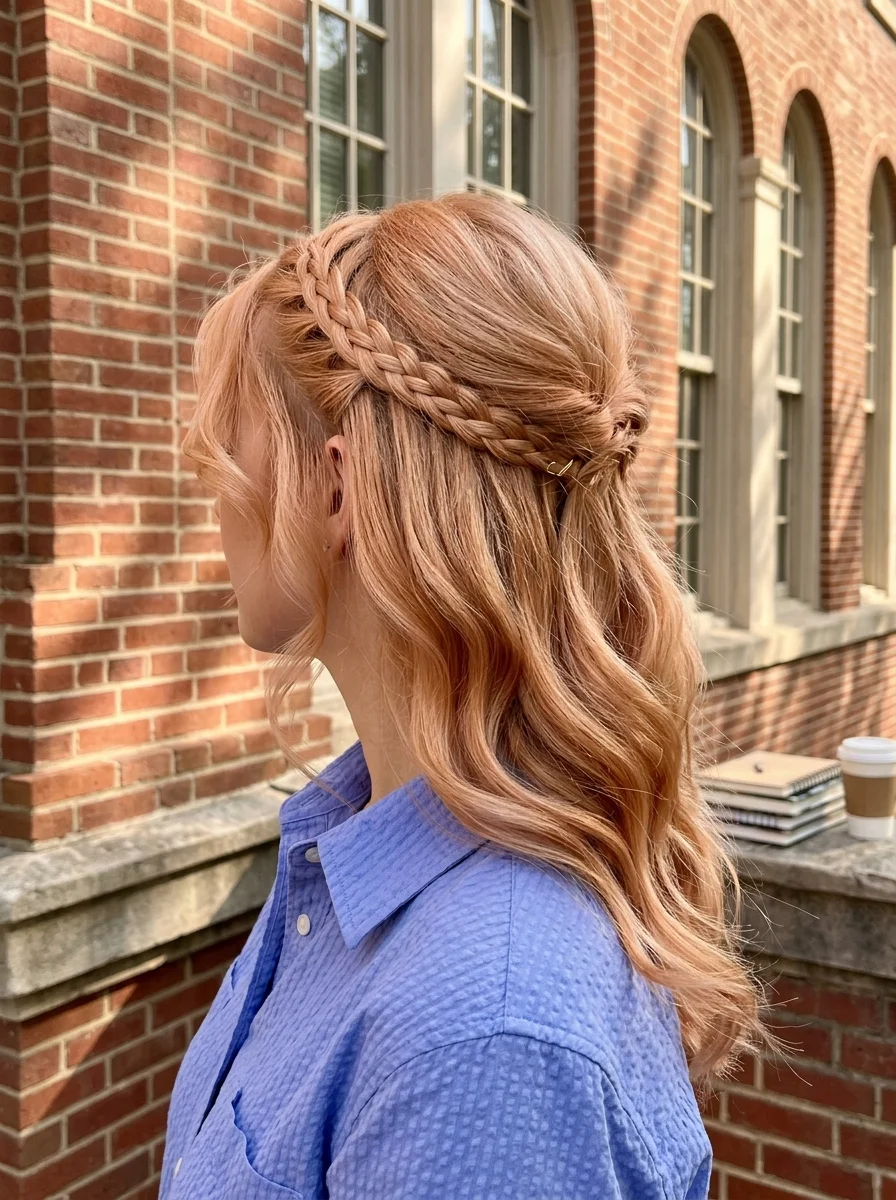
The first week of school sets the tone for the rest of your semester. You are juggling new schedules, new classrooms, and the unspoken pressure of looking put-together while still appearing effortless. Your hair should be the easiest part of that equation, not the thing that makes you late to first period.
We gathered twenty-eight back-to-school hairstyles that actually work in real life. Some take under five minutes. Others are worth the extra ten when you have time before first bell. Every single one is designed to survive hallways, lectures, and whatever your day throws at you without falling apart by lunch.
The School Morning Playbook: 4 Rules for 5-Minute Styling
The secret to looking polished every morning isn't waking up an hour earlier—it's shifting 80% of your hair prep to the night before. Hair trends are favoring effortless texture, prep-school accessories, and heatless longevity. Here is how to build a foolproof morning hair routine before diving into the styles below:
1Preventative Night Prep
Apply dry shampoo at bedtime rather than in the morning; your scalp's natural oils absorb the powder overnight for residue-free volume. Sleep with a satin bonnet or pillowcase to eliminate morning bedhead frizz.
2Master Heatless Setting
Ditch morning curling irons. Damp-braiding or wrapping hair around a satin headband before sleep creates soft, long-lasting waves by morning with zero thermal damage.
3The Prep-School Accessory Accent
Elevate a simple ponytail or bun instantly using "prep-school polish"—velvet scrunchies, gold bead cuffs, grosgrain bows, or tortoiseshell claw clips transform basic hair into an intentional outfit statement.
4Build a 3-Tier Morning Matrix
Categorize your go-to styles by available time: 2-minute emergency (claw clip twist), 5-minute standard (half-up crown or bubble pony), and 10-minute extra credit (Dutch crown braid).
1.Braided Bubble Ponytail with Gold Bead Cuffs
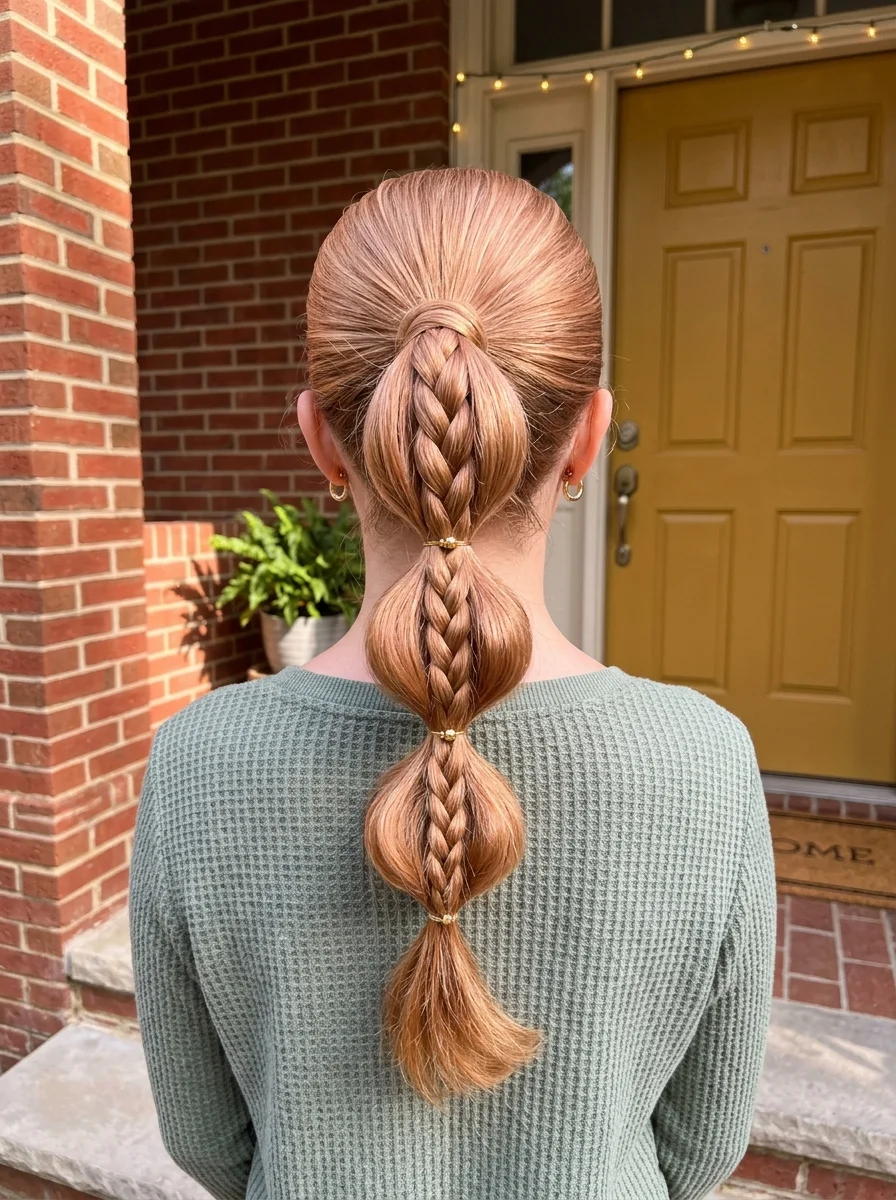
The overview: A high ponytail divided into bubble sections, each separated by small gold bead elastic cuffs. A three-strand braid runs down the center of each bubble, creating a hybrid braided-bubble effect that reads as more complex than it actually is. The crown is smooth and sleek, pulled back cleanly without a visible part.
This style solves the problem of wanting something fun without committing to intricate braiding. The bubbles add visual rhythm down the length, and the gold beads catch classroom fluorescent lighting in a way that makes your hair look intentional rather than thrown together.
Why this look is popular: Bubble braids are having a continous moment because they require zero braiding skill. You are just placing elastics and pulling sections apart. The gold bead cuffs elevate the look from playground to campus-ready.
Where this look is suitable: First-day classes, campus tours, group photos, any situation where you want your hair to photograph well without dominating your morning routine.
Step by step:
- Smooth the base. Apply a lightweight smoothing serum to damp hair and blow-dry straight for a polished crown.
- Create the high ponytail. Gather all hair at the crown and secure with a strong elastic.
- Add the central braid. Take a small section from the top of the ponytail and create a three-strand braid that runs down the center. Secure the end temporarily.
- Create bubbles. Tie gold bead elastics at 2-inch intervals down the ponytail, incorporating the braid into each section.
- Pull for volume. Gently tug each bubble outward to create rounded, full shapes. Adjust the braid so it stays centered.
Tips and tricks: Keep consistent tension on each bubble for a balanced look. If one section is significantly larger than the others, the entire ponytail reads as lopsided. The gold beads should be proportional to your ponytail thickness - too many overwhelm fine hair.
30 Stunning Mother of the Groom Hairstyle Ideas for 2026 💍✨
2.Dutch Braid into Braided Low Bun with Pearl Pins
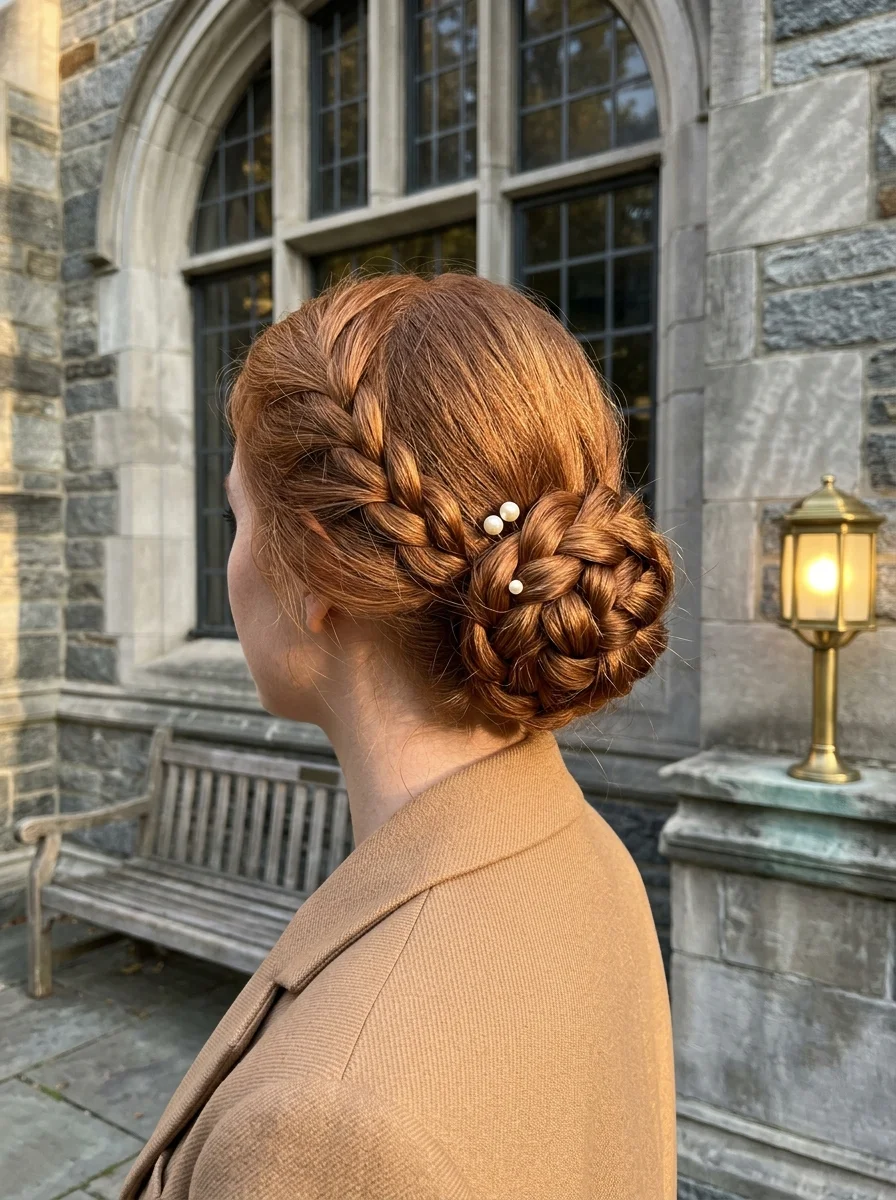
The overview: A Dutch braid starts at the temple and sweeps back along the side of the head, feeding into a low braided bun at the nape. Three small pearl pins are tucked into the bun as decoration. The raised braid creates visible texture against the smooth sides, and the pearl pins add a polished, preppy detail that elevates the entire style.
The Dutch braid is more practical than a French braid for school because it sits on top of the hair rather than blending in, making it visible from across a classroom. The low bun keeps everything secure during movement and doesn't interfere with sitting in chairs or leaning over textbooks.
Why this look is popular: The braid-to-bun combination is the most requested school hairstyle because it distributes tension evenly across the scalp, preventing the headaches that tight ponytails cause by third period.
Where this look is suitable: Classroom days, lab sessions, library study hours, any situation where your hair needs to stay completely secure through long periods of sitting and concentration.
Step by step:
- Prep for grip. Apply texturizing spray to dry hair for hold - freshly washed hair is too slippery for clean braids.
- Dutch braid from the temple. Start above one ear and braid backward along the hairline, crossing strands under to create the raised effect. Add small sections as you go.
- Gather at the nape. Once the braid reaches the back of the head, combine it with the remaining hair into a low ponytail. Secure with an elastic.
- Braid the ponytail. Create a standard three-strand braid from the ponytail. Pancake it gently by pulling the outer edges for volume.
- Coil into a bun. Wrap the braided ponytail around its base, tucking the end underneath. Pin with bobby pins in crossing pairs.
- Add pearl pins. Insert three pearl-tipped pins into the bun at different angles. Space them unevenly for a more natural look.
Tips and tricks: Keep consistent tension throughout the Dutch braid. If one section is looser, the entire braid pattern looks uneven. A boar bristle brush smooths each section before braiding to eliminate bumps.
3.Pull-Through Braid Ponytail with Navy Bow
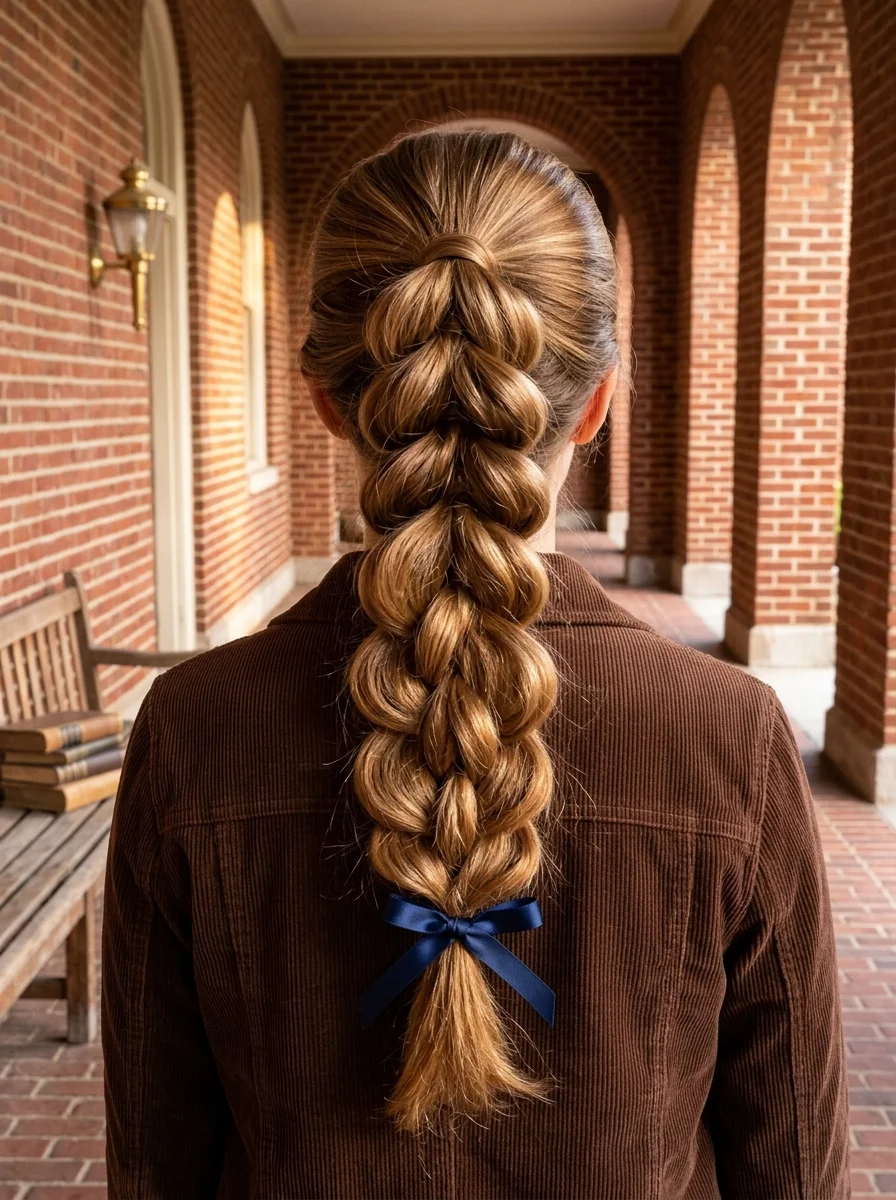
The overview: A voluminous, segmented braid created by repeatedly pulling sections through each other, starting from a high ponytail base and cascading down the back in thick, puffed-out segments. A navy blue satin ribbon bow secures the bottom, adding a classic, preppy finishing detail.
The pull-through braid is the cheat code for anyone who cannot braid. It creates the illusion of a complex woven pattern using only elastics and your fingers. The result is more voluminous than a traditional braid and holds its shape better through a full school day.
Why this look is popular: The pull-through braid photographs incredibly well from behind, which matters more than people admit. When someone is sitting in front of you in class, this is the hairstyle they see.
Where this look is suitable: School presentations, photo days, campus events, any situation where the back of your head will be visible and you want it to look intentional.
Step by step:
- Create a high ponytail. Gather hair at the crown and secure with a clear elastic.
- Start the pull-through. Take a small section from the top of the ponytail and split it into two. Pull the remaining ponytail up through the split section, then clip it out of the way.
- Repeat down the length. Combine the two split sections beneath the clipped hair, add a new elastic, split again, and pull through. Continue until you reach the ends.
- Pull for volume. Gently tug each section outward to create the puffed, bubble-like effect.
- Add the bow. Tie a navy satin ribbon into a bow at the bottom elastic. Let the tails hang alongside the braid.
Tips and tricks: Use small clear elastics that blend with your hair color. If the elastics are visible, the mechanics of the style become obvious. Pull each section evenly for a balanced silhouette.
34 Cutest Butter Yellow Nail Designs for 2026 🧈
4.Sleek Low Bun with Green Satin Scarf
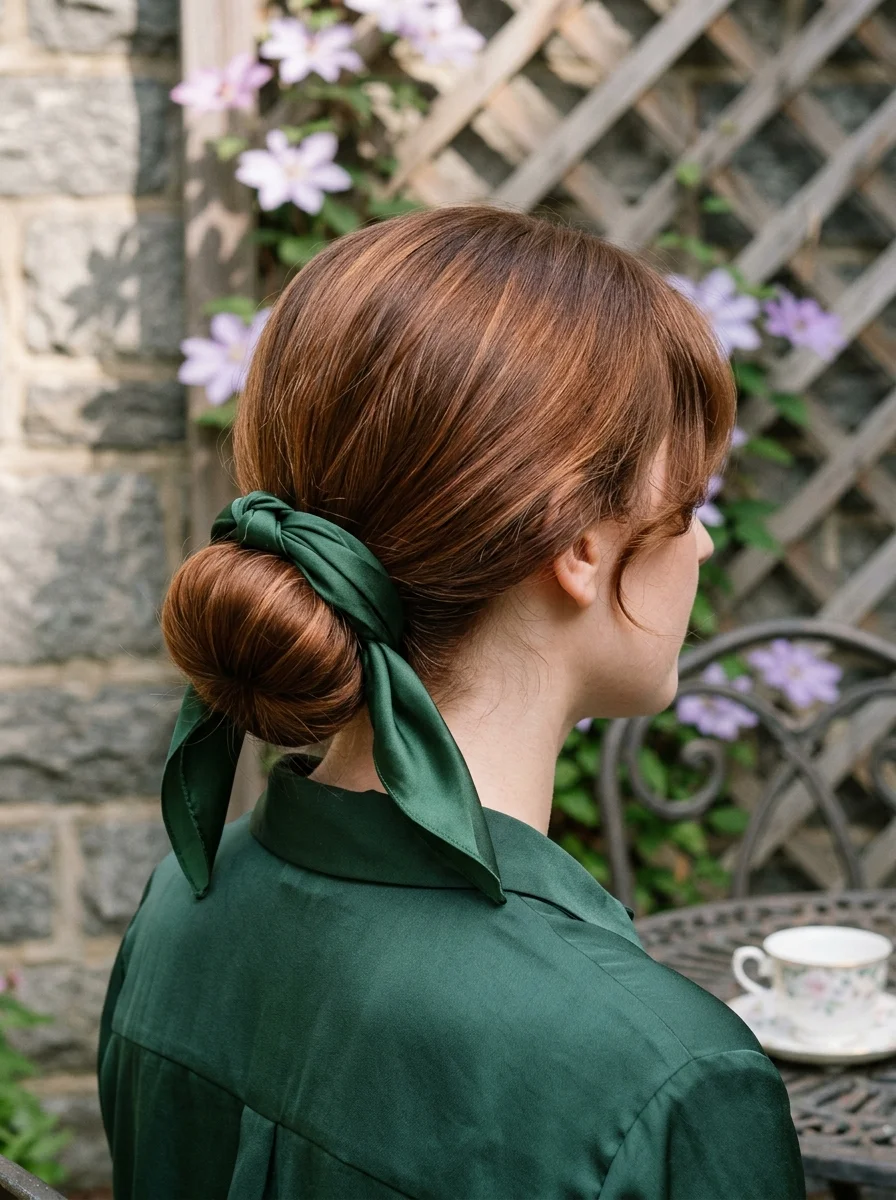
The overview: Hair is smoothed back without a visible part and gathered into a neat, rounded chignon at the nape. A forest green satin scarf wraps around the bun, tied with the ends hanging as tails that catch movement. The finish is polished and controlled, with a single face-framing tendril left loose at the front.
The scarf does more than decorate - it conceals any looseness in the bun and adds a color accent that coordinates with school uniforms or fall wardrobes. Satin has enough structure to hold its shape without wilting by sixth period.
Why this look is popular: The scarf-wrapped bun is having a quiet renaissance because it bridges the gap between casual and polished. It looks like you tried without looking like you spent thirty minutes on your hair.
Where this look is suitable: School presentations, parent-teacher meetings, any day where you need to look professional without being overdressed.
Step by step:
- Smooth the hair. Apply a light smoothing cream and brush hair back from the face. Skip creating a part for the sleekest result.
- Gather low. Collect all hair at the nape and secure with an elastic that matches your hair color.
- Form the bun. Twist the ponytail and wrap it around the base. Pin with bobby pins pushed horizontally through the bun.
- Wrap the scarf. Fold the green scarf into a 2-inch band. Wrap it around the bun base and tie at the bottom. Let the ends hang.
- Release face-framers. Pull a thin section from the front hairline near the ear. Curl it loosely with a 1-inch iron if desired.
Tips and tricks: Cotton scarves grip better than silk, especially on fine hair. If the scarf slips, anchor it with a bobby pin hidden underneath on each side. The scarf tails should be even - trim them if one side is longer.
5.Twisted Half-Up Bun with Gold Filigree Clip
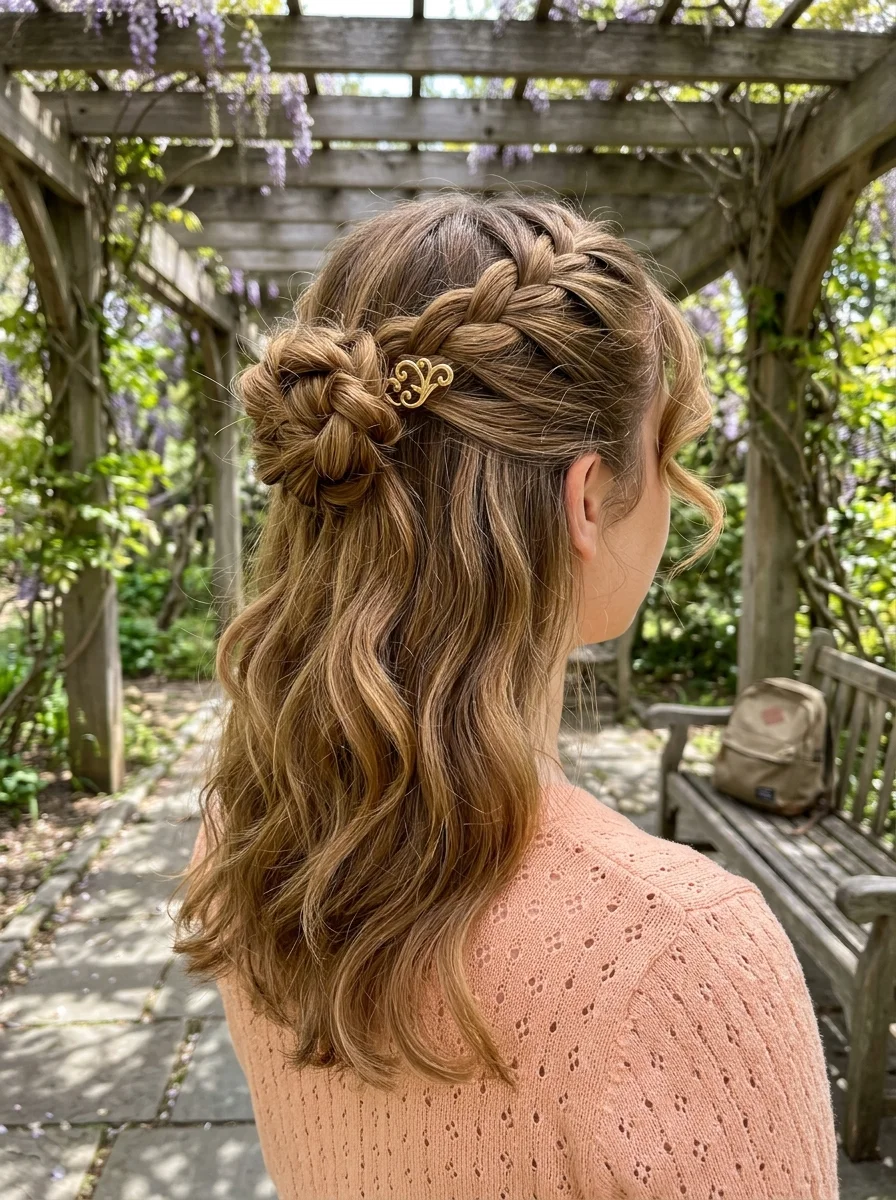
The overview: Two sections from the front are twisted or loosely braided and gathered at the back of the head into a small twisted bun. An ornate gold filigree hair clip secures the bun, catching light as you turn your head. The remaining hair falls in soft, tousled waves that reach mid-back length.
The half-up construction keeps hair off your face during lectures while the loose waves below maintain movement and softness. The gold clip adds a focal point that makes the whole style feel considered rather than thrown together.
Why this look is popular: Half-up styles are the most versatile school hairstyle because they work with headphones, don't interfere with leaning over desks, and still look styled from the front.
Where this look is suitable: Daily classes, after-school activities, casual campus outings, any situation where you want hair off your face without losing length.
Step by step:
- Create loose waves. Use a 1.25-inch curling wand on 1-inch sections, leaving the ends out. Break up with fingers for natural-looking waves.
- Section the top half. Gather hair from each temple and the crown area. Keep it loose - tight gathering defeats the purpose.
- Twist and secure. Twist the gathered section loosely toward the back of the head. Coil it into a small bun and secure with bobby pins.
- Add the gold clip. Slide the filigree clip over the bun, making sure it grips both the bun and the hair beneath.
- Adjust the waves. Shake the loose sections gently for natural volume. A mist of texturizing spray through the mid-lengths enhances the lived-in quality.
Tips and tricks: The clip should be large enough to grip all the gathered hair. If it slips, your section is too heavy for that clip size. Second-day hair holds this style better than freshly washed hair.
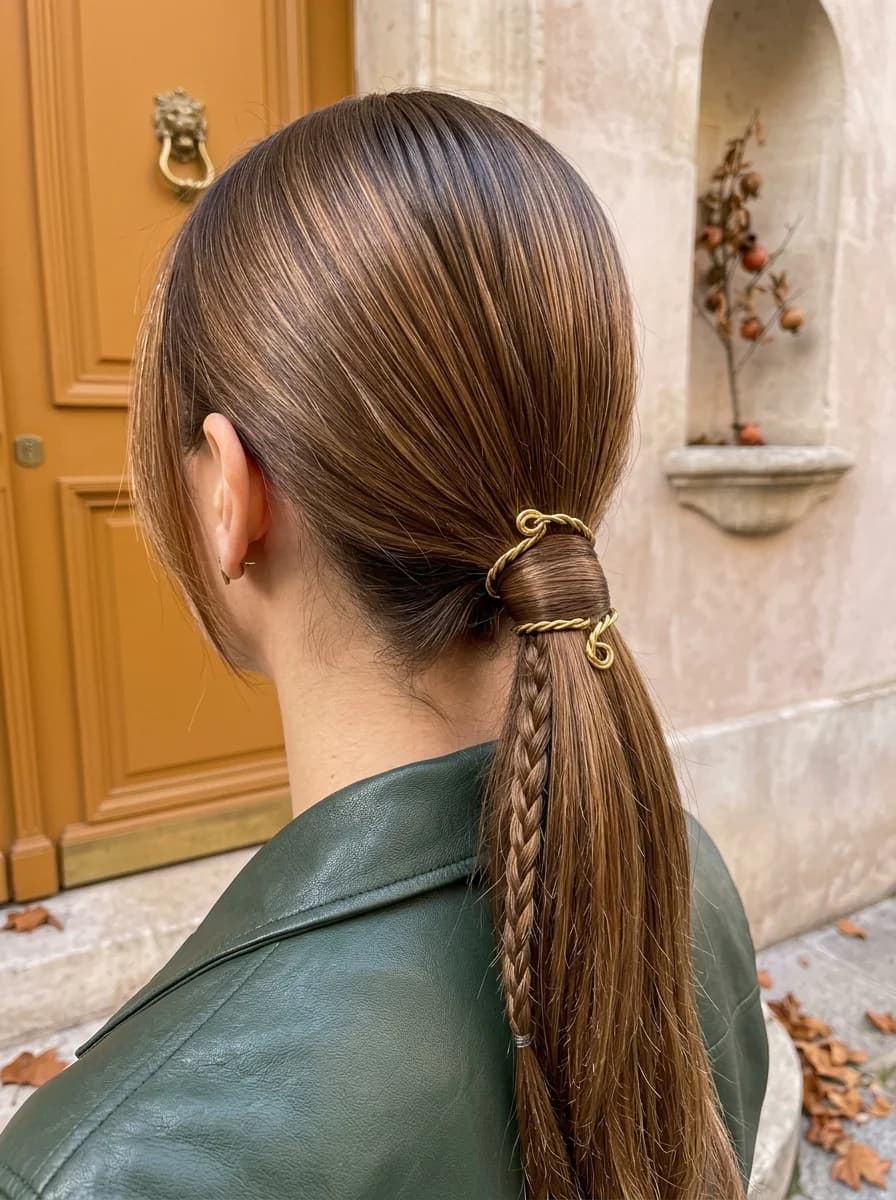
37 Best Fall Hair Trends for 2026 🍂
6.Half-Up Fishtail Braid with Pearl Accents
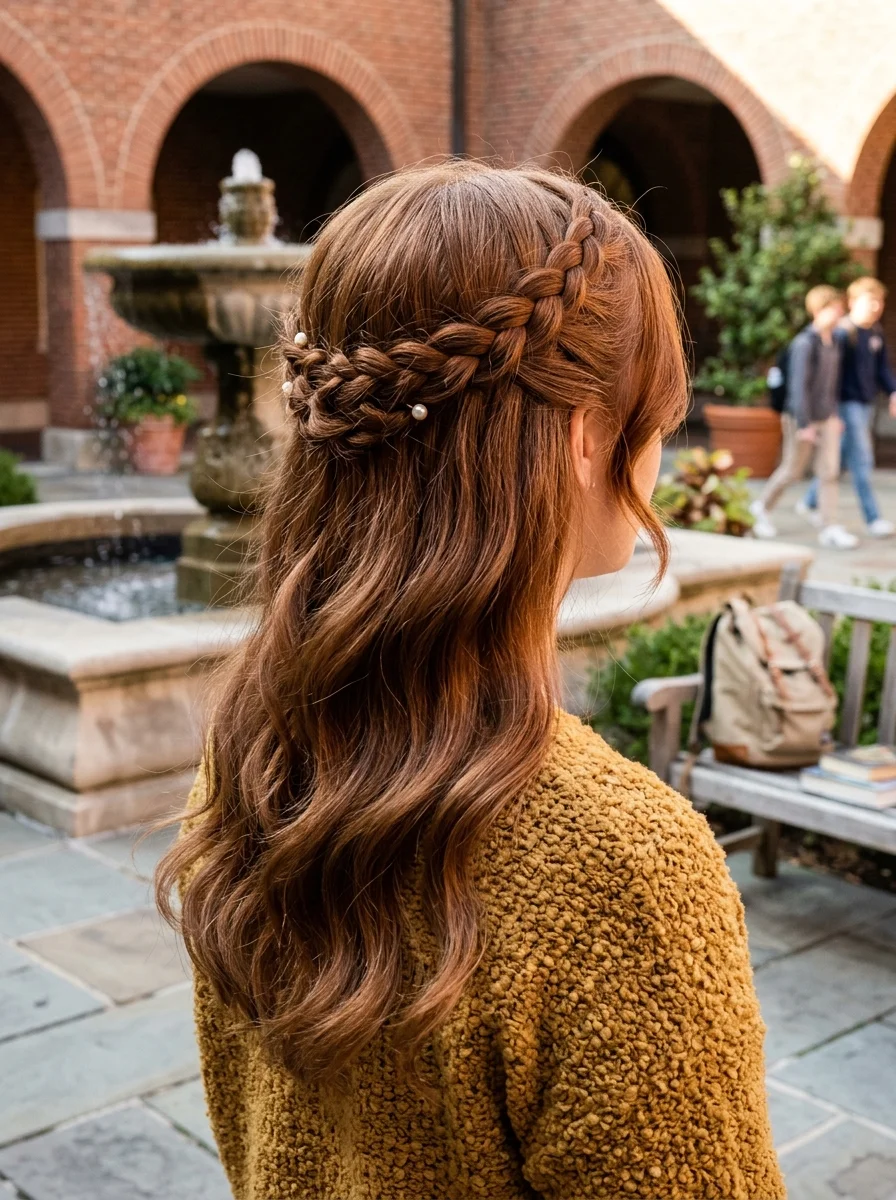
The overview: A fishtail braid starts from one side of the head and sweeps across the back horizontally, wrapping into a small braided rosette at the opposite side. Small pearl pins are scattered along the braid for decoration. The remaining hair hangs in soft, voluminous waves with significant movement.
The fishtail's flat profile means it doesn't add bulk at the back of the head, which matters when you are sitting in chairs for hours. The horizontal placement creates a headband effect that keeps hair contained while showing off the length below.
Why this look is popular: The fishtail has a woven texture that reads as far more complex than it actually is - two sections, small crosses, done. The pearl accents add a detail that makes people look twice.
Where this look is suitable: School dances, picture day, campus tours, any event where the back of your head will be visible in photos.
Step by step:
- Prep with texture. Apply texturizing spray to dry hair for grip. Second-day hair holds fishtails better than freshly washed.
- Start the fishtail. Take a section from one side of the head, above the ear. Split it into two and begin the fishtail - cross small pieces from the outer edge of each section to the other.
- Sweep across the back. Continue the fishtail horizontally across the back of the head, adding small sections from the top as you go.
- Form the rosette. Once you reach the opposite side, coil the remaining braid tail into a small spiral and pin it against the head.
- Add pearl pins. Insert pearl-tipped pins along the braid at irregular intervals. Five to seven pins create the best visual balance.
Tips and tricks: Pancake the braid gently after completing it to widen the weave. The wider the braid, the more visible the fishtail pattern. Keep the pancaking even - pulling more on one side creates an asymmetrical look.
7.Half-Up Side Braid with Gold Filigree Pin
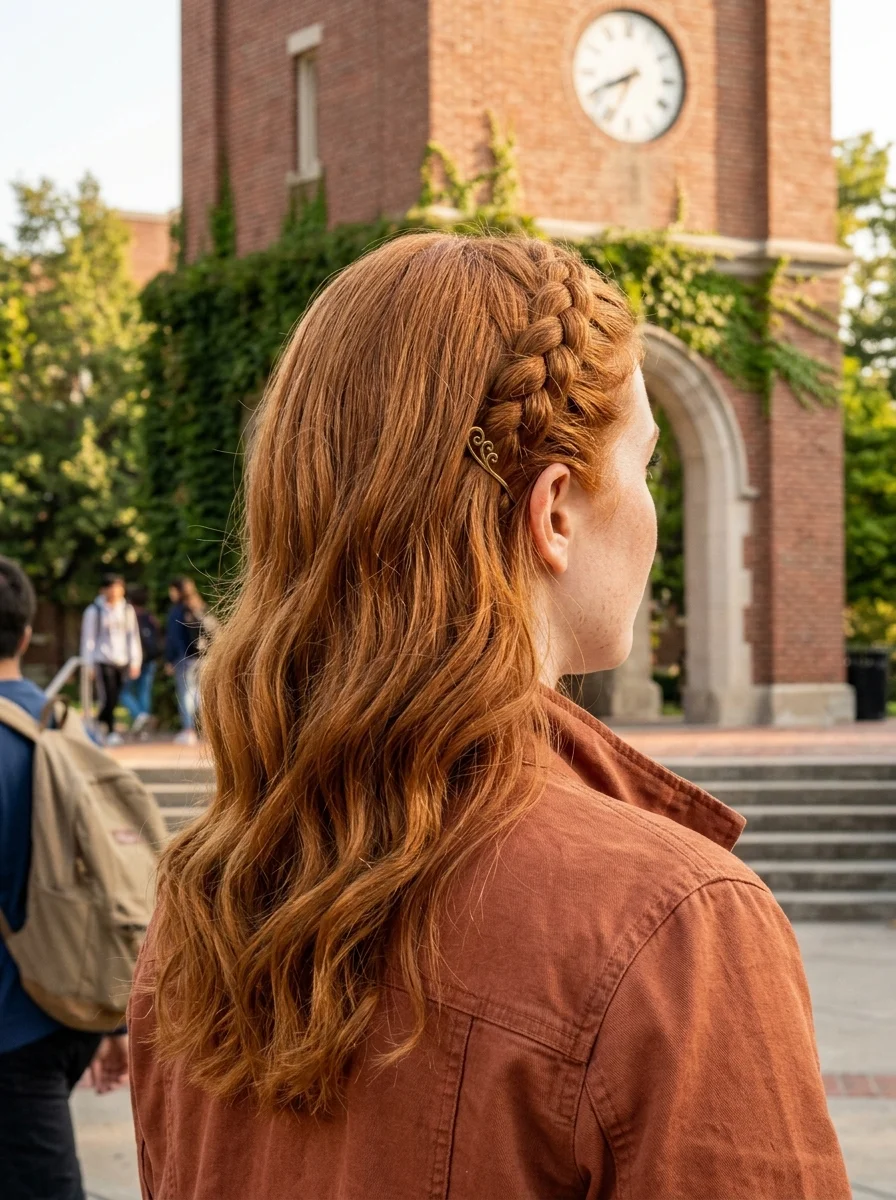
The overview: A Dutch braid begins at the temple and runs along the side of the head above the ear, feeding toward the back where it is secured with an ornate gold hair pin. The remaining hair falls in natural, relaxed waves with a slightly tousled, lived-in texture. A few wispy face-framing pieces are left out near the ear.
The side braid is the most practical half-up option for school because it controls the hair on one side where it tends to fall into your face during writing and reading. The gold pin adds a focal point that elevates the braid from functional to intentional.
Why this look is popular: The asymmetrical braid creates visual interest without requiring symmetry. You only need to braid one side, cutting styling time in half while still looking styled.
Where this look is suitable: Daily classes, after-school activities, campus events, any day where you need hair off one side of your face without a full updo.
Step by step:
- Define waves. Apply curl cream or mousse to damp hair and air-dry for natural texture.
- Section for braiding. Take a 2-inch section along the hairline from the temple to just above the ear. Clip the rest out of the way.
- Dutch braid. Cross strands under to create the raised effect. Pick up small sections from the hairline as you go. Keep the braid close to the scalp.
- Secure behind the ear. Once the braid reaches behind the ear, stop adding new hair. Braid the remaining tail 2 inches and secure with a tiny elastic.
- Add the gold pin. Slide the filigree pin through the braid's end and into the hair beneath, securing the braid and adding the accent simultaneously.
Tips and tricks: Choose the side with more volume or where your natural part falls. The braid works best framing the heavier side because it creates a more balanced silhouette from the front.
29 Stunning Summer Almond Nails for Women in 2026 💅
8.Bubble Braid Ponytail with Red Elastics
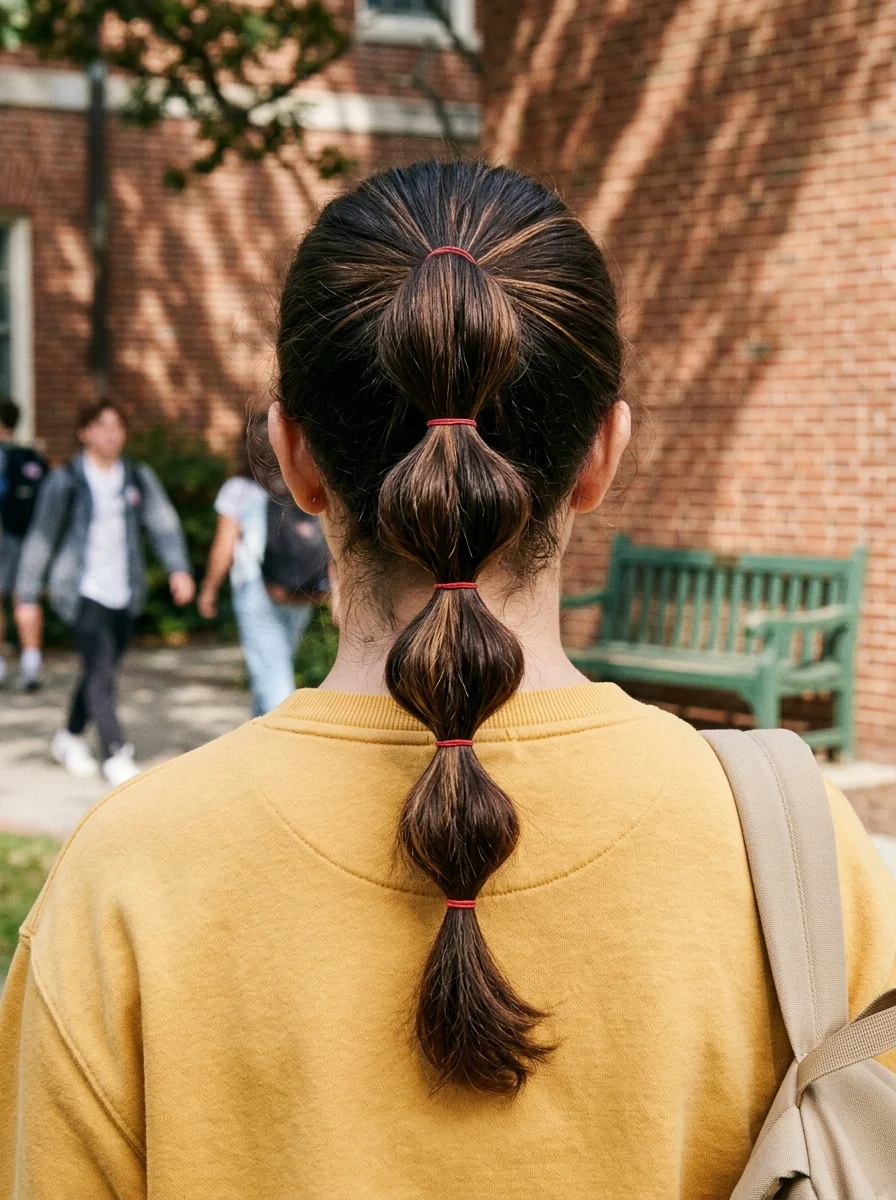
The overview: A high ponytail divided into four or five rounded bubble sections using small red elastic bands. Each bubble is pulled apart for volume, creating a rhythmic, sculptural effect down the length. The hair at the crown is smooth and straight with a slight sheen that catches overhead lighting.
This is the clean, minimal version of the bubble ponytail. No braids, no extra accessories - just elastics and volume. The red bands add a subtle pop of color that coordinates with school colors or fall wardrobes without being overt.
Why this look is popular: The bubble ponytail is the most shared school hairstyle on social media because it photographs well and takes under ten minutes. The red elastics are small enough to be versatile but visible enough to register as a deliberate choice.
Where this look is suitable: School spirit days, sports events, casual campus days, any situation where you want a hairstyle that looks polished but not overdone.
Step by step:
- Smooth the crown. Apply smoothing serum and blow-dry straight for a polished base.
- Create the high ponytail. Gather all hair at the crown and secure with a red elastic.
- Add bubbles. Tie red elastics at equal intervals down the ponytail. Gently pull each section apart to create rounded bubbles.
- Adjust volume. Ensure each bubble is roughly the same size. Tug at the edges for a fuller, more symmetrical look.
- Set with spray. A mist of flexible-hold hairspray keeps the bubbles defined without stiffness.
Tips and tricks: Use elastics that match your school colors for a coordinated look, or stick with clear elastics if you want the bubbles to read as more sophisticated. The spacing between bubbles should be consistent - measure visually before securing each elastic.
9.Messy Bun with Tortoiseshell Claw Clip
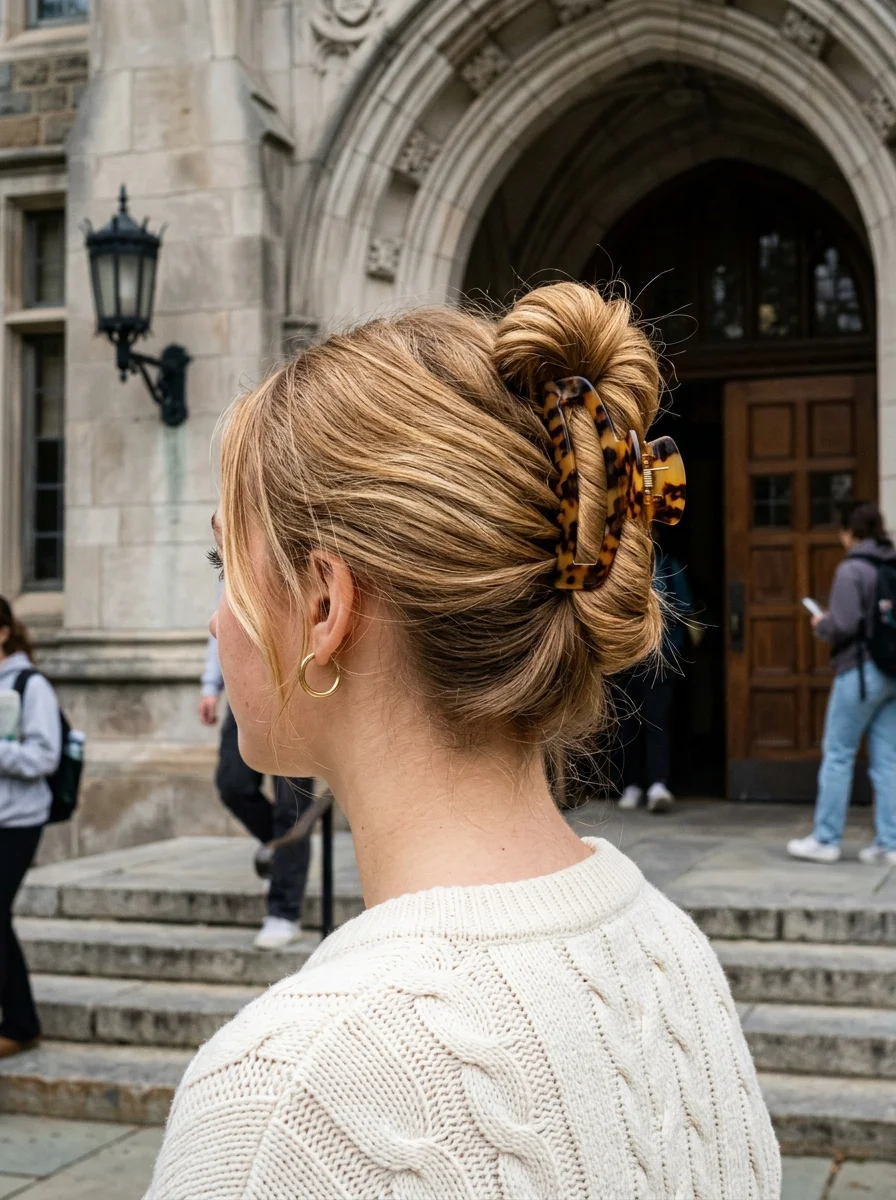
The overview: Hair is pulled up into a loose, casual twisted bun secured with a large tortoiseshell-pattern claw clip in amber and brown tones. Several face-framing tendrils are left out around the ear. The overall effect is relaxed and undone - the kind of bun that looks better after you have been wearing it for a few hours.
The claw clip does the structural work so you don't have to. Unlike bobby pins that slip by mid-afternoon, a quality claw clip with strong teeth grips from multiple angles and holds through movement, wind, and the general chaos of a school day.
Why this look is popular: The claw clip bun is the default school hairstyle for a reason: it takes thirty seconds, requires zero skill, and actually improves as the day goes on. The tortoiseshell pattern adds warmth that complements most hair colors.
Where this look is suitable: Morning classes when you overslept, gym days, after-school study sessions, any day where speed matters more than polish.
Step by step:
- Gather loosely. Pull hair up to the crown without smoothing it. Bumps and texture are part of the look.
- Twist and fold. Twist the ponytail once, then fold it against the back of your head.
- Clamp with the clip. Open the tortoiseshell clip and clamp it over the folded hair, making sure it grips from top to bottom.
- Pull out face-framers. Tug soft strands around your temples and ears for a relaxed frame.
- Adjust the shape. Pull at sections of the bun to create the desired level of messiness. The more you pull, the more relaxed it reads.
Tips and tricks: The clip should be large enough to grip all your hair. If it slips, your hair is too heavy for that clip size. Second-day hair holds this style better than freshly washed hair because the natural oils provide grip.
25 Top Curly Hairstyle Trends for 2026 ➰✨
10.Twisted Half-Up with Tortoiseshell Claw Clip
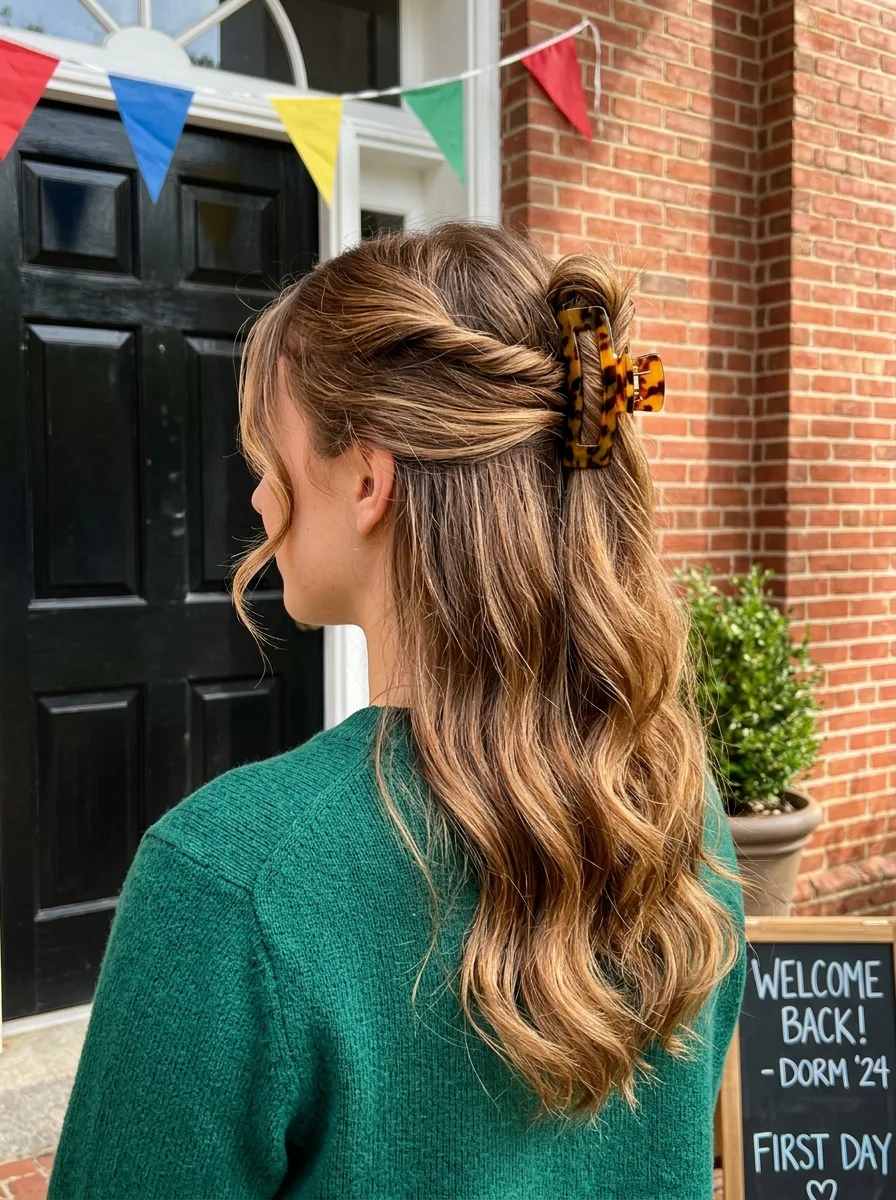
The overview: The top section of hair is loosely twisted back and secured at the crown with a tortoiseshell claw clip. The remaining hair falls down past the shoulders in soft, loose waves. This is the half-up version of the claw clip bun - hair stays off your face while maintaining length and movement below.
The twisted half-up with a claw clip is the most requested back-to-school style because it bridges the gap between casual and polished. The twist adds structure; the clip adds a decorative element; the loose waves keep everything feeling effortless.
Why this look is popular: Half-up styles with claw clips dominate school hallways because they work with every outfit, every hair texture, and every level of effort. This is the style you reach for when you want to look good without thinking about it.
Where this look is suitable: Daily classes, campus events, casual outings with friends, any day where you want your hair to look intentional without dominating your morning.
Step by step:
- Prep with texture. Apply sea salt spray or texturizing mousse to damp hair for natural wave.
- Air-dry. Let hair dry naturally for the most authentic wave texture.
- Twist the top section. Gather hair from the temples and twist loosely toward the back of the head.
- Clip it. Secure the twist with the tortoiseshell claw clip at the back of the crown. Let the tail fan out slightly above the clip.
- Pull out face-framing pieces. Tug soft strands around the temples and ears for a relaxed frame.
Tips and tricks: Choose a clip with strong teeth that interlock firmly. Cheap clips slip by lunch. The twist should be loose enough to maintain volume - tight twists flatten the crown and look severe.
11.Woven Ponytail with Gold Cuff
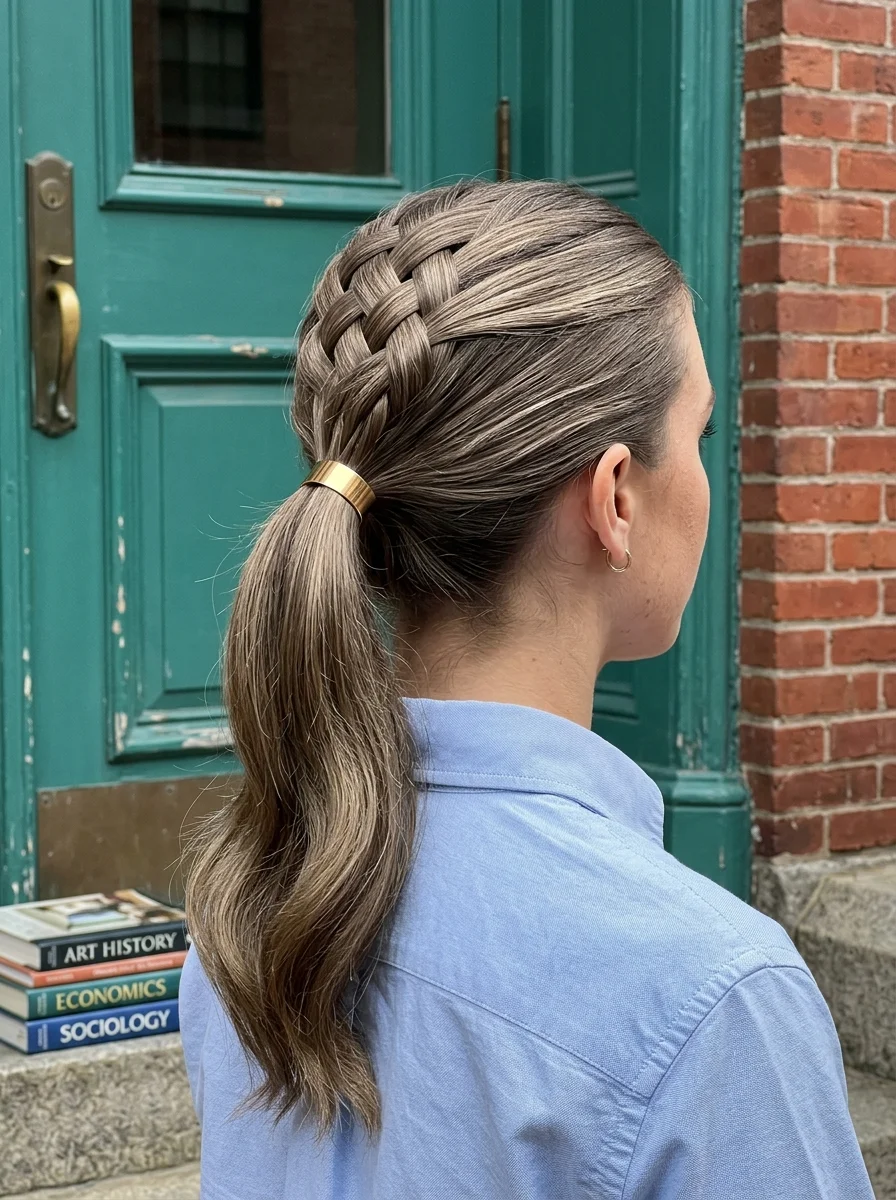
The overview: The top section of hair features an intricate basket-weave pattern that transitions into a sleek low ponytail. The ponytail is secured with a polished gold metal cuff, and the ends have a soft wave. This is a ponytail that rewards a closer look - the woven detail at the crown catches light and creates dimension that a standard ponytail cannot achieve.
The woven technique is more accessible than it appears. It uses the same two-strand crossing motion as a fishtail, just applied to a flat section rather than a gathered one. The gold cuff adds a modern, minimalist accent that complements the intricate weaving above.
Why this look is popular: The woven ponytail is the style that makes people ask how long it took. The answer is usually twenty minutes, which is reasonable for a hairstyle that looks this polished. The gold cuff keeps it from feeling precious.
Where this look is suitable: School presentations, college interviews, career days, any situation where you need to look competent and put-together.
Step by step:
- Section the crown. Take a 4-inch section from the top of the head and clip the rest out of the way.
- Create the weave. Split the section into two. Cross small pieces from the outer edge of each side to the other, alternating sides. Continue until you reach the back of the crown.
- Gather the ponytail. Combine the woven section with the remaining hair into a low ponytail at the nape.
- Secure with cuff. Slide the gold cuff over the elastic and clamp it shut.
- Add wave to the ends. Use a curling iron on the last 3 inches of the ponytail for a soft, flicked finish.
Tips and tricks: Keep consistent tension on each cross. If one strand is significantly tighter than the others, the weave pattern looks uneven. A fine-tooth comb smooths each section before crossing for the cleanest result.
27 Coral Nail Art Designs for a Warm, Tropical Manicure (2026)
12.Low Ponytail with Red Velvet Scrunchie
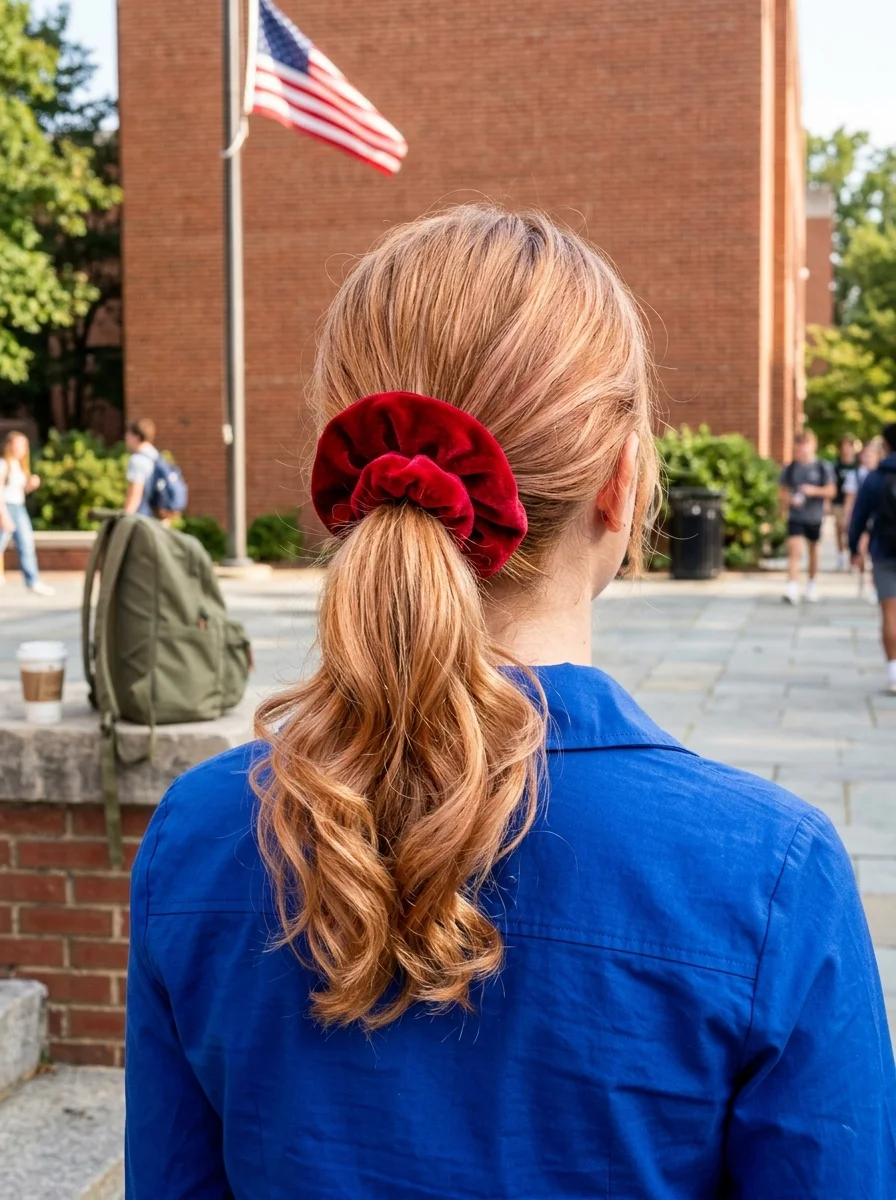
The overview: Hair is gathered into a low ponytail at the nape, secured with an oversized red velvet scrunchie. The ponytail cascades down in soft, loose curls with significant volume and texture. The velvet fabric adds warmth and a tactile quality that photographically reads as luxe.
The velvet scrunchie is having a continous revival because it combines function and style without compromise. Unlike thin elastics that create dents and pull hair, the scrunchie distributes pressure evenly, meaning you can wear it all day without developing a tension headache by fifth period.
Why this look is popular: The velvet scrunchie ponytail is the most wearable throwback trend in schools right now. It references '90s styling while feeling completely current, and the red velvet adds a richness that elevates a basic ponytail.
Where this look is suitable: Casual school days, game days, weekend study sessions, any situation where comfort and style need to coexist.
Step by step:
- Add volume. Apply volumizing mousse to damp hair and rough-dry for natural body.
- Curl the ends. Use a 1.25-inch curling iron on the bottom 4 inches of hair for loose, bouncy curls.
- Gather low. Brush hair into a relaxed ponytail at the nape. Don't pull it tight - the softness is the point.
- Secure with scrunchie. Wrap the red velvet scrunchie around the ponytail base twice. Position it so the fabric shows prominently.
- Fluff the curls. Separate the curls with your fingers for volume. A light mist of texturizing spray adds definition.
Tips and tricks: Choose a scrunchie with a strong elastic core. Cheap versions lose their stretch after a few wears. The velvet should be dense enough to hold its shape without looking floppy.
13.Double Dutch Braids with Gold Cuffs
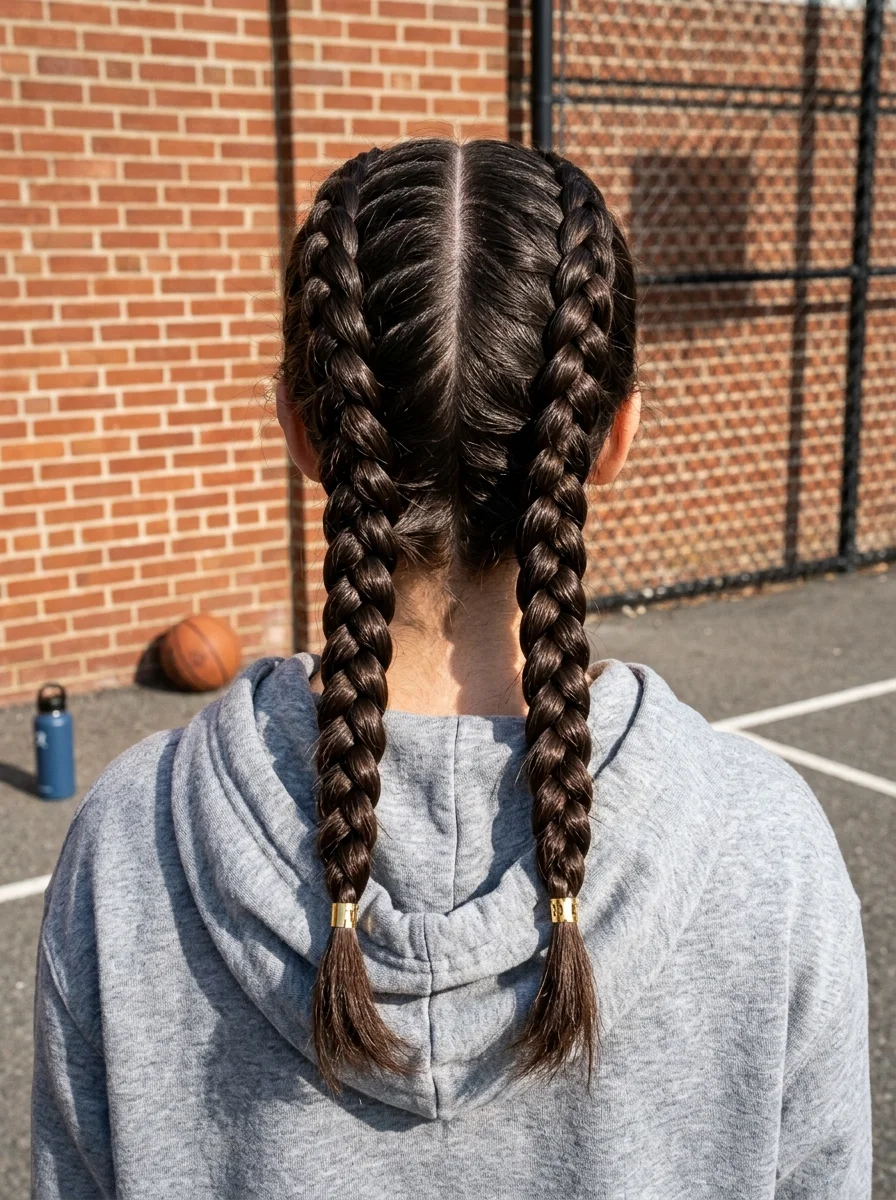
The overview: Hair is parted cleanly down the center and styled into two Dutch braids running from the front hairline all the way down to the ends. The braids are tight, neat, and thick with visible dimension. Each braid is secured at the bottom with a small gold metal cuff.
Double Dutch braids are the most secure school hairstyle available. The braids distribute tension evenly across both sides of the head, preventing the lopsided tilt that side-swept styles create. The gold cuffs add a polished finish that keeps the look from reading as purely athletic.
Why this look is popular: Two braids are more secure than one, and the center part creates symmetry that photographs well from the front. The gold cuffs add a subtle metallic accent that catches light without being distracting.
Where this look is suitable: Gym days, outdoor activities, long school days, any situation where your hair needs to survive intense movement without budging.
Step by step:
- Create a precise center part. Use the pointed end of a rat-tail comb to draw a line from forehead to nape. A crooked part throws off the symmetry of the entire style.
- Dutch braid each side. Starting at the hairline, cross strands under to create the raised braid effect. Pick up small sections from each side as you braid backward.
- Maintain consistent tension. Each new section should be pulled snugly against the scalp. If the braid feels loose, undo the last two crosses and redo them tighter.
- Braid to the ends. Once all hair is incorporated, continue braiding as a standard three-strand to the ends. Secure with gold cuffs.
- Pancake for fullness. Gently pull the outer edges of each braid to widen them. This creates a thicker, more substantial appearance.
Tips and tricks: Braid with slightly damp hair for the cleanest result. The sections are easier to control when there is a little moisture in the hair. Check symmetry by holding both braids side by side before securing.
24 Stunning Bridesmaid Hairstyles for Weddings 2026 💍✨
14.Fishtail Braid with Gold Cuff
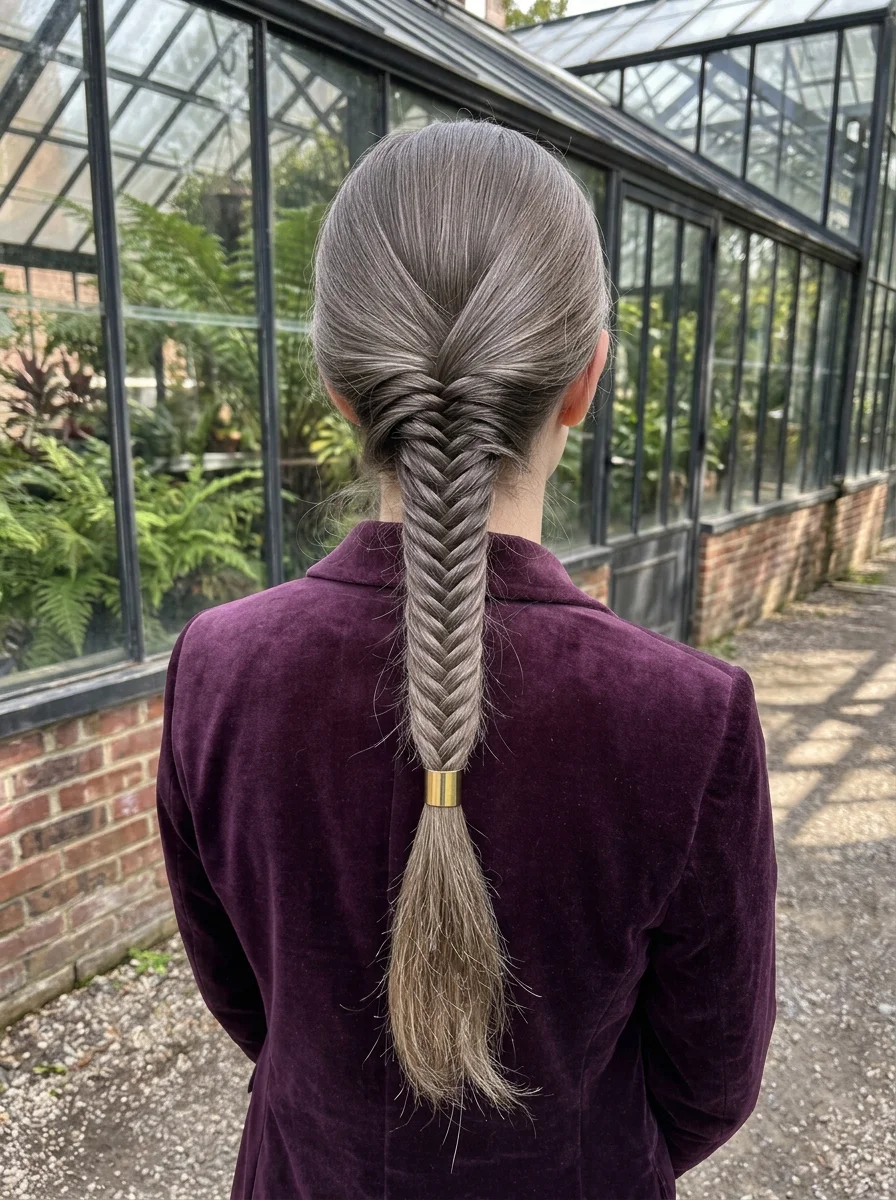
The overview: A single fishtail braid starts from mid-crown and runs down the center of the back. The braid has the characteristic herringbone pattern with fine, intricate weaving. A gold metal cuff secures the bottom, with the ends left loose and slightly wispy.
The fishtail braid is visually distinct from a standard three-strand braid. The two-strand weaving creates a flatter, more detailed pattern that catches light differently. Against platinum or silver hair, the gold cuff creates a striking contrast that elevates the entire look.
Why this look is popular: The fishtail reads as more sophisticated than a regular braid while requiring no additional skill. The gold cuff is the kind of accessory that makes people ask where you got it.
Where this look is suitable: School events, campus outings, any day where you want a braid that feels elevated rather than athletic.
Step by step:
- Prep for texture. Apply texturizing spray to dry hair for grip. The fishtail holds better when hair has some natural oils.
- Gather to one side. Pull all hair over one shoulder. Split into two sections for the fishtail.
- Fishtail braid. Cross small pieces from the outer edge of each section to the other. Work from crown to ends, keeping tension consistent.
- Secure with cuff. Slide the gold cuff over the final elastic. The cuff should sit snugly without crushing the braid.
- Pancake gently. Pull the outer edges of the braid to widen it slightly. The fishtail looks best when it has some width.
Tips and tricks: The smaller the pieces you cross, the more intricate the braid pattern. Larger pieces create a chunkier, more casual appearance. Match the piece size to the occasion.
15.Half-Up Twist with Gold Hair Pins
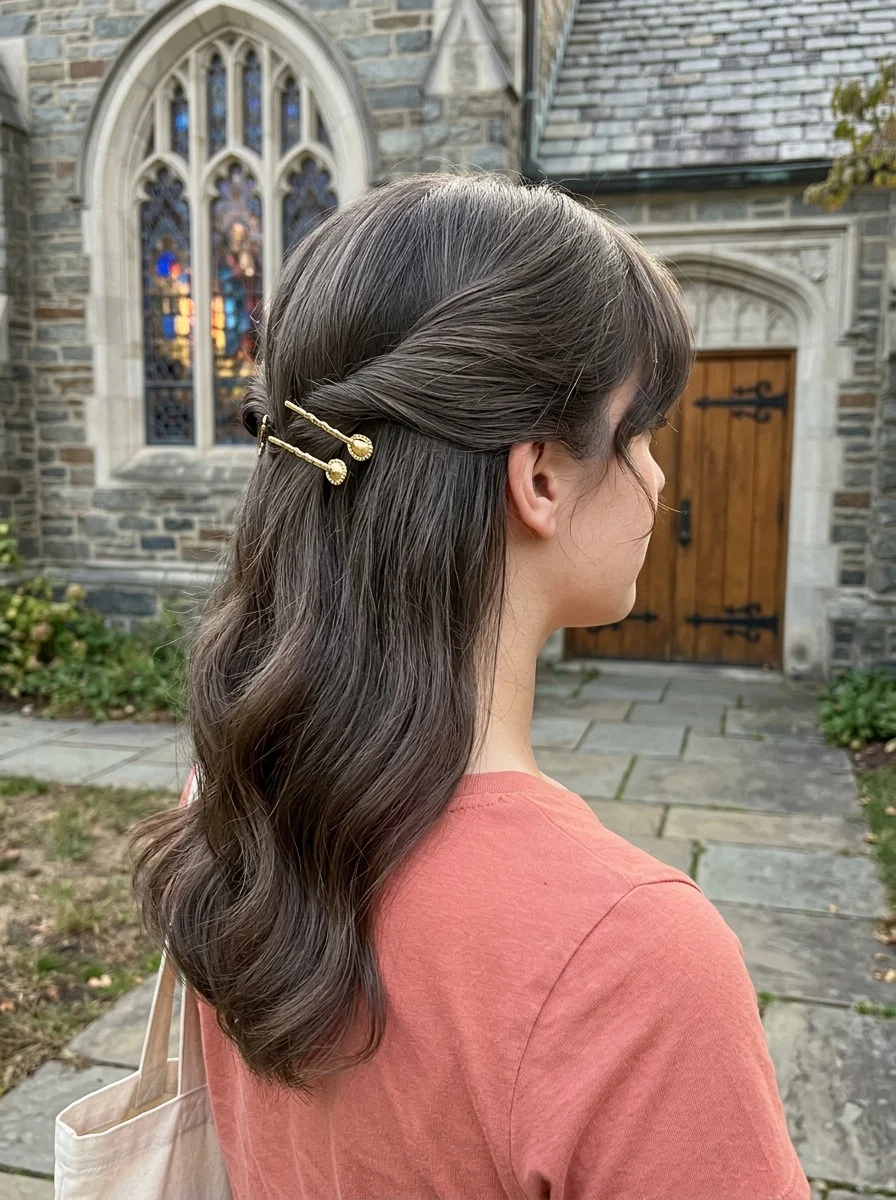
The overview: Sections from each side are twisted and pulled back, meeting at the back of the head. Two decorative gold hair pins with ornate, flower-like heads secure the twist. The remaining hair flows down past the shoulders in loose, soft waves. The pins add a delicate, nature-inspired detail that catches light without overwhelming the style.
The double-pin placement is more secure than a single clip and distributes the weight of the twisted section across two anchor points. This matters when you are wearing the style for eight-plus hours.
Why this look is popular: Gold hair pins are the accessory trend of 2026 because they add warmth and polish without being flashy. The flower-like heads create a subtle botanical reference that feels organic rather than themed.
Where this look is suitable: Daily classes, campus events, casual dates, any situation where you want your hair to look intentional without being overdressed.
Step by step:
- Create loose waves. Use a large-barrel curling iron or braid damp hair overnight for natural-looking waves.
- Twist from each side. Take a section from each temple and twist it loosely toward the back of the head.
- Cross at the back. Cross the two twists at the back of the head, overlapping them slightly.
- Pin with gold pins. Insert the decorative pins through the crossed twists and into the hair beneath. Angle them in different directions for better grip.
- Adjust the waves. Shake the loose sections for natural volume. A light mist of flexible-hold spray keeps everything in place.
Tips and tricks: The pins should be inserted at an angle, not straight down. Angled pins grip more hair and are less likely to slide out. Push them deep enough that only the decorative heads are visible.
31 Stunning Prom Nails for Women in 2026 💃
16.Half-Up with Navy Blue Satin Bow
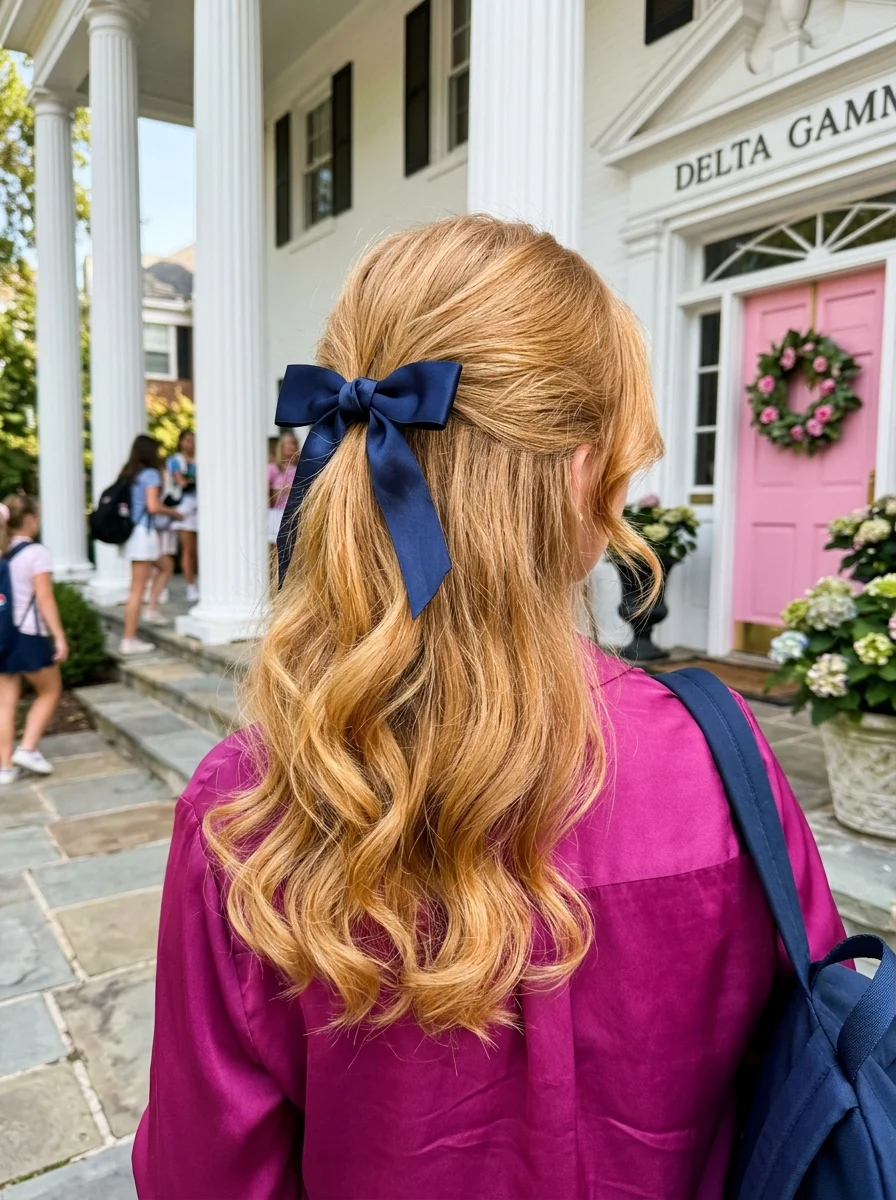
The overview: The top section is gathered and secured with a large navy blue satin ribbon bow. The bow is classic and preppy with trailing ribbon tails that hang alongside the hair. The remaining hair falls in loose, defined spiral curls to mid-back length.
A navy bow against golden-blonde hair creates a contrast that photographs beautifully in natural light. The satin fabric has enough structure to hold its shape throughout the day, unlike sheer or organza ribbons that wilt by lunch.
Why this look is popular: Bows are back in a major way, and the half-up placement is the most practical. The bow sits at the back of the head where it won't interfere with leaning back in chairs or wearing headphones.
Where this look is suitable: School dances, picture day, sorority events, any occasion where a classic, feminine detail feels appropriate.
Step by step:
- Define curls. Apply curl cream to damp hair and diffuse or air-dry for defined spiral curls.
- Gather the top section. Take hair from each temple and the crown. Smooth it back toward the back of the head.
- Secure with elastic. Tie the gathered section with a clear elastic at the back of the crown.
- Tie the bow. Thread the navy satin ribbon through the elastic or tie it directly over it. Create a full bow with even tails.
- Adjust the curls. Separate any clumped curls with your fingers. A few drops of shine serum on the ends adds polish.
Tips and tricks: Choose grosgrain over satin if your hair is fine - grosgrain has texture that grips better. For satin, anchor the bow with a hidden bobby pin on each side to prevent slipping.
17.Half-Up Twisted Bun with Pearl Bobby Pin
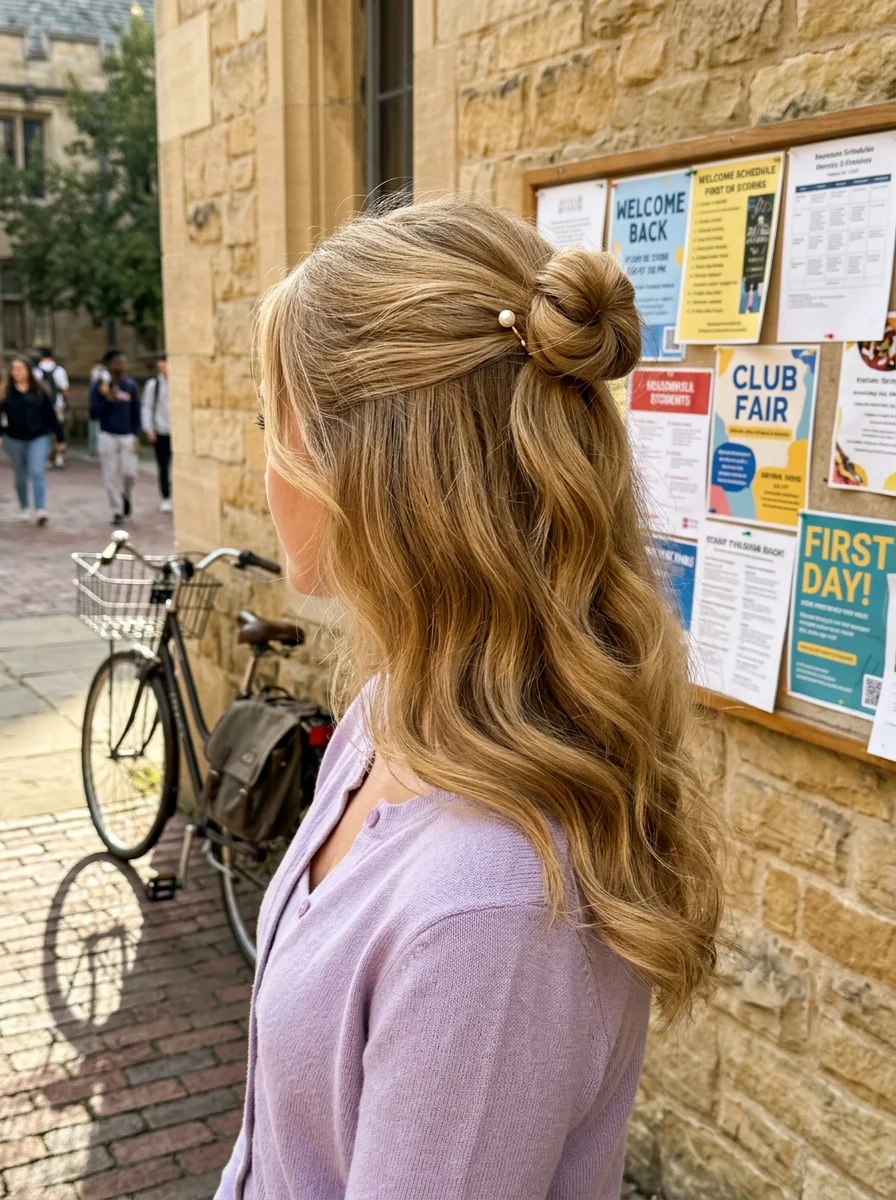
The overview: Top and side sections are pulled back and twisted into a small, neat bun at the back of the head. A pearl-topped bobby pin - a single round white pearl on a gold pin - secures the bun. The rest of the hair flows down in soft, loose waves to mid-back length.
The single pearl pin is the minimalist's answer to hair accessories. It adds a point of interest without creating visual clutter. Against the twisted bun, the pearl creates a focal point that draws the eye precisely where you want it.
Why this look is popular: Pearl pins are having a continous moment because they bridge the gap between casual and formal. One pearl pin reads as thoughtful; a dozen reads as costume. The single placement is the sweet spot.
Where this look is suitable: School presentations, college campus visits, any day where you want to look polished without being obvious about the effort.
Step by step:
- Create waves. Use a 1.25-inch curling iron on 1-inch sections, leaving the ends out. Break up with fingers.
- Gather the top section. Take hair from the temples and crown. Twist loosely toward the back.
- Form the bun. Coil the twisted section into a small bun. Pin with standard bobby pins first for security.
- Add the pearl pin. Insert the pearl-tipped pin through the bun at an angle. The pearl should sit visible on the surface.
- Adjust the waves. Shake the loose sections for volume. A light mist of texturizing spray adds definition.
Tips and tricks: Use standard bobby pins for the structural hold and the pearl pin for decoration. A single pearl pin cannot support the weight of a bun on its own. Place it where it catches light from the front.
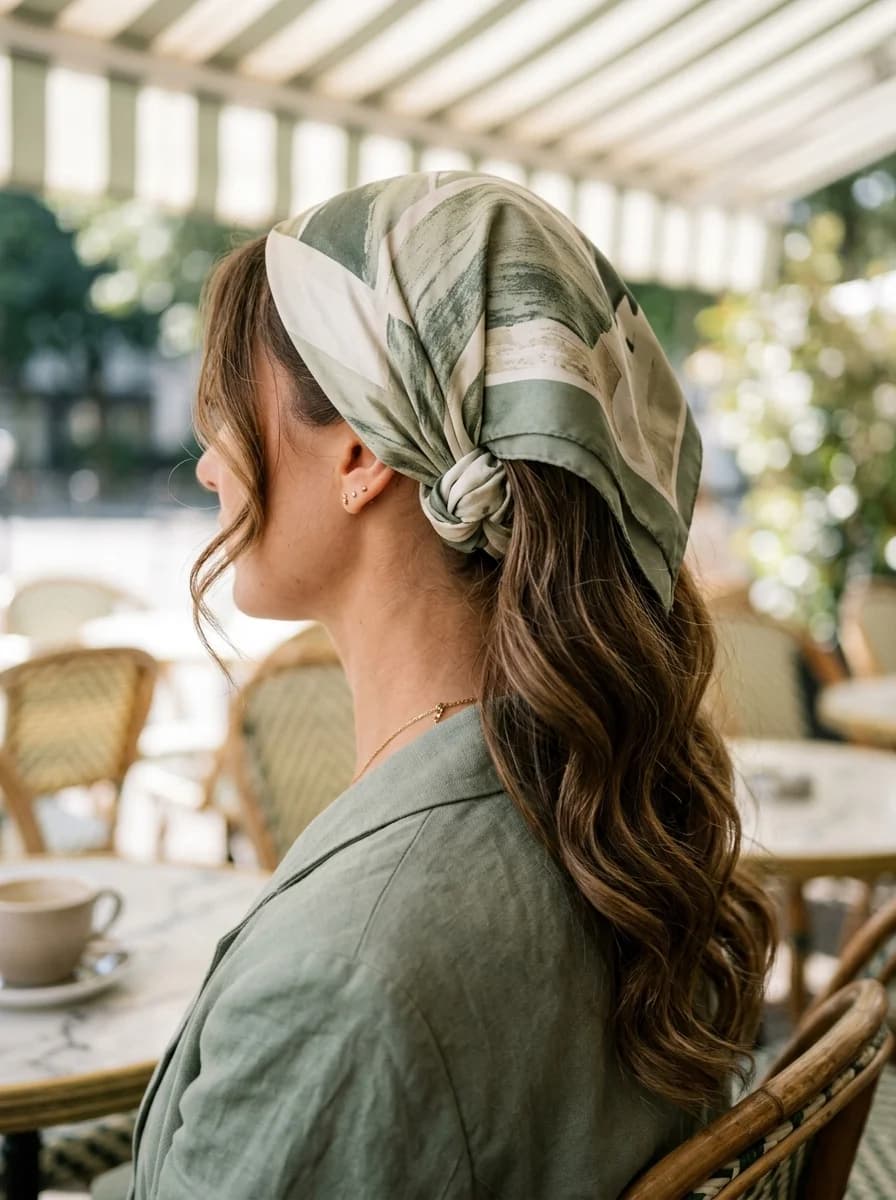
38 Trending Bandana Hairstyles for Women (2026)
18.Half-Up Twist with Gold Hair Clip
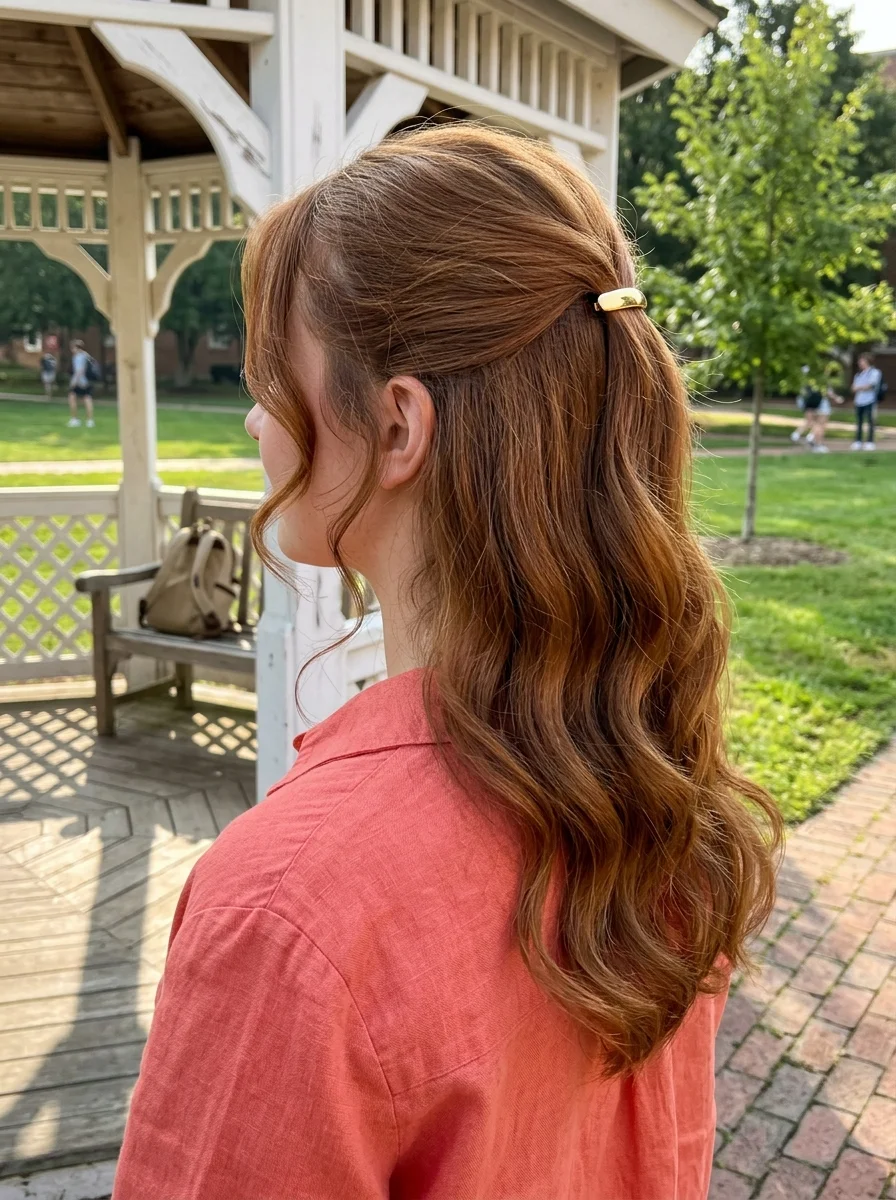
The overview: Sections from the front are twisted back and secured with a small gold hair clip at the back of the head. A few face-framing tendrils are left loose around the ear and temple. The rest of the hair falls in long, loose, voluminous waves past the shoulders.
This is the most straightforward half-up style on the list. Two twists, one clip, done. The gold clip adds a warm metallic accent that coordinates with gold jewelry without competing with it.
Why this look is popular: The twisted half-up with a gold clip is the fastest polished hairstyle available. Under five minutes from start to finish, and the result looks like you planned it.
Where this look is suitable: Morning classes when time is limited, campus errands, casual study groups, any day where speed and polish need to coexist.
Step by step:
- Prep with texture. Apply a lightweight mousse to damp hair and air-dry for natural volume.
- Twist from each side. Take a section from each temple and twist loosely backward.
- Clip at the back. Bring the two twists together at the back of the head and secure with the gold clip.
- Pull out face-framers. Tug a few strands around the ears for a relaxed, effortless look.
- Add wave if needed. If the loose hair is too straight, wrap 1-inch sections around a curling wand for soft bends.
Tips and tricks: The clip should be proportional to your hair. Slim clips work best on fine to medium hair; wider ones on thick. Keep a spare clip in your bag - they have a way of disappearing.
19.Loose Waves with Navy Blue Headband
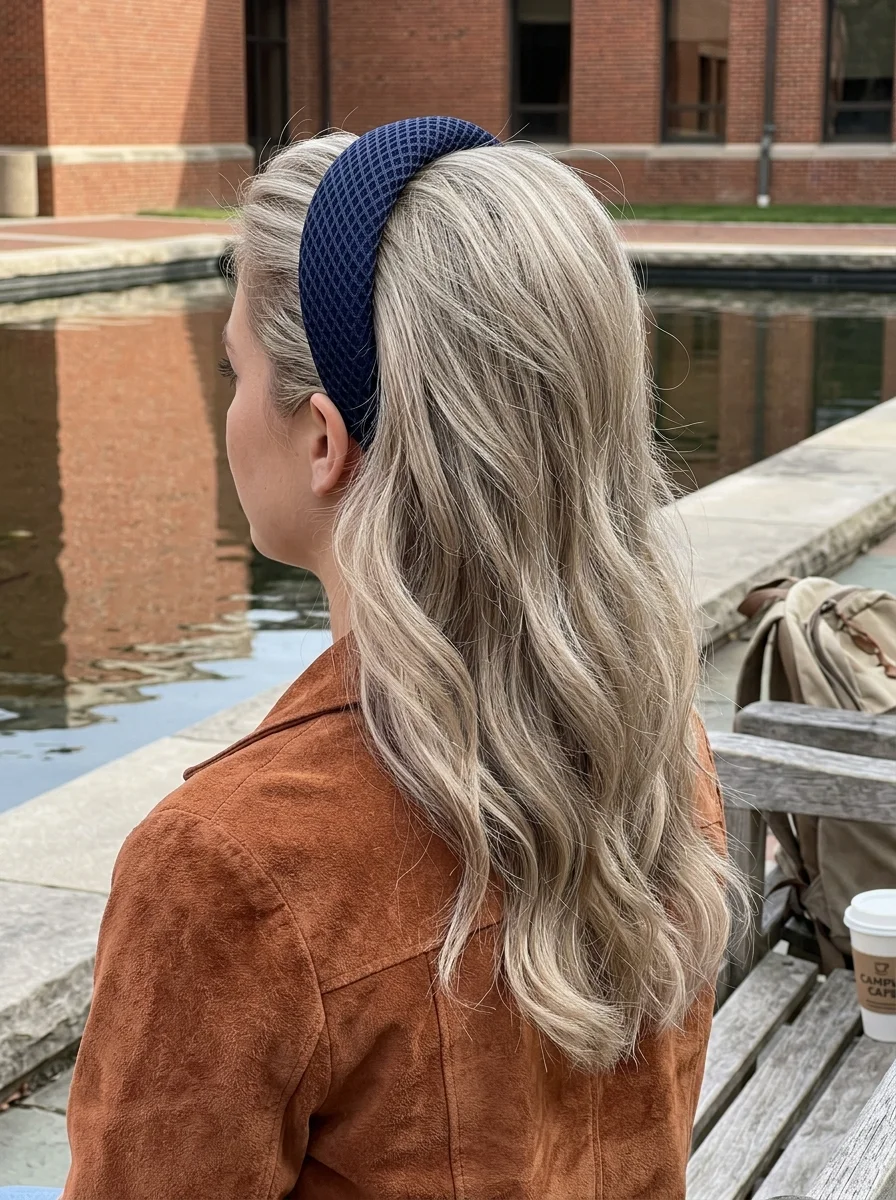
The overview: Beachy, textured waves fall to mid-back length, pushed back from the face by a thick, padded navy blue headband with a quilted texture pattern. The headband does the work of keeping hair off the face while the waves provide volume and movement below.
A padded headband is structurally different from a thin one. The padding creates height at the crown, which elongates the face and adds a subtle retro reference. The quilted texture adds visual interest that a smooth headband cannot achieve.
Why this look is popular: Headbands are the most underrated school accessory because they solve the constant hair-pushing-out-of-face problem without requiring pins, clips, or braids. The padded version adds enough structure to feel like a style choice.
Where this look is suitable: Daily classes, study sessions, campus walks, any day where you want your hair down but controlled.
Step by step:
- Create waves. Use a 1.25-inch curling wand on 1-inch sections, leaving the ends straight. Break up with fingers.
- Position the headband. Place the padded headband on top of your head, about 2 inches back from the hairline. Push it down firmly so it grips.
- Adjust the hair. Pull small sections of hair over the headband edges for a softer, more integrated look.
- Fluff the waves. Scrunch the loose waves for volume and texture. A light mist of sea salt spray adds definition.
Tips and tricks: A headband with silicone grips on the inside stays in place better than one without. If yours slides, anchor it with a bobby pin hidden on each side above the ear.
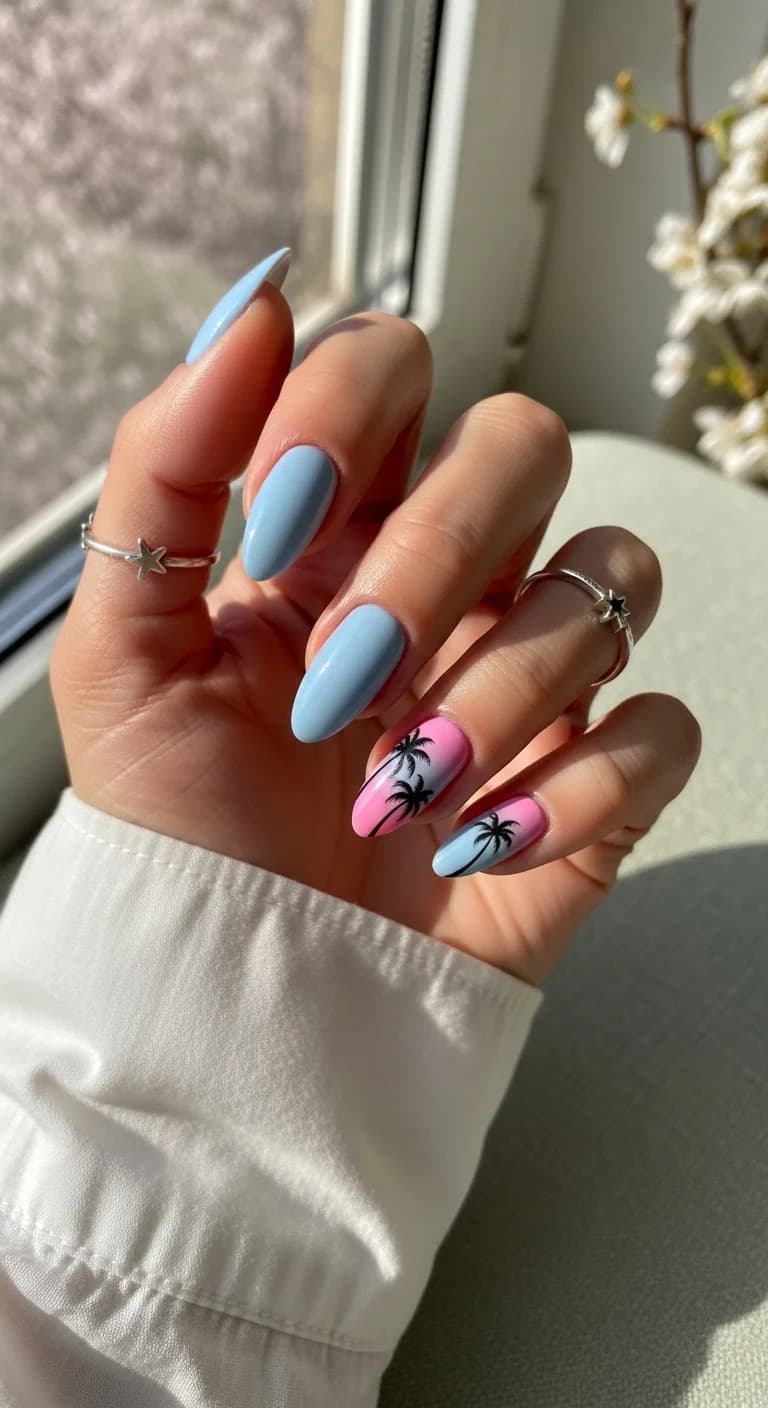
35 Palm Tree Nail Art Ideas that are the Most Iconic Nail Art Designs 🌴✨
20.Half-Up Waves with Gold Barrette
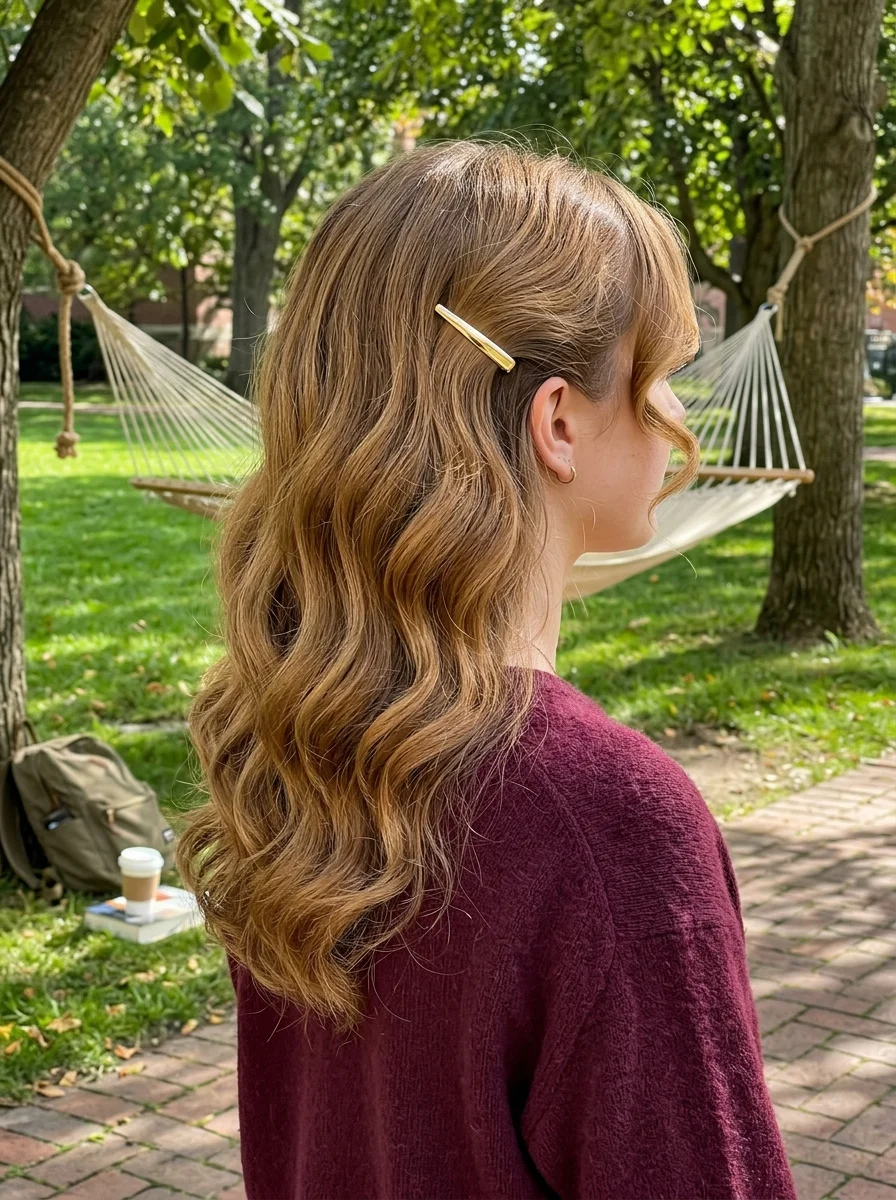
The overview: A section of hair from the side is pulled back and secured with a simple, sleek gold barrette just above the ear. The rest of the hair falls in defined, bouncy S-waves to mid-back length. A face-framing curled tendril is left loose near the ear.
The slim gold barrette is the most versatile school accessory. It adds a jewelry-like accent without overwhelming the style. Against defined waves, it creates a focal point that says "I planned this" even though the whole look takes under ten minutes.
Why this look is popular: The half-up barrette style is the most requested school look because it is fast, flattering, and works for virtually every hair texture. The gold barrette adds warmth and polish.
Where this look is suitable: Daily classes, weekend brunches, campus events, any daytime setting where simple polish is the goal.
Step by step:
- Create waves. Use a 1.25-inch curling wand on 1-inch sections, leaving the last inch out. Break up with fingers.
- Gather the side section. Take hair from one side, above the ear, and smooth it back toward the crown.
- Clip with barrette. Secure the gathered section with the gold barrette just above the ear.
- Adjust the waves. Shake the loose waves for natural volume and separation.
- Set lightly. A mist of flexible-hold hairspray keeps the waves defined without stiffness.
Tips and tricks: The barrette should be proportional to your hair. Slim barrettes work best on fine to medium hair. For waves that last, apply heat protectant before curling and let each curl cool completely before touching.
21.Sleek High Ponytail with Gold Cuff
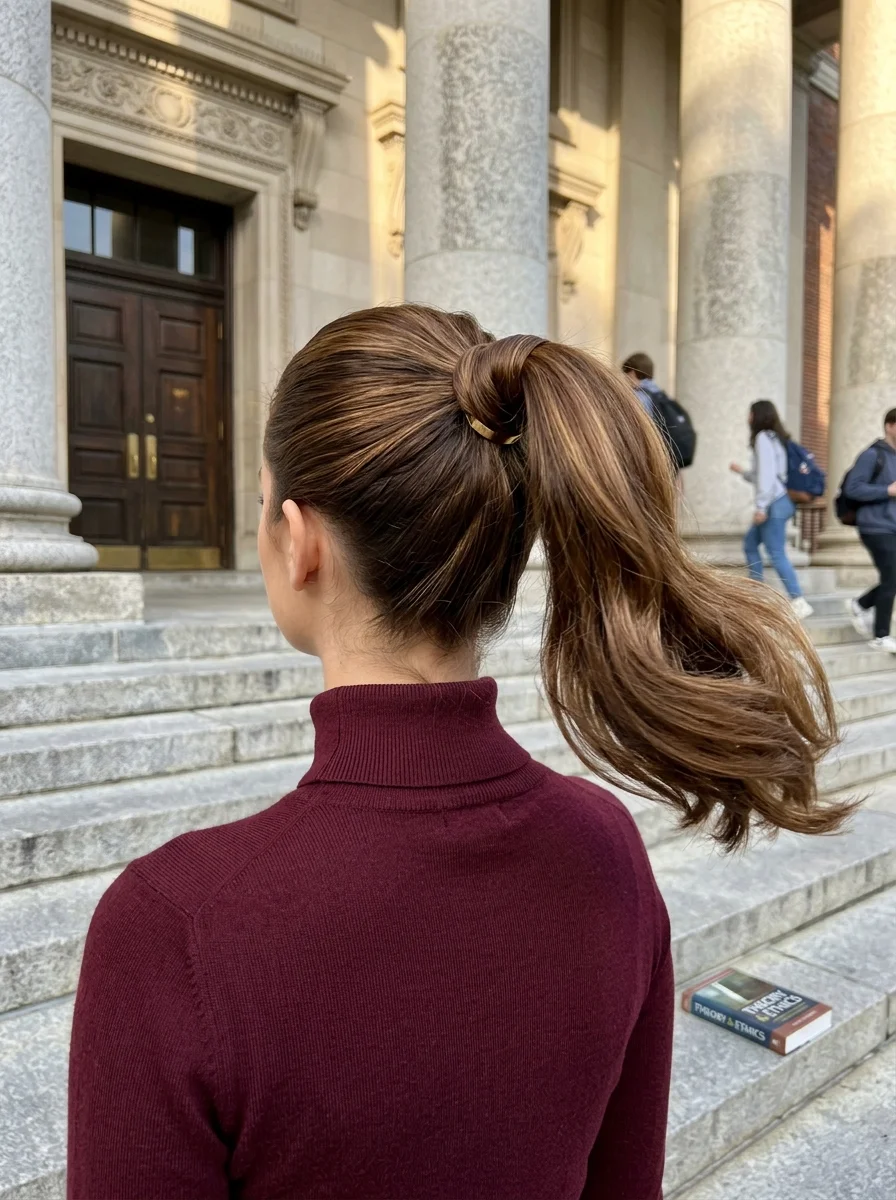
The overview: Hair is smoothly pulled back from the face and gathered into a high ponytail at the crown. The base is wrapped with a strand of hair to conceal the elastic, secured with a small gold hair cuff. The ponytail itself has a voluminous, bouncy curl at the ends with a slight flick.
The sleek high ponytail is a power move on campus. It elongates your neck, highlights your bone structure, and the gold cuff adds a modern accent that keeps the look from feeling too severe. The bouncy curl at the ends softens the entire silhouette.
Why this look is popular: The high ponytail is having a continous moment because it works with bold earrings, strong makeup, and structured clothing. It's minimal but never boring.
Where this look is suitable: School presentations, career days, campus interviews, any day where you need to look sharp and in control.
Step by step:
- Apply smoothing product. Work gel or pomade through damp hair from root to tip for a sleek, controlled base.
- Gather high. Use a boar bristle brush to pull all hair up to the crown. Secure with a strong elastic.
- Wrap the elastic. Take a thin strand from the underside of the ponytail, wrap it around the elastic, and pin the end underneath.
- Add the gold cuff. Slide the cuff over the wrapped section and clamp it shut.
- Curl the ends. Use a 1.25-inch curling iron on the last 3 inches of the ponytail for a bouncy flick.
Tips and tricks: Use a toothbrush sprayed with hairspray to smooth any baby hairs along your hairline. It gives precision that a regular brush cannot match. The ponytail should feel secure enough to shake your head without shifting.
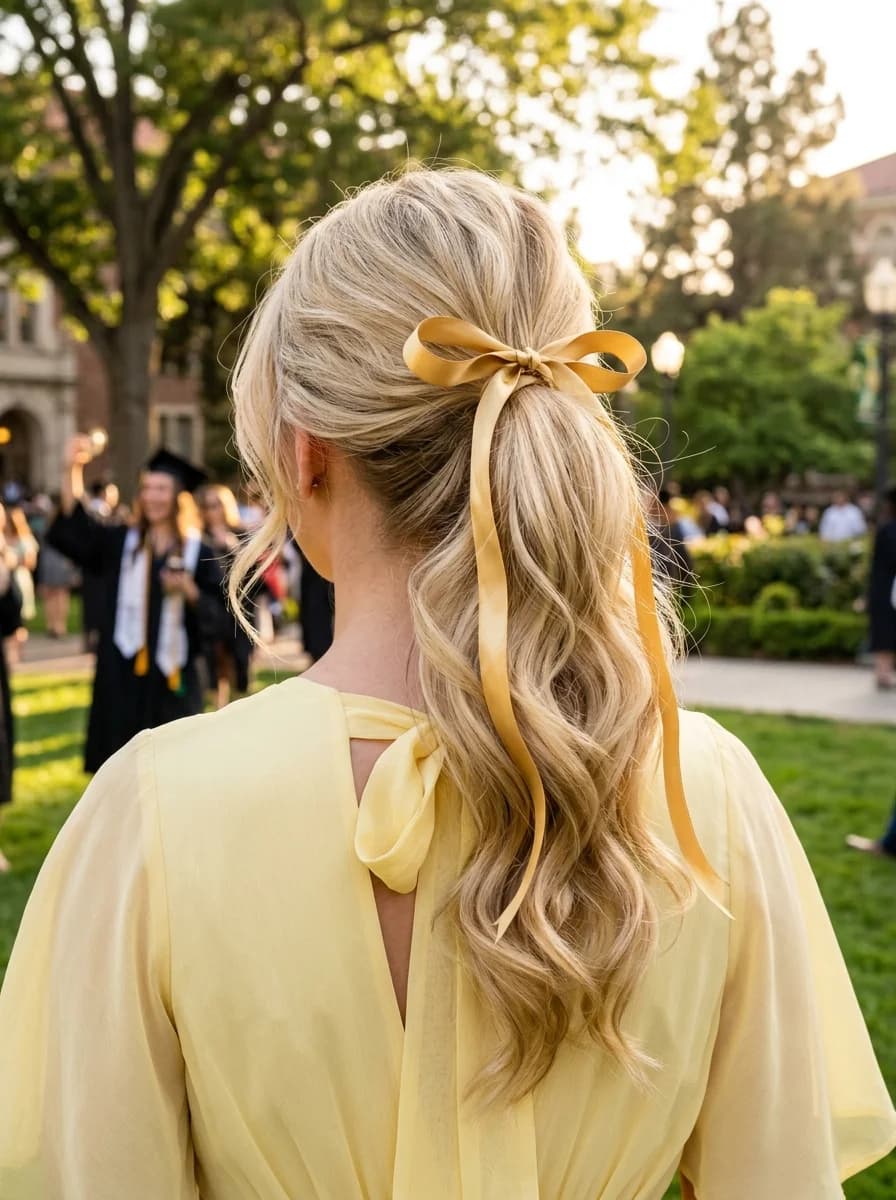
22 Best Graduation Day Hairstyles for 2026 🎓✨
22.Half-Up Braided Crown with Gold Bobby Pin
The overview: Two Dutch braids start from the front hairline and travel along the side of the head, meeting at the back where they are secured with a small gold bobby pin. The remaining hair falls in loose, soft waves past the shoulders. The braided crown creates a headband effect that keeps hair contained while showing off length below.
The braided crown is the most practical half-up style for school because it controls hair on both sides of the face, preventing the constant pushing-back motion that disrupts concentration during lectures.
Why this look is popular: The braided crown photographs well from every angle, which matters more than people admit. In group photos, you look styled from the front, side, and back.
Where this look is suitable: School dances, campus events, picture day, any occasion where you want a hairstyle that works from every angle.
Step by step:
- Prep for grip. Apply texturizing spray to dry hair for hold. Second-day hair braids better than freshly washed.
- Dutch braid from each side. Start above one ear and braid along the hairline toward the back. Repeat on the other side.
- Meet at the back. Bring both braids to the back of the head. Cross them over each other and secure with a gold bobby pin.
- Pancake the braids. Gently pull the outer edges of each braid to widen them. This creates a fuller, more substantial crown.
- Add wave to the loose hair. Use a curling wand on the remaining hair for soft, natural-looking waves.
Tips and tricks: Keep consistent tension throughout both braids. If one is looser, the crown looks lopsided. Check symmetry by looking at both braids in a mirror from the back before securing.
23.Low Ponytail with Burgundy Bow
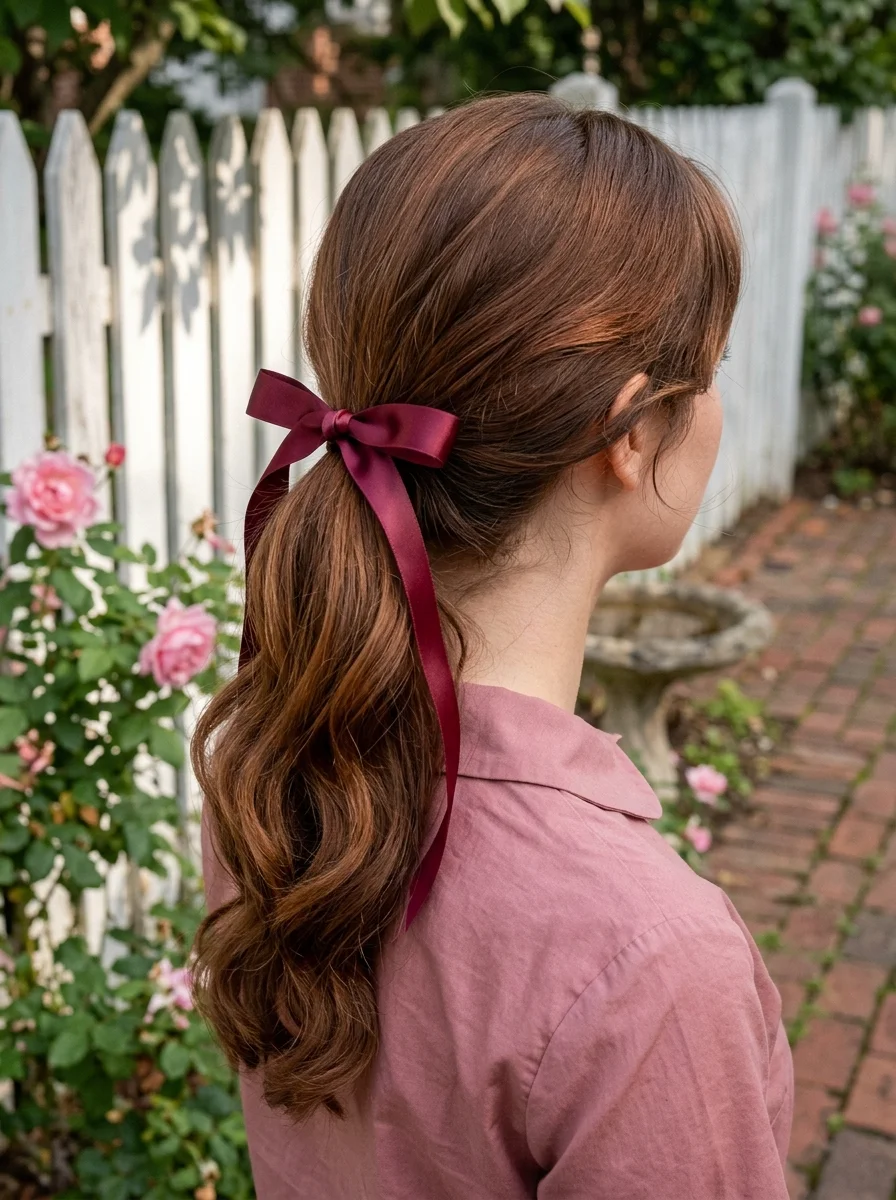
The overview: Hair is gathered into a low ponytail at the nape, secured with a rich burgundy satin ribbon tied in a bow with long trailing ends. The ponytail has soft, bouncy curls throughout. The burgundy against medium-to-dark brown hair creates a tonal richness that feels autumnal without being costumey.
The low ponytail with a bow is the most wearable formal-casual crossover. It reads as polished enough for a school event but relaxed enough for daily wear. The trailing ribbon tails add movement that a static clip cannot achieve.
Why this look is popular: Burgundy is the color of fall, and translating that to a hair accessory creates an instant seasonal reference. The satin ribbon photographs well and holds its shape through a full school day.
Where this look is suitable: School dances, fall festivals, family photos, any occasion where a classic, romantic detail feels appropriate.
Step by step:
- Curl the hair. Use a 1.25-inch curling iron on 1-inch sections for soft, bouncy curls throughout.
- Gather low. Brush hair into a relaxed ponytail at the nape. Don't pull it tight.
- Tie the bow. Wrap the burgundy satin ribbon around the ponytail base and tie into a full bow. Adjust the tails to be even.
- Fluff the curls. Separate the curls with your fingers for volume. A light mist of flexible-hold spray keeps them defined.
Tips and tricks: Choose a ribbon width that is proportional to your ponytail thickness. Wide ribbon on a thin ponytail overwhelms; narrow ribbon on a thick ponytail disappears. The tails should reach at least to the midpoint of the ponytail for visual balance.
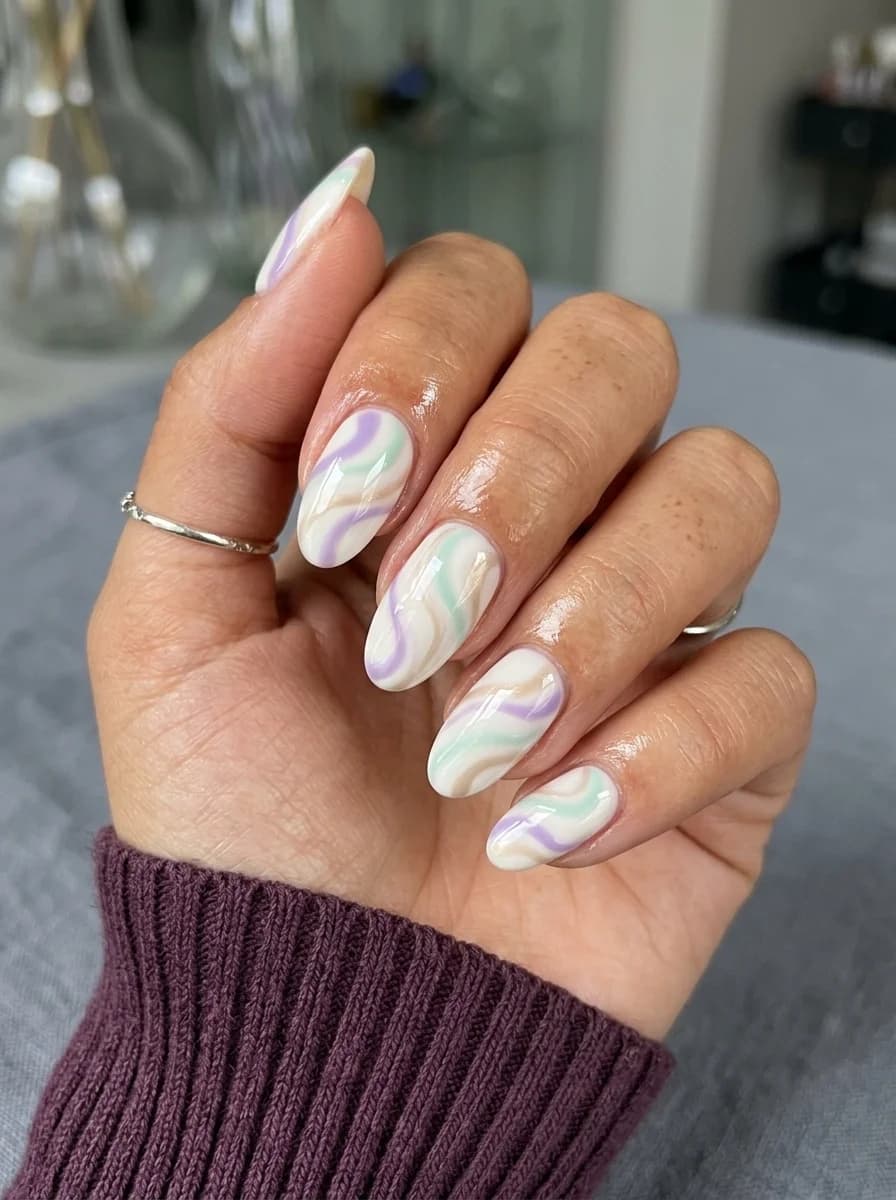
27 August Nail Designs That Capture the Last Days of Summer
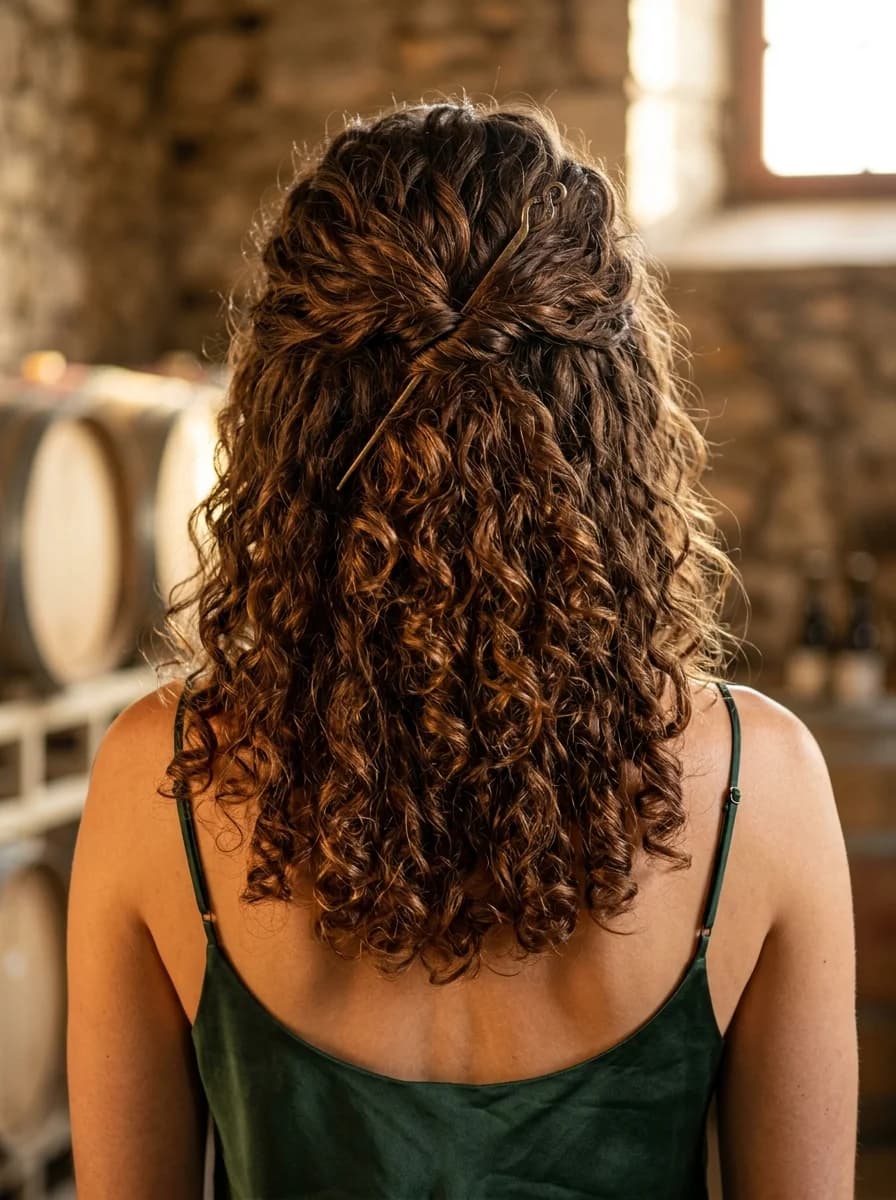
24.Natural Curls with Gold Headband
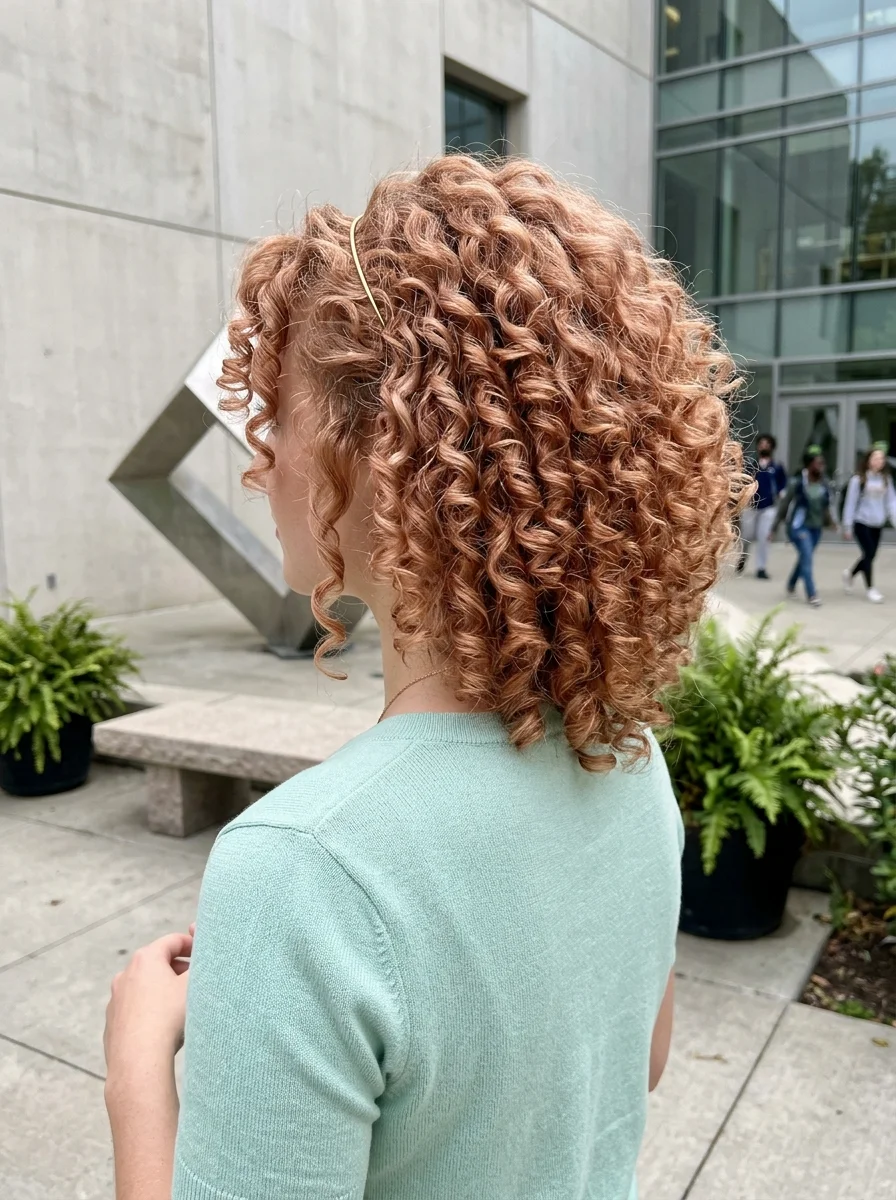
The overview: Voluminous, tightly coiled ringlet curls in a copper-toned shade fall to shoulder length with excellent definition. A thin gold metal headband sits across the top of the head, pushing the curls back slightly from the face without compressing them.
The thin gold headband is the most curl-friendly accessory because it controls the hairline without flattening the crown. Unlike padded headbands that create a visible ridge, the thin metal band disappears into the curls, creating the illusion that your hair simply cooperated.
Why this look is popular: Natural curls are having their biggest moment in school hallways because the styling approach has shifted from "manage" to "celebrate." The gold headband adds a polished accent without pretending the curls need taming.
Where this look is suitable: Daily classes, campus events, any day where your curls are the statement and you want a simple accessory to complement them.
Step by step:
- Define curls. Apply curl cream to soaking wet hair, scrunching upward to encourage curl formation. Follow with a lightweight gel for hold.
- Diffuse or air-dry. Cup sections in the diffuser and hold against the scalp for 10-15 seconds each. Don't touch while drying.
- Scrunch out the crunch. Once fully dry, scrunch each section to break the gel cast, revealing soft, defined curls.
- Add the headband. Place the thin gold headband on top of the head, about 1.5 inches back from the hairline. Push it down gently so it grips without flattening.
- Adjust the curls. Lift curls at the root around the headband for volume. Pull a few pieces forward over the band for a softer look.
Tips and tricks: A headband with silicone grips on the inside stays in place better on curly hair. If yours slides, anchor it with a bobby pin hidden on each side above the ear.
25.Shag Cut with Tortoiseshell Claw Clip
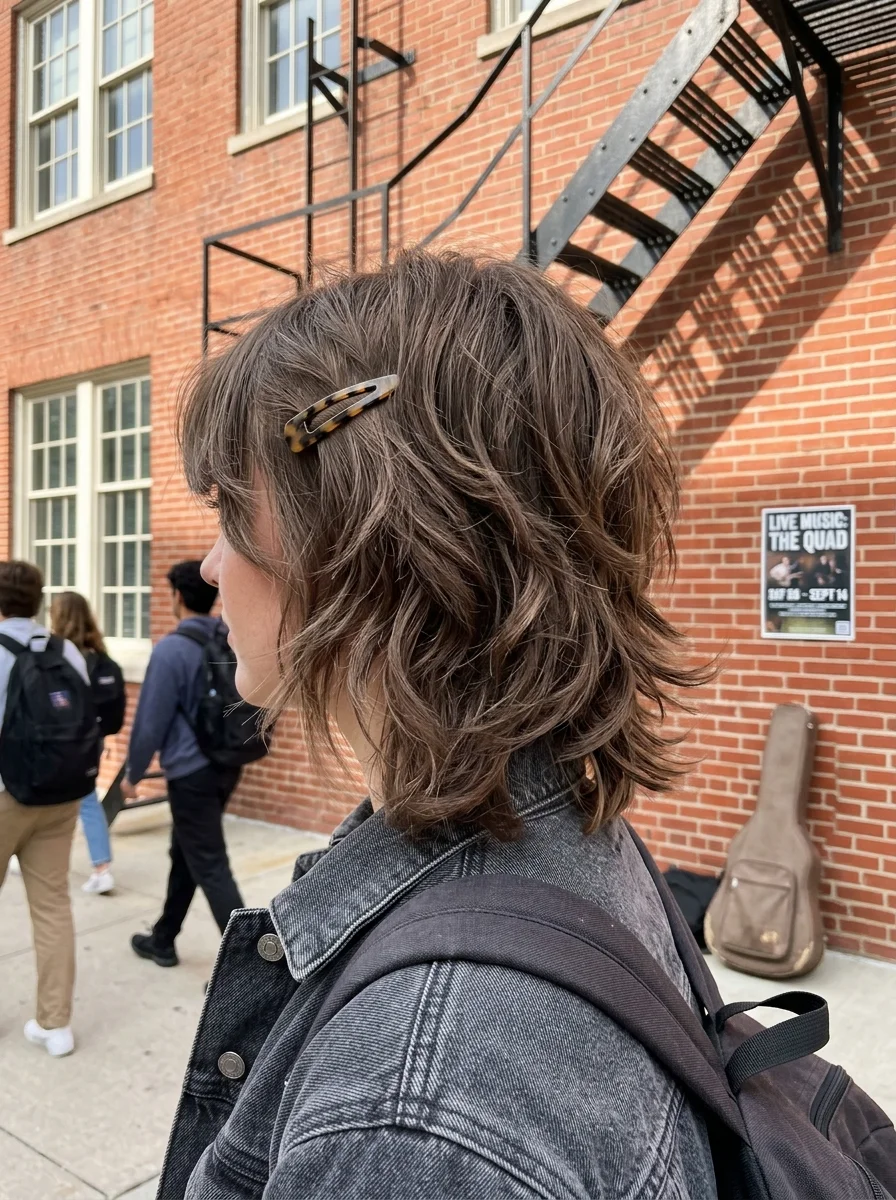
The overview: A textured, layered shag cut in medium ashy brown with subtle highlights. The hair has a tousled, lived-in wave pattern with choppy ends. A single tortoiseshell-patterned claw clip pulls back a section near the temple, keeping hair off one side of the face while maintaining the shag's natural movement.
The shag cut is the lowest-maintenance cut in this list. The layers are designed to work with your natural texture, not against it. The claw clip adds a functional detail that keeps the longer pieces from falling into your eyes during class.
Why this look is popular: The shag is the cut that stylists are recommending most for students because it requires zero heat tools, improves with air-drying, and looks intentional even on mornings when you rolled out of bed five minutes before first bell.
Where this look is suitable: Daily classes, weekend errands, casual campus life, any day where effortless texture is the goal.
Step by step:
- Wash and towel-dry. Squeeze out excess water with a microfiber towel. Don't rub.
- Apply texturizing product. Work sea salt spray or matte paste through the mid-lengths and ends.
- Air-dry. Let hair dry naturally. Avoid touching it while it dries - hands create frizz.
- Clip one side. Take a section from the heavier side of the part and clip it back with the tortoiseshell claw clip.
- Piece out the texture. Once dry, use your fingers to separate and define individual pieces throughout the layers.
Tips and tricks: Ask your stylist for a shag with "point-cut ends" that create natural texture without blunt lines. Maintenance trims every 8-10 weeks keep the layers fresh.
25 Stunning Summer Vacation Hairstyles for 2026 ☀️🌊
26.Sleek Low Bun with Gold Circular Cuff
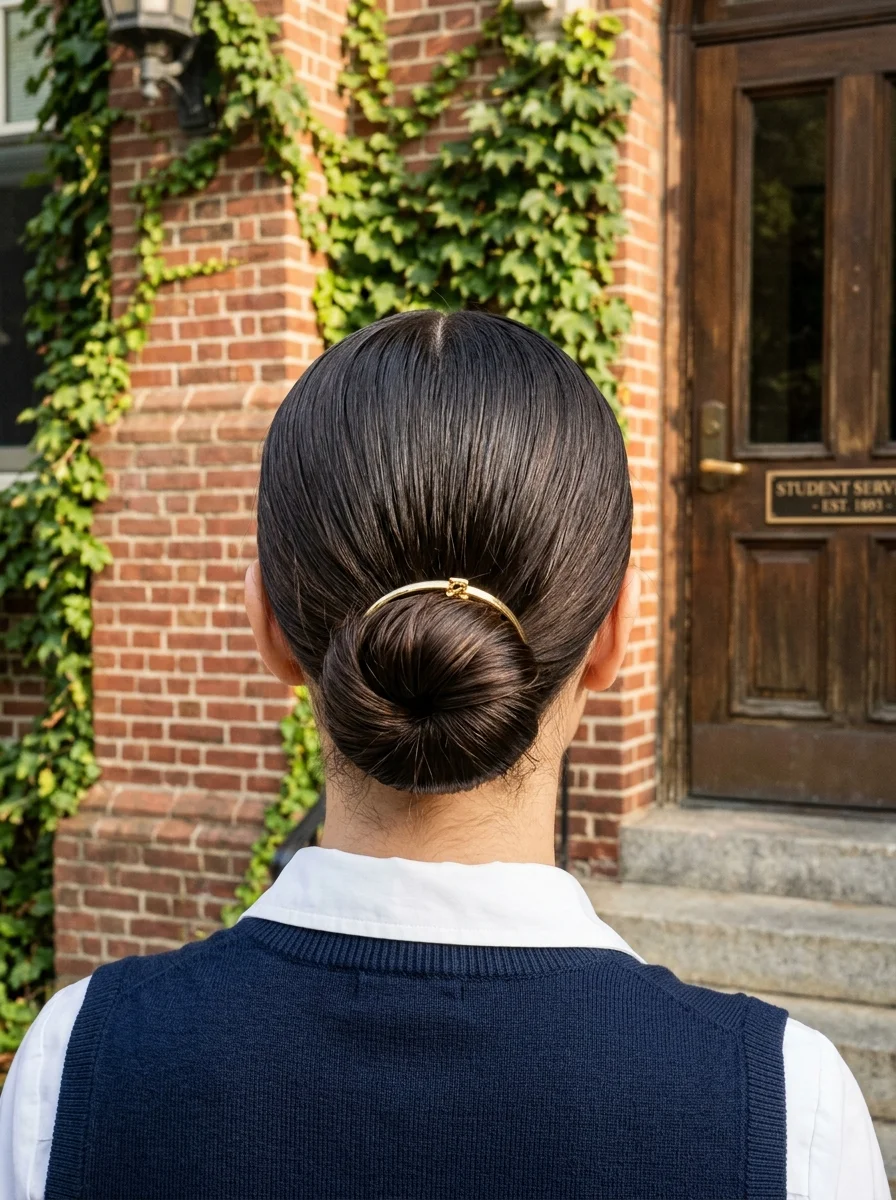
The overview: Very sleek, straight dark brown hair pulled tightly into a smooth, polished low bun at the nape. The bun is a neat, rounded shape. A thin gold circular hair cuff encircles the base of the bun, adding a minimalist metallic accent.
This is the most polished style on the list. The sleek finish and gold cuff create a look that communicates precision and control. For students who want their hair to match their academic focus, this is the style.
Why this look is popular: The sleek low bun is the professional's choice for school. It survives long days, stays completely secure through movement, and photographs consistently from every angle.
Where this look is suitable: School presentations, college interviews, career days, any situation where you need to look competent and polished.
Step by step:
- Create a glass-smooth base. Apply smoothing serum to damp hair. Blow-dry with a paddle brush, directing the nozzle downward along the hair shaft.
- Brush into a low ponytail. Use a boar bristle brush to sweep hair into a ponytail at the nape. Eliminate every bump.
- Twist into a bun. Twist the ponytail tightly, wrap it around the base, and pin from the inside with bobby pins.
- Add the gold cuff. Slide the circular cuff over the bun base. It should sit snugly without crushing the bun.
- Set with spray. A firm-hold hairspray locks everything in place. Wrap the crown with a silk scarf for 10 minutes while the spray sets for the smoothest result.
Tips and tricks: Use U-shaped hairpins instead of bobby pins for the bun. U-pins grip in two directions while bobby pins only grip in one, creating a more stable hold.
27.Half-Up Twist with Gold U-Pin
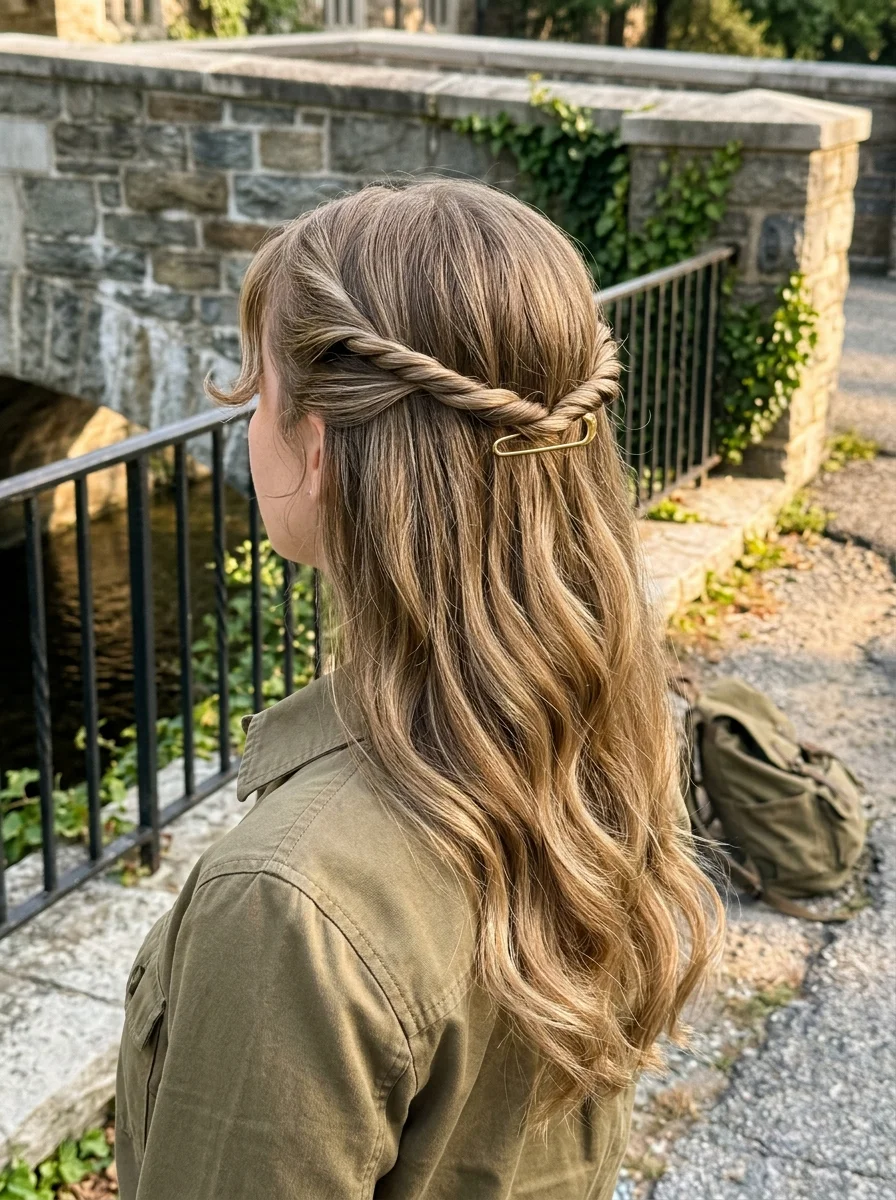
The overview: A section from each side is twisted and brought to the back of the head, where it is secured with a gold U-shaped hairpin or bobby pin. The rest of the hair flows down in soft, natural waves past the shoulders. This is the most understated half-up style on the list - the twist does the structural work, and the pin does the decorative work.
The U-pin is more secure than a standard bobby pin because it grips hair from two directions. For a half-up style that needs to survive eight hours of classes, this structural advantage matters.
Why this look is popular: The minimalist half-up twist is the style that works with everything. It doesn't compete with earrings, necklaces, or scarves. It simply holds hair back and adds a small metallic detail.
Where this look is suitable: Daily classes, campus errands, study groups, any day where functionality and subtlety are the goals.
Step by step:
- Prep with texture. Apply a lightweight mousse to damp hair and air-dry for natural body.
- Twist from each side. Take a section from each temple and twist loosely backward toward the back of the head.
- Cross and pin. Cross the two twists at the back of the head. Insert the gold U-pin through both twists and into the hair beneath.
- Adjust the waves. Shake the loose sections for natural volume. A light mist of texturizing spray adds definition.
Tips and tricks: Insert the U-pin at an angle, not straight down. Angled pins grip more hair and are less likely to slide out during the day. For extra security, use two pins in a crossing pattern.
35 Cute & Trendy Short Summer Nails for 2026 ☀️
28.Double Space Buns with Red Velvet Scrunchies
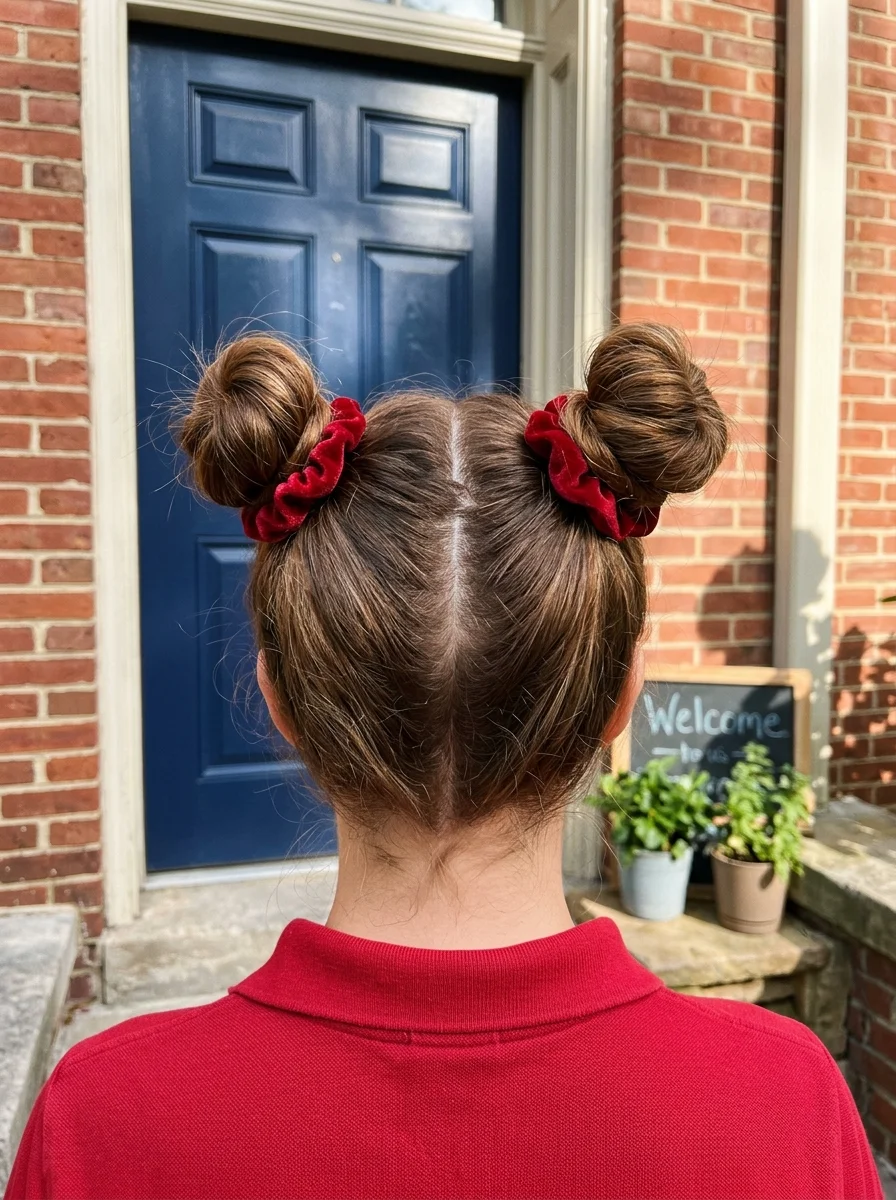
The overview: Hair is parted cleanly down the center and styled into two symmetrical buns positioned high on either side of the crown. Each bun is wrapped with a plush red velvet scrunchie. The buns are slightly messy and textured rather than perfectly smooth, giving them a playful, youthful energy.
Double buns are the most fun hairstyle on this list. They reference a specific kind of youthful confidence that works especially well in school settings where personality is part of the social currency.
Why this look is popular: Space buns have a nostalgic appeal that transcends trends. The red velvet scrunchies add a tactile, seasonal detail that elevates the style from costume to intentional.
Where this look is suitable: School spirit days, casual campus hangs, weekend outings with friends, any day where you want your hair to match your bold energy.
Step by step:
- Create a center part. Use a comb to make a clean part from forehead to nape.
- Gather each side. Pull each side into a high ponytail positioned on either side of the crown. Secure with elastics.
- Form the buns. Twist each ponytail and wrap it around its base. Pin with bobby pins for security.
- Add scrunchies. Wrap a red velvet scrunchie around each bun. The scrunchie should be visible and prominent.
- Soften the look. Pull at sections of each bun for a less rigid appearance. A few face-framing pieces add softness.
Tips and tricks: Use a rattail comb for a crisp center part. If the buns feel loose, wrap a small elastic around the base of each bun before pinning - it adds security without visible hardware.